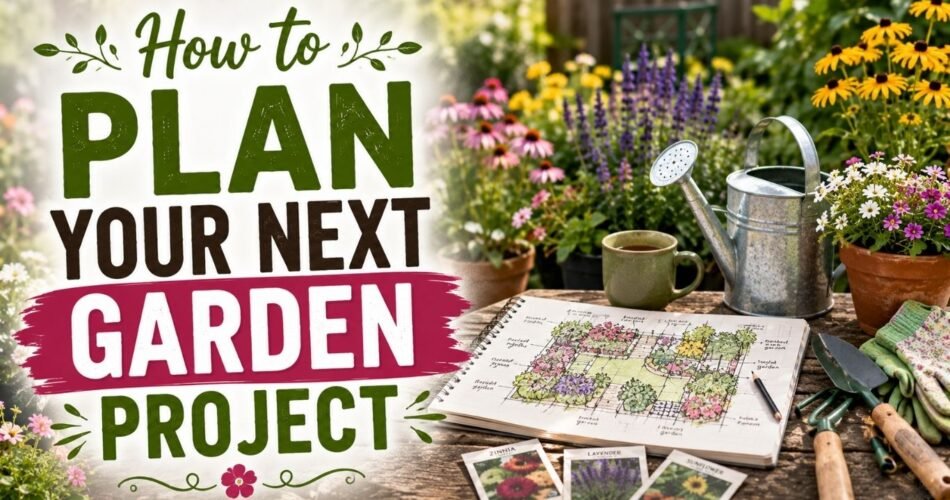
Whether you’re turning a bare patch of lawn into a vegetable bed or redesigning your entire backyard, knowing how to plan your next garden project properly makes all the difference between a thriving garden and a frustrating mess of weeds and wasted money.
I’ve been gardening for over fifteen years — from tiny apartment balconies to half-acre backyard spaces — and one thing I’ve learned the hard way is that the planning phase is where gardens are won or lost. Most beginners skip straight to buying plants, then wonder why things don’t grow the way they imagined. This guide walks you through every step of the process, whether you’re a first-time gardener or someone who’s been at it for years but wants to finally get organized about it.
Let’s dig in.
Why Garden Planning Matters More Than You Think
A good plan saves you money, time, and a whole lot of disappointment. When you plan before you plant, you avoid overcrowding, nutrient competition, poor sun placement, and impulse buys that don’t suit your climate or space.
Think of it like this — you wouldn’t build a house without a blueprint. Your garden deserves the same respect.
Planning also helps you see your garden as a living system, not just a collection of individual plants. Understanding how sunlight moves across your space, what your soil needs, and which plants support each other turns gardening from guesswork into something genuinely rewarding.
Step 1: Define Your Gardening Goals
Before you sketch anything or buy a single seed packet, get clear on why you want a garden and what you want from it.
Ask Yourself These Questions
- Do you want to grow food for your family?
- Are you more interested in a beautiful flower display?
- Do you want to attract pollinators and support local wildlife?
- Are you hoping to grow your own herbs and cut your grocery bill?
- Is this purely for relaxation — a quiet corner to sit and enjoy?
Your answers will shape every decision after this. A vegetable garden has very different requirements than a pollinator meadow or a formal rose garden. There’s no wrong answer, but there is such a thing as a confused plan — and a confused plan leads to a confused garden.
Set Realistic Expectations
If you’re a beginner, start smaller than you think you need to. A 4×8 foot raised bed maintained well will give you more satisfaction than a sprawling plot you can’t keep up with. You can always expand next season.
Step 2: Assess Your Available Space
Walk your garden space at different times of day and really look at it. Take notes. Take photos. You’ll be surprised how much you notice when you’re paying attention.
Measure Your Space
Get a tape measure and record your garden dimensions. Sketch a rough outline — it doesn’t need to be artistic. You just need to know:
- Total square footage available
- Existing features (trees, fences, paths, sheds)
- Areas that are unusable or awkward
- Access points for water and tools
Think About Scale
A good garden layout respects the scale of your space. Tall plants at the back, shorter ones in front. Wide-spreading shrubs need room to breathe. Raised beds need at least 18–24 inches of walking space between them. If you’re working with a small backyard, vertical gardening — using trellises, wall planters, and tiered shelving — can dramatically expand what you can grow.
Step 3: Understand Sunlight and Shade Patterns
Sunlight is arguably the most important factor in backyard garden planning, and it’s the one most beginners underestimate.
Track the Sun Throughout the Day
Spend one full day observing your garden. Mark which areas receive:
- Full sun — 6 or more hours of direct sunlight daily
- Partial sun/shade — 3 to 6 hours of direct light
- Full shade — fewer than 3 hours of direct light
Do this during summer when the sun is at its highest, and again in early spring if you’re planning a cool-season garden. Trees that seem bare in March will cast heavy shade by June.
Match Plants to Light Conditions
Most vegetables — tomatoes, peppers, zucchini, cucumbers — need full sun. Herbs like basil, rosemary, and thyme are sun-lovers too. But lettuce, spinach, and many herbs (including mint and parsley) can tolerate partial shade. Ferns, hostas, and impatiens actually prefer it.
Ignoring light requirements is one of the most common and easily avoidable planning mistakes out there.
Step 4: Test and Improve Your Soil
Healthy plants start with healthy soil. You can have perfect sunlight and ideal spacing, but if your soil is compacted, nutrient-poor, or at the wrong pH, your plants will struggle.
Get a Soil Test
A basic soil test costs $15–$30 at most garden centers or through your local cooperative extension service. It will tell you:
- Soil pH (ideal for most plants is between 6.0 and 7.0)
- Nitrogen, phosphorus, and potassium levels
- Organic matter content
Some tests also check for heavy metals, which is important if you’re growing in urban areas.
Improve Your Soil Before Planting
Based on your test results, you might need to:
- Add compost to improve drainage, add nutrients, and encourage healthy microbial activity
- Apply lime to raise pH in overly acidic soil
- Use sulfur to lower pH in alkaline soil
- Till or loosen compacted areas before planting (though no-dig methods are increasingly popular and effective)
If you’re starting a raised bed or container garden, you get to build your soil from scratch — a real advantage. Use a mix of quality topsoil, compost, and a well-draining amendment like perlite.
Step 5: Choose the Right Plants for Your Space
This is the fun part, but it’s also where things can go sideways fast if you’re not strategic about it.
Consider Your Climate Zone
In the United States, the USDA Plant Hardiness Zone Map divides the country into zones based on average minimum winter temperatures. Knowing your zone helps you choose plants that will actually survive your winters or thrive in your summers. You can find your zone easily online by entering your zip code.
Match Plants to Purpose
Here’s a quick overview by garden type:
Vegetable Garden Planning
Start with easy winners: tomatoes, zucchini, lettuce, beans, and cucumbers. These have relatively predictable yields and are forgiving for beginners. Add complexity as your skills grow.
Flower Garden Ideas
For continuous color through the growing season, mix annuals (which bloom heavily but die after one season) with perennials (which come back year after year). If you want low-maintenance blooms, look at options that are adapted to your region. For some outstanding choices, check out these 10 Best Backyard Plants That Bloom All Season — it’s a genuinely useful list if you want color without constant replanting.
Herb Garden Planning
Herbs are incredibly rewarding because they’re useful in the kitchen and most are relatively drought-tolerant once established. Basil, thyme, oregano, chives, mint (plant mint in containers — it spreads aggressively), and rosemary are excellent starters.
Pollinator-Friendly Spaces
Focus on native plants. Coneflowers, black-eyed Susans, lavender, native milkweed, and bee balm attract a wide variety of pollinators. Avoid heavily hybridized double-flowered varieties — they look pretty but often have reduced nectar.
Container Gardens
Almost anything can grow in a container if the pot is large enough and drainage is adequate. Herbs, lettuce, cherry tomatoes, strawberries, and dwarf varieties of many vegetables work particularly well.
Step 6: Plan Seasonal Planting
One of the biggest gaps in beginner garden planning guides is a failure to think in seasons. Gardening isn’t a one-time event — it’s a rhythm.
Understanding Growing Seasons
- Cool-season crops (lettuce, spinach, peas, broccoli, kale) grow best in spring and fall when temperatures are between 45°F and 65°F
- Warm-season crops (tomatoes, corn, squash, peppers, basil) need soil temperatures above 60°F and thrive in summer heat
- Perennial plants establish themselves in their first year and reward you in subsequent years with minimal replanting
Create a Planting Calendar
A planting calendar is simply a visual schedule showing what to start, transplant, and harvest throughout the year. It prevents the common mistake of planting warm-season crops too early (killing them in a late frost) or missing your window for cool-season crops entirely.
Base your calendar on your last spring frost date and first fall frost date — both are available through your local extension office or a quick online search.
Step 7: Create Your Garden Layout
A garden layout puts all your planning onto paper (or screen) so you can see the full picture before you touch a single plant.
Drawing Your Layout
You don’t need fancy software. Graph paper works perfectly — assign a scale (like 1 square = 1 foot) and sketch in your beds, paths, and existing features. Then map where each plant group will go.
Free digital tools like GrowVeg, Garden Planner, or even a simple spreadsheet can help if you prefer working digitally.
Design Principles to Keep in Mind
- Place tall plants on the north side of your garden so they don’t shade shorter neighbors
- Group plants with similar water needs together — it simplifies irrigation
- Leave enough space between plants — overcrowding is the single most common mistake and leads to disease, competition, and disappointment
- Include paths that allow you to reach every part of the bed without stepping on the soil (stepping on soil compacts it)
- Create focal points — a well-placed birdbath, a beautiful climbing rose on a trellis, or a raised herb spiral can make a garden feel designed rather than random
Maximizing Small Garden Spaces
If you’re working with limited square footage, think vertically. Cucumbers, pole beans, peas, and even small squash varieties can be trained up a trellis, freeing ground space for shorter plants. Use square foot gardening methods to maximize intensive planting in raised beds. Layer plants — tall, medium, and ground-cover — to make the most of your vertical space.
Step 8: Budget for Tools and Materials
Nothing kills a garden project faster than running out of money halfway through. Budgeting upfront prevents that.
Essential Tools for Beginners
- Hand trowel and transplanting spade
- Garden fork or cultivator
- Quality pruning shears (buy once, buy good)
- Watering can or hose with adjustable nozzle
- Gloves (get ones that actually fit)
- Kneeling pad (your knees will thank you later)
You don’t need to buy everything at once. Start with the basics and add specialized tools as your garden grows.
Materials to Budget For
- Seeds or transplants
- Soil amendments (compost, fertilizer)
- Raised bed lumber or kits (if applicable)
- Mulch
- Plant supports (stakes, cages, trellises)
- Containers (if container gardening)
- Labels and markers
Saving Money on Garden Projects
- Start plants from seed rather than buying transplants
- Make your own compost
- Swap seeds and divisions with other gardeners
- Buy perennial plants that will return each year rather than annuals you have to replace
- Watch for end-of-season sales at garden centers
Step 9: Select Your Irrigation Method
Water is life in the garden, and how you deliver it matters as much as how much you use.
Irrigation Options Compared
Hand Watering
Best for small gardens, containers, and seedlings. Lets you monitor each plant individually. Time-consuming for large spaces.
Soaker Hoses
Lay along the base of plants and deliver slow, deep water directly to roots. Excellent for vegetable beds and very water-efficient. Affordable and easy to set up.
Drip Irrigation
The most efficient option for established gardens. Emitters deliver precise amounts of water to each plant. Higher upfront cost but saves significant water long-term.
Overhead Sprinklers
Covers large areas quickly but wastes water through evaporation and can promote fungal diseases by wetting leaves. Generally not recommended for vegetable gardens.
Watering Tips
- Water deeply and less frequently to encourage deep root growth
- Water in the morning so foliage dries before evening (reduces disease risk)
- Mulch around plants to reduce evaporation — it can cut your watering frequency nearly in half
- Install a rain gauge so you know how much natural precipitation your garden is receiving
Step 10: Plan for Companion Planting
Companion planting is the practice of growing certain plants together because they benefit each other — repelling pests, attracting pollinators, fixing nitrogen in the soil, or simply making efficient use of space.
Classic Companion Planting Combinations
- Tomatoes + Basil — Basil is thought to repel aphids and whiteflies while improving tomato flavor
- The Three Sisters (Corn + Beans + Squash) — A Native American tradition: corn provides a climbing structure for beans, beans fix nitrogen, squash shades the ground to retain moisture and suppress weeds
- Carrots + Onions — Carrot flies are repelled by onion scent; onion flies are repelled by carrot scent
- Roses + Garlic — Garlic deters aphids from roses
- Marigolds + Almost Everything — French marigolds in particular repel nematodes and deter whiteflies; plant them throughout your vegetable garden
What to Avoid Planting Together
- Fennel with nearly anything — it’s allelopathic and inhibits the growth of many vegetables
- Onions and garlic near beans and peas — they stunt legume growth
- Brassicas (cabbage, broccoli, kale) near strawberries — they compete poorly and can reduce each other’s yields
Step 11: Create a Maintenance Plan
A garden without a maintenance plan is a garden that gradually becomes a wilderness. Real garden project planning includes thinking ahead about ongoing care.
Weekly Maintenance Tasks
- Check soil moisture
- Look for pest or disease signs (early detection makes all the difference)
- Remove weeds before they establish
- Deadhead flowers to encourage continued blooming
- Harvest vegetables that are ready (leaving overripe vegetables on plants often signals them to stop producing)
Monthly Maintenance Tasks
- Fertilize as needed based on plant type and growth stage
- Prune overgrown or dead growth
- Check irrigation systems for clogs or leaks
- Refresh mulch as it breaks down
Seasonal Maintenance Tasks
- Spring: Clean up debris, divide crowded perennials, apply fresh compost
- Summer: Manage irrigation during heat waves, tie up tall plants, watch for stressed plants
- Fall: Cut back perennials, add compost, plant cover crops
- Winter: Tool maintenance, bed protection, planning for next season
Avoiding Common Garden Planning Mistakes
Even experienced gardeners make these mistakes. Knowing them ahead of time is half the battle.
- Planting too much, too fast — Start with a manageable space and expand gradually
- Ignoring spacing requirements — Crowded plants compete for light, water, and nutrients and are more disease-prone
- Forgetting about access — You need to be able to reach every plant for watering, harvesting, and maintenance
- Buying plants before having a plan — Impulse buys rarely work out well
- Skipping soil preparation — Poor soil is the #1 reason plants fail
- Planting sun-loving plants in shade — Always check light requirements before placing plants
- Underestimating watering needs — Especially in the first year when plants are establishing
- Not keeping records — A simple garden journal or even photos on your phone will help you learn from each season and improve year after year
Frequently Asked Questions
Q: How do I start planning a garden as a complete beginner?
Start with one small, defined space — a raised bed, a container cluster, or a 4×8 foot in-ground plot. Choose a purpose (vegetables, flowers, or herbs), assess your sunlight, test your soil, then pick 3–5 easy plants suited to your conditions. Success in a small space builds confidence far better than struggling with a large, overwhelming one.
Q: What is the best time of year to plan a garden project?
Honestly, winter is ideal. You have time to research, order seeds at a discount, and sketch layouts without any pressure. But planning a few weeks before your intended planting window works too — the key is simply to plan before you buy and plant, not after.
Q: How much does it cost to start a garden project?
A basic container or raised bed garden can be started for $50–$150 including soil, plants, and basic tools. An in-ground vegetable garden might run $100–$400 depending on soil amendment needs and what tools you already own. Costs decrease significantly in subsequent years as soil improves and perennials return.
Q: How do I plan a garden in a small space?
Focus on vertical growing, square foot gardening techniques, and choosing compact or dwarf plant varieties. Containers on patios and balconies, wall-mounted planters, and tiered raised beds all extend your growing capacity without requiring more ground space. Prioritize your highest-value crops — the ones you actually eat regularly.
Q: How do I know which plants grow well together?
A companion planting chart (available free from most seed company websites) is your best starting point. The general rules: marigolds help nearly everything, fennel hurts nearly everything, and grouping plants by family (all brassicas together, all nightshades together) simplifies rotation planning.
Q: What is the most important thing to include in a garden plan?
Without question — sunlight mapping. More gardens fail from mismatched light conditions than from any other single factor. Know exactly where your full sun, partial sun, and shade areas are before you place a single plant.
Q: How do I plan a garden that produces vegetables all season long?
Use succession planting — sow short batches of fast-growing crops (lettuce, radishes, beans) every 2–3 weeks rather than all at once. Combine cool-season crops for spring and fall with warm-season crops for summer. Plant both early-maturing and late-maturing varieties of the same vegetable to extend your harvest window.
Conclusion
Learning how to plan your next garden project isn’t about becoming an expert overnight — it’s about approaching your garden with intention instead of impulse. Every season teaches you something new, and every year your garden gets a little better, a little more productive, a little more beautiful.
The steps in this guide — defining your goals, assessing your space, understanding sunlight, building healthy soil, choosing the right plants, thinking seasonally, laying out a smart design, budgeting wisely, planning for water and maintenance, and learning from your mistakes — give you a genuine foundation to work from.
Start simple. Stay curious. Take notes. And enjoy the process.
Gardening is one of the few activities where you genuinely get out what you put in — and the return on a good plan is a garden that actually works the way you dreamed it would.