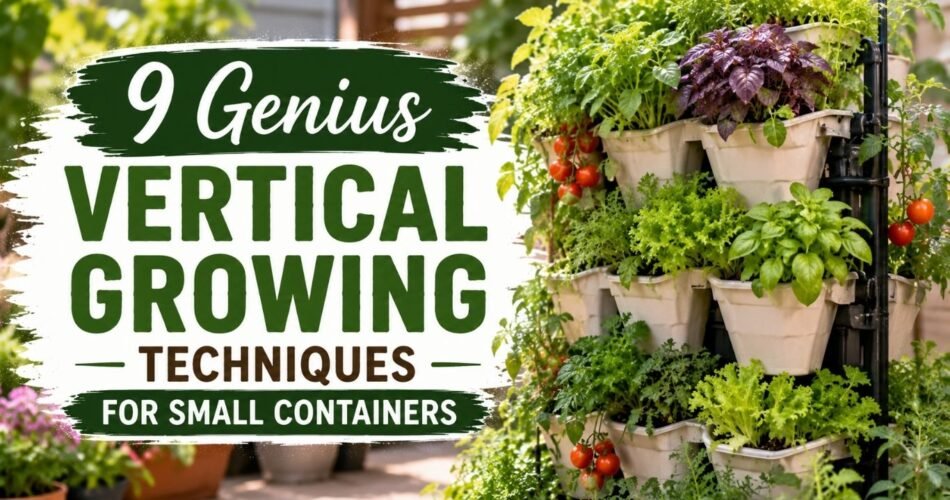
If you’re working with a tiny balcony, a cramped patio, or just a handful of pots on a windowsill, you already know the struggle — not enough space, but too many plants you want to grow. The good news? Growing upward instead of outward completely changes the game.
Vertical gardening isn’t just a trendy concept you see on Pinterest boards. It’s a genuinely practical approach that experienced container gardeners have been using for years to squeeze impressive harvests out of surprisingly small spaces. Whether you’re growing tomatoes on a fifth-floor balcony or herbs on a fire escape, the right vertical technique can double or even triple what you grow without adding a single square foot of floor space.
In this guide, I’ll walk you through 9 genius vertical growing techniques for small containers — ones that actually work in the real world, not just in magazine photoshoots. Each method includes everything you need to get started: what to grow, what to buy or build, and what mistakes to avoid along the way.
Let’s dig in.
Why Vertical Growing Works So Well in Small Containers
Before jumping into the techniques, it helps to understand why vertical growing is such an effective strategy for small-space gardeners.
Most container gardeners think horizontally — they line pots along a railing or spread them across a patio floor. But plants don’t need to grow that way. Many vegetables, herbs, and flowers are natural climbers or trailers that actually prefer to grow upward when given support.
Vertical growing also improves airflow around your plants, which reduces fungal diseases. It exposes more of the plant to sunlight, which means better photosynthesis and stronger growth. And practically speaking, vertical gardens are easier to water, harvest, and maintain when everything isn’t crammed at ground level.
For renters especially, most vertical gardening setups are temporary, freestanding, and removable — which means no damage to walls or landlord headaches.
Technique 1: Trellis in a Container
How This Method Works
A trellis is one of the simplest and most effective vertical growing tools you can add to a container garden. You plant a climbing or vining crop in a large pot, then insert a trellis directly into the soil so the plant has something to grip, wind around, or be tied to as it grows upward.
This method works especially well because climbing plants naturally reach for support. Without it, they sprawl across the ground, take up far more space, and become prone to rot and pest damage. With a trellis, they grow cleanly upward, stay off the soil, and produce better.
Best Plants for This Technique
- Vegetables: Cucumbers, pole beans, snap peas, sugar snap peas, small-fruited squash
- Flowers: Sweet peas, morning glory, black-eyed Susan vine
- Herbs: None specifically, but you can grow climbing nasturtiums alongside them
Materials Needed
- A large container (at least 12–15 inches wide and 12 inches deep — bigger is better for cucumbers)
- A wooden, metal, or bamboo trellis (fan-shaped, A-frame, or rectangular panel)
- High-quality potting mix with compost
- Soft plant ties or garden twine
Step-by-Step Setup
- Choose a container that’s large enough for your chosen plant’s root system.
- Fill it with well-draining potting mix mixed with a slow-release fertilizer.
- Insert the trellis into the back of the pot before planting so you don’t disturb roots later.
- Plant your seeds or seedlings at the base of the trellis.
- As the plant grows, gently guide young tendrils toward the trellis and tie loosely if needed.
- Place the container where it gets at least 6–8 hours of direct sunlight daily.
Advantages
- Very space-efficient; keeps vining plants neat and productive
- Improves airflow, reducing mildew and disease
- Easy to harvest when fruits hang freely
- Works on any balcony or patio without permanent installation
Disadvantages
- Large containers can be heavy and hard to move
- Tall trellises can catch wind and tip over on exposed balconies
- Some plants need regular tying and training
Maintenance Tips
- Check ties every week and loosen any that are too tight as stems thicken
- Water at the base, not overhead, to reduce fungal issues
- Feed with a liquid fertilizer every 2 weeks once plants are actively growing
- Remove any yellowing or dead leaves promptly to improve airflow
Common Mistakes to Avoid
- Using too small a container (under-potted plants struggle to support vertical growth)
- Placing the trellis after planting and disturbing roots
- Leaving the trellis unsecured in windy spots — anchor it or lean against a wall
Technique 2: Tomato Cage in a Container
How This Method Works
A tomato cage is a wire or metal support structure that surrounds a plant and holds its branches upright as it grows. Instead of staking individual stems, the cage provides 360-degree support, which works beautifully for bushy or semi-vining plants that don’t cling on their own.
You simply push the cage into the potting mix when the plant is young, and as it grows, you tuck branches through the wire rings to keep everything upright and organized.
Best Plants for This Technique
- Vegetables: Tomatoes (especially determinate or compact varieties like ‘Bush Early Girl’ or ‘Patio’), peppers, eggplant, tomatillos
- Flowers: Dahlias, zinnias (tall varieties)
- Herbs: Overgrown basil can benefit from a small cage to keep it upright
Materials Needed
- A container that’s at least 15–20 inches wide and 15–18 inches deep
- A wire tomato cage (buy one or make your own from concrete reinforcement mesh)
- Quality potting mix enriched with compost
- Stakes or clips to secure the cage if needed
Step-by-Step Setup
- Choose a compact or determinate tomato variety suited to containers.
- Fill your container with enriched potting mix, leaving about 2 inches at the top.
- Plant your tomato seedling slightly deeper than it came in its nursery pot (tomatoes root along buried stems).
- Push the tomato cage over the plant and anchor it firmly into the soil.
- Place the container in your sunniest spot — south or west-facing works best.
- As the plant grows, gently guide branches through the cage rings every few days.
Advantages
- No daily tying or training needed
- Great for beginners — very low skill requirement
- Supports heavy fruit without individual staking
- Reusable season after season
Disadvantages
- Standard tomato cages are often too small for vigorous varieties
- Wire cages can rust over time
- Takes up a wider footprint than a trellis
Maintenance Tips
- Water deeply and consistently — tomatoes hate irregular watering (it causes blossom end rot)
- Feed with a tomato-specific fertilizer once flowering begins
- Remove suckers (the shoots that grow between the main stem and branches) on indeterminate varieties to manage size in containers
- Check for aphids and whiteflies weekly, especially in warm weather
Common Mistakes to Avoid
- Choosing a sprawling indeterminate tomato variety for a small container (they get massive)
- Underwatering in hot weather — containers dry out fast
- Placing tomatoes in a spot with less than 6 hours of sun and wondering why fruits don’t develop
Technique 3: Bamboo Pole Support System
How This Method Works
Bamboo poles are one of the most affordable and versatile vertical growing supports available. You can configure them in dozens of ways — a single pole for one plant, a teepee structure for multiple climbers, or a fan arrangement anchored in a large pot.
The teepee style is especially popular for container gardens. You push three to six bamboo poles into a large pot at an angle so they meet at the top, tie them together, and plant climbers at the base of each pole. The plants grow up naturally, creating a living, productive column.
Best Plants for This Technique
- Vegetables: Pole beans, runner beans, peas, small cucumbers
- Flowers: Morning glory, nasturtiums, sweet peas
- Herbs: None as primary climbers, but basil grows well as a companion plant in the same container
Materials Needed
- 3–6 bamboo canes, 4–6 feet tall
- Garden twine or jute string for tying
- A large container (at least 16–20 inches in diameter)
- Quality potting mix
Step-by-Step Setup
- Fill your container with potting mix to about 3 inches from the top.
- Push 4–6 bamboo canes into the soil, evenly spaced around the edge of the pot, angled inward at about 70 degrees.
- Gather the tops together and tie firmly with garden twine, wrapping several times.
- Optionally, wrap twine horizontally between canes at 8–10 inch intervals to give plants more grip points.
- Plant seeds or seedlings at the base of each cane.
- As plants grow, gently wrap or guide them around the nearest cane.
Advantages
- Extremely affordable — bamboo canes cost almost nothing
- Customizable to any container size or plant type
- Completely removable and reusable
- Creates a beautiful, cottage-garden visual effect
Disadvantages
- Bamboo can split or rot after a few seasons, especially if stored wet
- Needs periodic checking and retying as plants get heavy
- Not as sturdy in strong winds as a solid trellis panel
Maintenance Tips
- Let bamboo canes dry out between seasons before storing them
- Spray with a diluted fungicide solution if you notice mold on the canes
- Loosen or redo ties if stems are being pinched
Common Mistakes to Avoid
- Using canes that are too short — climbers will outgrow 3-foot canes quickly
- Not tying the tops securely enough (they collapse under the weight of plants)
- Forgetting to water extra because taller plants transpire more
Technique 4: Wall Planters and Pocket Organizers
How This Method Works
Wall planters turn a vertical surface — a balcony wall, a fence, or an exterior wall — into a productive growing area. These can be purchased as fabric pocket planters, modular plastic systems, or metal mounted planters, or you can DIY versions from repurposed materials.
Each pocket or compartment holds an individual plant or a small group of plants, effectively turning several square feet of wall into a garden without using any floor space at all.
Best Plants for This Technique
- Vegetables: Lettuce, spinach, arugula, radishes, small herbs
- Herbs: Basil, parsley, chives, cilantro, mint (kept separate to prevent spreading)
- Flowers: Pansies, violas, trailing petunias, calibrachoa
Materials Needed
- Fabric pocket planter, modular wall planter system, or individual mounted planters
- Wall anchors, hooks, or a tension rod system (for renters)
- Potting mix formulated for containers
- A watering can with a narrow spout or drip irrigation tubing
Step-by-Step Setup
- Assess your wall surface — is it structural enough to hold the weight of wet soil and plants? Most balcony walls and fences handle this fine.
- Install hooks, brackets, or anchor the planter system according to the manufacturer’s instructions. For renters, use over-the-railing hangers or freestanding frame systems that don’t require drilling.
- Fill each pocket with potting mix, leaving a little space at the top.
- Plant small seedlings or sow seeds directly into each pocket.
- Water gently until moisture seeps through the bottom of each pocket.
- Make sure the wall location receives adequate sunlight — walls that face east or west often work well.
Advantages
- Uses zero floor space
- Creates a dramatic, attractive display
- Easy to customize with different plant combinations
- Great for renters who can use non-invasive hanging systems
Disadvantages
- Pockets dry out faster than larger containers
- Plants in wall planters tend to have smaller root zones, limiting growth potential
- May need more frequent feeding and watering
- Wall-mounted systems need stable structural support
Maintenance Tips
- Water wall planters once daily during hot weather — they dry out very quickly
- Add a slow-release granular fertilizer to the potting mix at planting and reapply every 6–8 weeks
- Rotate which pocket you water first each day so all plants get adequate moisture
- Replace depleted plants promptly when one finishes producing
Common Mistakes to Avoid
- Planting large or deep-rooted plants (like full-size tomatoes) in pocket planters — stick to shallow-rooted plants
- Overloading a single wall structure with too much weight
- Neglecting to water during hot weather and losing an entire wall’s worth of plants in one dry day
Technique 5: Hanging Baskets as Productive Planters
How This Method Works
Most people think of hanging baskets as decorative — full of petunias and trailing ivy. But they’re actually fantastic productive growing spaces when you choose edible plants that naturally trail or cascade. Hanging baskets use overhead space that’s almost always wasted in container gardens, and they get excellent light exposure from all sides.
You hang them from balcony overhangs, ceiling hooks, pergola beams, or specially designed hanging planter stands.
Best Plants for This Technique
- Vegetables: Cherry tomatoes (trailing varieties like ‘Tumbler’ or ‘Tumbling Tom’), trailing cucumbers
- Fruits: Strawberries (especially Alpine or day-neutral varieties)
- Herbs: Thyme, oregano, trailing rosemary, mint, creeping chamomile
- Flowers: Trailing nasturtiums, lobelia, bacopa
Materials Needed
- Wire, plastic, or fabric hanging basket (at least 12 inches in diameter — 14–16 inches is better)
- Coco liner or felt liner to retain moisture
- High-quality potting mix with added water-retaining crystals
- Sturdy hooks rated for the weight of the basket when fully wet
- Liquid fertilizer
Step-by-Step Setup
- Line your hanging basket with a coco fiber liner to help retain moisture while allowing drainage.
- Mix water-retaining crystals into your potting mix before filling — this is especially important for hanging baskets, which dry out fast.
- Fill the basket, firm gently, and plant your chosen plants.
- For wire baskets, you can also push small plants through the sides of the liner to plant around the exterior for a fully-planted, lush look.
- Hang from a hook that’s rated for at least 2–3 times the weight of the basket when wet.
- Water thoroughly until water drips from the bottom.
Advantages
- Uses space that would otherwise be completely wasted
- Plants get excellent light and airflow
- Trailing plants look stunning and are easy to harvest
- Keeps fruits off the ground, reducing rot and pest contact
Disadvantages
- Dry out faster than any other container type
- Need watering at least once daily in summer
- Heavy when fully watered — hooks must be very secure
- Plants have a smaller root zone which limits size and yield
Maintenance Tips
- Check moisture every morning by poking a finger 2 inches into the soil
- Feed weekly with a liquid fertilizer during the growing season
- Deadhead flowers and harvest fruits regularly to keep plants producing
- Bring baskets inside or into a sheltered spot if strong wind or frost is forecast
Common Mistakes to Avoid
- Using too small a basket — a 10-inch basket dries out in hours on a hot day
- Hanging in a spot that’s too shaded (most edible plants need 6+ hours of sun)
- Skipping the water-retaining crystals, which can cut your watering frequency significantly
Technique 6: Stackable Planters
How This Method Works
Stackable planters are tiered growing containers that stack vertically on a central axis or pole. Each tier has planting pockets or openings around the sides, and water drips down from tier to tier, making them surprisingly water-efficient once you get the watering right.
They’re extremely compact — a 5-tier stackable planter might give you 20 or more individual planting pockets in a space barely 18 inches wide. They’re ideal for windowsills, balconies, and small patios.
Best Plants for This Technique
- Vegetables: Lettuce, spinach, radishes, small peppers
- Fruits: Strawberries (these are the classic stackable planter plant)
- Herbs: Basil, parsley, chives, thyme, oregano, cilantro
- Flowers: Pansies, marigolds, alyssum
Materials Needed
- A stackable planter system (many are available online and in garden centers)
- Potting mix suitable for containers
- A slow-release fertilizer to mix in at planting time
- A narrow watering can or a drip irrigation tube to reach the top opening
Step-by-Step Setup
- Assemble the planter according to the manufacturer’s instructions — most snap or stack together without tools.
- Mix slow-release fertilizer into your potting mix.
- Fill from the bottom tier up, adding potting mix and planting each tier as you go.
- Water from the top center and check that water reaches the lower tiers — sometimes you need to water each level individually until the mix is saturated.
- Place in a sunny spot, rotating the planter every few days so all sides get equal light.
Advantages
- Incredibly compact and space-efficient
- Water travels down through tiers, reducing waste
- Great for growing a variety of herbs or salad greens in one unit
- Easy to move, clean, and store off-season
Disadvantages
- Bottom tiers sometimes get less water than the top
- Plants in side pockets have limited root space
- Not suitable for large or deep-rooted plants
Maintenance Tips
- Rotate the planter a quarter turn every 2–3 days to ensure even sun exposure
- Top-dress with compost or liquid fertilizer monthly
- Check lower tiers during dry spells — they can dry out faster than you expect
- Clean the planter thoroughly between growing seasons to prevent disease buildup
Common Mistakes to Avoid
- Assuming water always reaches the bottom — check by lifting or probing lower tiers
- Planting the same crop in all pockets without variety (different plants have different watering needs and can compete)
- Overcrowding pockets with too many seedlings
Technique 7: Vertical Tower Planters
How This Method Works
Vertical tower planters are tall, column-shaped containers with planting openings along the sides and sometimes on top. They range from simple PVC pipe towers you can DIY to sophisticated self-watering hydroponic towers. The basic concept is the same: a tall narrow footprint with lots of growing pockets arranged vertically.
These towers can hold a remarkable number of plants — some commercial towers accommodate 30 or more plants — in a floor space of roughly one square foot.
Best Plants for This Technique
- Vegetables: Lettuce varieties, spinach, arugula, kale (dwarf varieties), herbs
- Fruits: Strawberries, Alpine strawberries
- Flowers: Pansies, violas, nasturtiums, marigolds
Materials Needed
- A purchased vertical tower planter OR PVC pipe, drill, end caps, and potting mix for a DIY version
- Quality potting mix (a lightweight mix is preferable in towers)
- Slow-release fertilizer or access to a liquid fertilizer regimen
- A drip irrigation tube (optional but very helpful)
Step-by-Step Setup
For a purchased tower:
- Assemble according to the package instructions.
- Fill with potting mix from the bottom, planting as you fill each level.
- Water from the top and check that moisture reaches the lower pockets.
- Place in full sun and rotate regularly.
For a DIY PVC tower:
- Cut a 4-inch PVC pipe to your desired height (4–6 feet is manageable).
- Drill 2-inch diameter holes every 6 inches around the pipe in a spiral pattern.
- Cap the bottom and place in a container filled with gravel for drainage.
- Fill with lightweight potting mix.
- Plant seedlings into each hole.
- Water from the top — you can insert a smaller perforated pipe in the center to distribute water evenly.
Advantages
- Maximum growing capacity in minimal floor space
- Looks modern and attractive on any patio or balcony
- DIY versions are very cheap to make
- Works well with an automatic drip irrigation system
Disadvantages
- Watering can be tricky — some pockets inevitably get more water than others
- Plants near the top may get more sun than those lower down
- Not suitable for large or sprawling plants
Maintenance Tips
- Set up a consistent watering schedule and check plant health weekly
- Feed with a liquid fertilizer every 2 weeks during the growing season
- Remove spent plants promptly to prevent disease from spreading within the tower
- Replant fast-growing crops like lettuce every 6–8 weeks for continuous harvest
Common Mistakes to Avoid
- Using heavy potting mix that compacts and blocks water flow
- Forgetting to rotate the tower so all sides get sunlight
- Trying to grow root vegetables (like carrots or beets) in a tower — stick to shallow-rooted plants
Technique 8: Ladder Planters
How This Method Works
A ladder planter is exactly what it sounds like — a ladder-shaped structure with shelves or rungs at multiple heights that hold pots or planting trays. It’s a brilliant way to arrange multiple containers in a vertical sequence without mounting anything to a wall.
Ladder planters are freestanding, portable, and typically hold 3–5 tiers of containers. You can buy decorative wooden or metal ladder planters, or repurpose an old wooden ladder with boards across the rungs.
Best Plants for This Technique
Since ladder planters hold individual pots, you have complete flexibility to grow almost anything. Mix and match based on height:
- Top shelf (most sun): Full-sun crops — tomatoes (compact varieties), peppers, basil, marigolds
- Middle shelves: Partial sun plants — lettuce, spinach, parsley, chives, pansies
- Bottom shelf (least sun): Shade-tolerant plants — mint, ferns, impatiens, watercress
Materials Needed
- A purchased ladder planter (many attractive options exist in wood, metal, or bamboo) OR an old wooden ladder and scrap wood boards
- A variety of pots and containers to fit each shelf
- Potting mix suited to your chosen plants
- Optional: Cable ties or zip ties to secure pots to the ladder in windy spots
Step-by-Step Setup
- Place your ladder planter against a wall or fence for stability, or use the built-in back legs if it’s a freestanding design.
- Secure the ladder to a wall or fence with a bungee cord or rope if you’re in a windy location.
- Arrange your pots on each shelf — start with the tallest plants at the back and shorter plants at the front.
- Plant your containers with appropriate plants for each light level.
- Place the whole structure in a spot that gets at least 4–6 hours of sunlight, keeping in mind that upper shelves will get more direct sun.
Advantages
- Completely freestanding — no wall mounting needed
- Great for renters and apartment dwellers
- Extremely flexible — rearrange pots easily with changing seasons
- Very attractive — looks intentional and stylish on any patio
Disadvantages
- Individual containers dry out at different rates and need individual attention
- Lower shelves may be too shaded for sun-loving crops
- Needs securing in windy locations
- Wooden ladder planters can rot if not properly sealed
Maintenance Tips
- Seal wooden ladder planters with an outdoor wood sealant before use
- Water each pot individually and check moisture levels often
- Rearrange pots seasonally to optimize light exposure as the sun angle changes
- Bring tender plants inside or to a sheltered spot at the first sign of frost
Common Mistakes to Avoid
- Putting heavy pots on the top shelf, which raises the center of gravity and increases tipping risk
- Ignoring the difference in light between the top and bottom shelves when choosing plants
- Leaving a wooden ladder planter out all winter without protection (it will deteriorate quickly)
Technique 9: DIY Recycled Vertical Gardens
How This Method Works
This is the most creative, budget-friendly, and arguably the most satisfying approach on this list. A DIY recycled vertical garden uses repurposed materials — pallets, shoe organizers, PVC gutters, plastic bottles, tin cans, old colanders, wine crates, and more — to create growing spaces that cost little to nothing.
The key is finding containers or structures that can hold potting mix, have or can be given drainage, and can be mounted, hung, or stacked vertically.
Best Plants for This Technique
Depends on what you build, but in general:
- For pallet gardens: Herbs, lettuce, succulents, strawberries
- For PVC gutter planters: Lettuce, spinach, herbs, small flowers
- For plastic bottle towers: Herbs, microgreens, small salad greens
- For shoe organizer planters: Herbs, small flowers, greens
Materials Needed
Basic materials depending on your chosen DIY:
Pallet garden:
- A heat-treated (HT-stamped) wooden pallet — avoid chemically treated ones
- Landscape fabric or weed barrier cloth
- Staple gun
- Potting mix
PVC gutter planter:
- Plastic rain gutters (available cheaply at hardware stores)
- End caps
- Mounting brackets or rope for hanging
- Drill for drainage holes
Plastic bottle tower:
- 2-liter plastic bottles (lots of them)
- Scissors or box cutter
- Wire or string to link them vertically
- Potting mix
Step-by-Step Setup: Pallet Herb Garden
- Choose a pallet stamped “HT” (heat treated) — avoid “MB” stamped pallets (methyl bromide treated, which is toxic).
- Lay the pallet flat and line the back and sides with landscape fabric, stapling it securely.
- Fill every gap and channel with potting mix.
- Plant small seedlings or herbs into each gap between the slats.
- Let the pallet lie flat for 2–3 weeks until plants establish their roots.
- Then slowly tilt it upright and lean it against a wall or fence.
Advantages
- Very low cost or completely free if you use salvaged materials
- Creative and rewarding to build
- Completely customizable to any space or aesthetic
- Great introductory project for new container gardeners
Disadvantages
- DIY structures can fail if materials aren’t suitable for outdoor use
- May not look as neat as commercial vertical planters (though many look fantastic)
- Some materials (like untreated wood) deteriorate quickly outdoors
- Initial setup requires more time and effort than buying a planter
Maintenance Tips
- Seal or paint any wood surfaces before building to extend their life
- Line metal containers with plastic to prevent rust leaching into the soil
- Check recycled structures periodically for signs of rot, rust, or structural weakness
- Replace deteriorating materials before they fail and spill your plants
Common Mistakes to Avoid
- Using chemically treated or contaminated pallets for edible plants
- Building a structure that looks great but can’t actually support the weight of wet soil
- Skimming on potting mix quality — even a free planter structure deserves good soil inside
Planning Your Vertical Garden: Where to Start
If this feels like a lot to take in at once, start small. Pick one or two techniques that match your current setup and budget, then expand as you gain confidence.
Before you buy anything, it’s worth mapping out your space, identifying your sunlight patterns, and deciding which plants matter most to you. This kind of upfront planning saves a lot of time, money, and frustration later. If you’re ready to think bigger and want a structured approach to your whole growing space, check out this helpful resource on How to Plan Your Next Garden Project — it walks you through everything from layout planning to plant selection in a practical, beginner-friendly way.
Best Beginner-Friendly Combinations
If you’re new to vertical growing and not sure where to start, here are three simple setups that work well right out of the gate:
Beginner Setup 1: Balcony Herb Wall
- A fabric pocket planter on a south-facing balcony wall
- Plant: Basil, parsley, chives, thyme, mint (in its own pocket — it spreads)
- Investment: Under $30
- Time commitment: 10 minutes a day
Beginner Setup 2: Cherry Tomato + Trellis Combo
- One large 20-liter container with a fan trellis
- Plant: ‘Tumbling Tom’ or ‘Patio’ cherry tomatoes
- Investment: Under $40
- Time commitment: 15 minutes a day in growing season
Beginner Setup 3: Salad Tower
- A stackable planter or vertical tower with 8–12 pockets
- Plant: Mixed lettuce varieties, spinach, arugula
- Investment: Under $50
- Time commitment: 10 minutes daily for watering and occasional harvesting
FAQ: Vertical Growing in Small Containers
Q1: Can I grow vegetables vertically if I only have a small balcony?
Absolutely. Most of the techniques in this guide are designed specifically for small balconies. Stackable planters, wall pocket planters, hanging baskets, and bamboo teepees in a single large pot all work in spaces as small as 4–6 square feet. Focus on compact or dwarf vegetable varieties, and choose plants suited to your available sunlight.
Q2: How do I prevent vertical planters from falling over in wind?
Always anchor freestanding structures — lean ladder planters against walls, tie trellises to railings with bungee cords or zip ties, and use heavy containers as bases for tall supports. For hanging baskets, ensure hooks are rated for at least twice the weight of a fully wet basket. In very exposed spots, opt for lower-profile setups or move lightweight planters inside during storms.
Q3: What’s the easiest vertical growing technique for complete beginners?
The bamboo teepee in a large pot is probably the most beginner-friendly approach — it costs almost nothing, requires no special equipment, and works for easy-to-grow plants like pole beans or sweet peas. Stackable herb planters are a close second because they’re nearly foolproof if you water consistently.
Q4: How often do I need to water vertical planters?
More often than you’d think. Small pockets and hanging baskets in summer heat can dry out within 24 hours. In hot weather (above 80°F/27°C), plan to water most vertical planters daily. Adding water-retaining crystals to your potting mix and using drip irrigation can cut the labor significantly.
Q5: Are vertical garden systems suitable for renters who can’t drill into walls?
Yes. Many vertical growing systems are completely renter-friendly. Freestanding ladder planters, stackable towers, bamboo teepees in large pots, and over-the-railing hanging baskets require no wall mounting at all. Fabric pocket planters can be hung from tension rods wedged in a doorframe or from over-the-railing hooks without any permanent installation.
Q6: How do I deal with pests in a vertical container garden?
Regular inspection is your best defense. Check the undersides of leaves weekly for aphids, spider mites, and whiteflies. In a compact vertical garden, pests can spread quickly because plants are close together. Use insecticidal soap, neem oil spray, or introduce beneficial insects like ladybugs if you garden on a balcony. Keeping good airflow by not overcrowding structures also reduces pest pressure significantly.
Q7: Can I grow fruit in a vertical container garden?
Yes — strawberries are the classic choice and grow beautifully in stackable planters, hanging baskets, and tower planters. Cherry tomatoes and trailing cucumbers also produce well when grown vertically in large containers with support. For anything larger (like dwarf apple trees or blueberries), you’ll need a larger freestanding container rather than a wall planter or pocket system.
Conclusion
Vertical growing in small containers isn’t complicated, and it doesn’t require a big budget or a big space. It just requires a shift in thinking — from spreading out to growing up.
Whether you hang a few baskets from a balcony railing, lean a trellis in a large pot of cucumbers, or build a DIY pallet herb wall for next to nothing, each of these 9 genius vertical growing techniques for small containers gives you more growing capacity with the space you already have.
Start with whatever matches your current budget and setup, pay close attention to sunlight and watering, and don’t be afraid to experiment. Container gardening is forgiving — if something doesn’t work in one spot, you can move it tomorrow. That flexibility is one of the best things about growing in containers to begin with.
Pick your first technique, grab some seeds or seedlings, and start growing upward. Your garden — and your dinner table — will thank you.