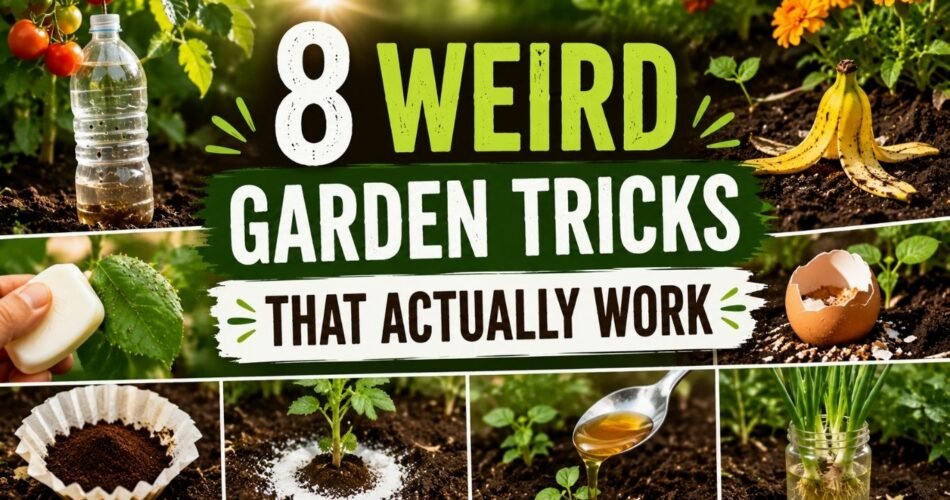
If you’ve spent any time gardening, you’ve probably heard a lot of advice that sounds completely ridiculous at first. Bury a banana peel near your roses? Sprinkle cinnamon on your seedlings? Water your plants with diluted hydrogen peroxide?
Honestly, I get it. A lot of so-called “gardening hacks” floating around social media are either exaggerated, misapplied, or just plain wrong. I’ve tested plenty of them and walked away disappointed.
But here’s the thing — some of these unusual techniques actually have real science behind them. And when you understand why they work and how to use them correctly, they can genuinely improve your garden results without costing you a fortune.
This article covers 8 weird garden tricks that actually work — not myths, not viral nonsense, but time-tested, science-backed methods that experienced gardeners and horticultural experts actually recommend. I’ll explain the reasoning behind each one, give you clear step-by-step instructions, and be upfront about their limitations so you don’t waste your time or hurt your plants.
Let’s dig in.
Quick Overview: What Makes a Garden Trick Worth Using?
Before jumping into the list, it’s worth setting expectations. A good, proven gardening technique should:
- Have a logical, explainable mechanism (biological, chemical, or physical)
- Be supported by gardening research, horticultural extension services, or consistent results from experienced growers
- Be practical and repeatable — not a one-time fluke
- Come with honest limitations, not just hype
Every trick in this list meets those standards. And where something is still debated among experts, I’ll tell you that too.
The 8 Weird Garden Tricks That Actually Work
Trick #1: Use Cinnamon as a Natural Fungicide for Seedlings
Why It Seems Unusual
Sprinkling a kitchen spice on your baby plants sounds more like baking than gardening. But this is one of the most genuinely useful organic gardening tips I’ve come across — and it has real biochemical reasons behind it.
Why It Actually Works
Cinnamon contains cinnamaldehyde, a compound with proven antifungal properties. Research published in horticultural and food science journals has confirmed its effectiveness against several common soil-borne fungi, including Pythium and Rhizoctonia — the culprits behind “damping off,” which is that heartbreaking condition where seedlings suddenly collapse and die at the soil line.
Cinnamon doesn’t eliminate all fungi (including beneficial mycorrhizal fungi deeper in soil), but when applied to the surface layer around seedlings, it creates a localized antimicrobial environment that helps young plants survive their most vulnerable stage.
Which Plants Benefit Most
- Tomato seedlings
- Pepper seedlings
- Basil
- Any transplants started indoors in humid conditions
Step-by-Step Instructions
- Start seeds in clean, sterile seed-starting mix (not garden soil).
- Once seeds have germinated and tiny seedlings emerge, lightly dust the soil surface around the base of each seedling with plain ground cinnamon.
- Use just a thin, visible dusting — you don’t need a thick layer.
- Reapply after watering washes it away, roughly every 5–7 days if damping off is a concern.
- Stop applying once seedlings are established and you’ve moved them to larger containers or outdoors.
Advantages
- Completely non-toxic to humans, pets, and most beneficial insects
- Extremely inexpensive
- Effective at preventing (not curing) damping off
- Won’t leave chemical residues
Limitations
- Works as a preventive measure only — it won’t save seedlings already showing damping off symptoms
- Works best in the surface layer; it won’t treat deep root rot
- Very heavy application can slightly inhibit germination in some sensitive seeds
Common Mistakes to Avoid
- Applying too much (a thin dusting is enough — more isn’t better here)
- Using cinnamon oil instead of ground cinnamon (the oil is far more concentrated and can burn tender seedlings)
- Expecting it to work on established plants with serious fungal infections
Expert Tip: If you’re also starting vegetables in containers this season, proper soil preparation is just as important as any topical treatment. Check out this helpful guide on How to Grow Zucchini in Containers for a Big Summer Harvest for a solid example of setting up container plants for success from the start.
Trick #2: Water Your Plants with Diluted Hydrogen Peroxide
Why It Seems Unusual
Pouring hydrogen peroxide — something most people associate with cleaning wounds — into your plant water sounds counterintuitive. Surely that would hurt the plants, right?
Why It Actually Works
Here’s the chemistry: hydrogen peroxide (H₂O₂) is essentially water with an extra oxygen molecule. When it breaks down in soil, it releases oxygen directly into the root zone. This does two important things:
- It helps roots breathe. Waterlogged or compacted soil is low in oxygen, which suffocates roots. A dilute H₂O₂ solution can temporarily improve oxygen availability.
- It has mild antimicrobial properties. At the right concentration, it can help suppress harmful bacteria and certain root pathogens without destroying beneficial soil biology the way stronger chemicals would.
The University of Illinois Extension and other agricultural sources have noted that hydrogen peroxide can be useful in hydroponic growing systems for this exact reason. Many experienced soil gardeners also use it cautiously for rescuing overwatered plants.
Which Plants Benefit Most
- Overwatered houseplants showing root stress
- Seedlings in poorly draining containers
- Plants recovering from root rot (in combination with repotting)
- Hydroponic systems (very common use case)
Step-by-Step Instructions
- Purchase standard 3% hydrogen peroxide (the brown bottle from the pharmacy — not higher concentrations used for hair bleaching or industrial purposes).
- Mix 1 tablespoon of 3% H₂O₂ per 1 quart (about 1 liter) of water. This gives you roughly a 0.3% solution — safe for most plants.
- Use this solution in place of your regular watering, no more than once a week.
- Water the soil thoroughly with the diluted mixture, allowing excess to drain.
- For overwatered plants, use this method for 2–3 waterings while also improving drainage, then return to plain water.
Advantages
- Breaks down into just water and oxygen — no lasting chemical residue
- Can genuinely help rescue overwatered plants
- Inexpensive and widely available
- Safe when used at the correct dilution
Limitations
- Provides temporary oxygen boost only — it doesn’t fix the underlying drainage problem
- Overuse can disrupt beneficial soil microorganisms
- Not a substitute for proper watering habits and well-draining soil
- Higher concentrations can burn roots and kill plants
Common Mistakes to Avoid
- Using concentrations higher than 3% without further dilution (this is the most dangerous mistake)
- Using it as a regular weekly treatment when your plant doesn’t need it
- Thinking it will cure established root rot without also addressing soil and drainage issues
Trick #3: Bury Banana Peels (The Right Way) for Potassium
Why It Seems Unusual
The internet is full of banana peel gardening advice, and unfortunately a lot of it is wrong. Banana peel “tea” (soaking peels in water) has been tested and found to deliver very little available potassium to plants. But burying or composting banana peels properly? That’s a different story.
Why It Actually Works
Banana peels are genuinely high in potassium — a macronutrient that plants use for flower development, fruit quality, disease resistance, and water regulation. They also contain smaller amounts of phosphorus, calcium, and magnesium.
The key word is decomposition. Nutrients locked in fresh organic matter aren’t immediately available to plants — they need to break down first, either through composting or microbial activity in the soil. When you bury banana peels directly in the soil, soil microorganisms begin breaking them down over several weeks, gradually releasing their nutrients.
This isn’t magic. It’s just composting happening in place.
Which Plants Benefit Most
- Roses (famously benefit from potassium for blooms)
- Tomatoes (potassium improves fruit development)
- Peppers
- Fruiting plants generally
- Flowering perennials
Step-by-Step Instructions
- Collect banana peels and chop or tear them into smaller pieces (increases surface area and speeds decomposition).
- In your garden bed, dig a small hole 4–6 inches deep near (but not touching) the base of your plant.
- Place the chopped peels in the hole and cover completely with soil.
- Repeat every 3–4 weeks during the growing season.
- Alternatively, add peels directly to your compost bin — this is arguably the most efficient method.
Advantages
- Free byproduct of something you’re eating anyway
- Genuinely adds potassium and other minerals to soil over time
- Encourages beneficial microbial activity
- Completely organic and non-toxic
Limitations
- Nutrient release is slow — this is a long-term soil enrichment strategy, not a quick fix
- Fresh buried peels can attract fruit flies, ants, or small animals if not buried deeply enough
- Will not substitute for a balanced fertilizer if your soil has significant deficiencies
- “Banana peel tea” (soaking in water) has not been shown to be significantly effective — stick to burying or composting
Common Mistakes to Avoid
- Laying peels on the soil surface (they attract pests and dry out before decomposing properly)
- Expecting immediate results — this is a weeks-long process
- Using peels that have been heavily treated with wax or pesticides without washing them first
Trick #4: Apply Used Coffee Grounds — But Only in Specific Situations
Why It Seems Unusual
Coffee grounds are one of the most misunderstood soil amendments out there. Half the internet says they’re great for everything; the other half says they kill plants. The truth? Both sides are partially right, which is why you need to understand this one carefully.
Why It Actually Works (and When It Doesn’t)
Fresh, unused coffee grounds are quite acidic (pH around 6.0 or lower). But used coffee grounds — the ones from your morning brew — are actually nearly pH-neutral, with most studies measuring them between 6.5 and 6.8 after brewing. The acid leaches into your coffee, not into the grounds.
So coffee grounds won’t dramatically acidify your soil. What they do offer:
- Nitrogen: Coffee grounds contain roughly 2% nitrogen by volume, which becomes available as they decompose.
- Organic matter: They improve soil structure and drainage.
- Earthworm attraction: Worms are genuinely attracted to coffee grounds in compost — studies have confirmed this.
- Mild pest deterrent: Some evidence suggests slugs and certain insects avoid crossing dry coffee grounds.
However, applying them thickly and directly to soil can create a hydrophobic crust that repels water. And used as a mulch without mixing, they can compact and actually prevent water from reaching roots.
Which Plants Benefit Most
- Blueberries (which genuinely love acidic conditions — use sparingly and in combination with other acidifying agents)
- Roses
- Tomatoes
- Leafy greens
- Herbs like basil and parsley
Step-by-Step Instructions
- Collect used (spent) coffee grounds and let them dry slightly if you have a large amount to prevent mold.
- Mix into compost at a ratio of no more than 20–25% grounds to total compost volume. This is the most effective use.
- For direct soil application, mix grounds lightly into the top 2–3 inches of soil at no more than 1/2 inch depth over the planting area. Don’t pile them up.
- Water afterward to help them begin breaking down.
- Repeat once every 3–4 weeks during the growing season.
Advantages
- Free from your own kitchen (or often free from coffee shops, which give away used grounds)
- Adds nitrogen and organic matter
- Improves soil biology
- Can deter slugs as a surface barrier when dry
Limitations
- Won’t significantly acidify soil on its own (despite popular belief)
- Can compact and crust over if applied too thickly
- Too much nitrogen from grounds can promote excessive leafy growth at the expense of fruiting
- Should be composted, not applied fresh in large quantities
Common Mistakes to Avoid
- Applying thick layers directly on soil or using as mulch without mixing (creates water-repelling crust)
- Using fresh, unused grounds expecting the same effect (they are more acidic and harsher on plants)
- Adding excessive amounts to compost bins — 20-25% is the maximum recommended ratio
Trick #5: Use Eggshells to Prevent Blossom End Rot in Tomatoes (With Realistic Expectations)
Why It Seems Unusual
Crushing eggshells and working them into your tomato soil sounds like something your grandmother would do, and it turns out grandma might have been onto something — though the popular reasoning isn’t entirely accurate.
Why It Actually Works (Partially)
Blossom end rot in tomatoes and peppers is caused by calcium deficiency in the developing fruit — but this is almost always a water uptake issue, not a lack of calcium in the soil. Inconsistent watering prevents the plant from absorbing calcium efficiently.
That said, eggshells do contain calcium carbonate (roughly 95%), and they do slowly release calcium into the soil as they decompose. Will they fix an acute blossom end rot problem mid-season? No — they decompose too slowly for that. But used consistently over time, they genuinely add calcium to the soil and can improve overall growing conditions.
They also have a secondary benefit: crushed eggshells create a physical barrier against soft-bodied pests like slugs and cutworms. Sharp shell fragments are uncomfortable for these pests to crawl over.
Which Plants Benefit Most
- Tomatoes
- Peppers
- Squash (also prone to blossom end rot)
- Roses (benefit from calcium for cell wall strength)
Step-by-Step Instructions
For calcium supplementation:
- Rinse and dry eggshells thoroughly to prevent odor and pests.
- Crush or grind them as finely as possible — a blender or mortar works well. Finer particles decompose and become available faster.
- Mix crushed shells into the planting hole before transplanting, or work into the top few inches of soil early in the season.
- You can also add shells to your compost for a more efficient breakdown process.
For pest deterrence:
- Crush shells into irregular, coarse pieces (not powder).
- Create a ring of shell pieces around the base of vulnerable plants.
- Refresh after heavy rain washes the barrier flat or smooth.
Advantages
- Free kitchen waste that would otherwise be discarded
- Slow-release calcium source for long-term soil health
- Physical pest deterrent
- Completely natural and safe
Limitations
- Decompose very slowly — won’t help blossom end rot that has already appeared
- Not a substitute for consistent watering (the real fix for blossom end rot)
- Pest barrier only works when shells are coarse and sharp — fine powder offers no deterrent
- Requires consistent application season after season to build up calcium levels meaningfully
Common Mistakes to Avoid
- Expecting eggshells to cure blossom end rot that’s already present — focus on even watering first
- Not crushing them finely enough for soil amendment purposes (large whole shells take years to break down)
- Applying without rinsing (attracts pests and smells bad)
Trick #6: Companion Planting with Basil and Tomatoes
Why It Seems Unusual
The idea that simply planting basil next to tomatoes could improve plant health sounds like folk wisdom more than science. And to be fair, some companion planting claims are exaggerated. But this particular pairing has enough research and practical support behind it to be worth doing.
Why It Actually Works
This is a case where multiple mechanisms may be operating at once:
- Volatile organic compounds: Basil releases aromatic compounds including linalool and eugenol, which have been shown in some studies to repel aphids, thrips, and certain other insects.
- Pollinator attraction: Flowering basil attracts bees and other pollinators, which also benefits neighboring tomatoes.
- Spatial efficiency: In practice, basil and tomatoes have different root depths and canopy structures, so they don’t compete intensely for the same resources.
- Anecdotal, widely confirmed results: Decades of observation from gardeners and some controlled studies suggest the pairing works, even if the full mechanism isn’t perfectly mapped.
A 2016 study in the journal Pest Management Science found that basil intercropping reduced thrips populations on tomatoes under experimental conditions. It’s not a silver bullet, but it’s a real effect.
Which Plants Benefit Most
- Tomatoes (primary beneficiary)
- Peppers (similar benefits observed)
- Asparagus (basil may deter asparagus beetles)
Step-by-Step Instructions
- Choose a sweet basil or Genovese basil variety — these have the strongest aromatic compounds.
- Plant basil seedlings 12–18 inches from your tomato plants — close enough to interact, but with enough space for both to grow.
- Allow some basil plants to flower rather than pinching them all back. The flowers attract pollinators that also help your tomatoes set fruit.
- Plant multiple basil plants throughout your tomato bed rather than just one at one corner.
- Water both plants appropriately — basil needs good drainage while tomatoes prefer consistent, deeper watering.
Advantages
- Provides a potentially pest-deterrent effect using a plant you probably want anyway
- Improves biodiversity and pollinator activity
- Gives you fresh basil for cooking right next to your tomatoes — convenient!
- No cost beyond the seeds or seedlings
Limitations
- Not a replacement for proper integrated pest management
- Basil won’t eliminate serious pest infestations
- Effect may vary depending on local pest populations and conditions
- Basil is frost-sensitive and needs similar weather to tomatoes — works well in most climates
Common Mistakes to Avoid
- Planting basil too far away (other side of the garden) and expecting benefits
- Always pinching off all basil flowers — let some bloom for pollinator benefits
- Expecting this one technique to handle all pest issues on its own
If you’re working with limited space and want to maximize the productivity of every container you have, don’t miss these 9 Genius Vertical Growing Techniques for Small Containers — companion planting principles work especially well when combined with vertical layouts.
Trick #7: Use the “Bottom Watering” Method for Seedlings and Container Plants
Why It Seems Unusual
Most people water plants from the top — it’s the obvious way. Watering from the bottom, by letting pots sit in water and soak it up through drainage holes, seems backwards. But for certain situations, it’s genuinely the superior method.
Why It Actually Works
Bottom watering uses capillary action — the same principle that pulls water up a paper towel. When you place a pot in a shallow tray of water, the soil wicks moisture upward from the drainage holes, saturating from the bottom up.
This does several useful things:
- Encourages deep root growth. Roots follow water. When water comes from below, roots grow downward toward the moisture — building a stronger, deeper root system than when water is always applied from the top.
- Keeps the soil surface dry. A dry surface discourages fungal gnats (which lay eggs in moist topsoil) and reduces the risk of damping off and fungal disease at the soil level.
- Ensures thorough, even saturation. It’s surprisingly easy to underwater plants by hand — water often channels through dry spots without fully saturating the root zone. Bottom watering forces even moisture distribution.
- Reduces leaf and stem wetting. Overhead watering can contribute to fungal diseases on leaves and stems. Bottom watering eliminates this risk entirely.
Which Plants Benefit Most
- Seedlings and young transplants
- Succulents and cacti (water less frequently using this method)
- African violets (which hate water on their leaves)
- Ferns and moisture-sensitive houseplants
- Any container plant prone to root rot
Step-by-Step Instructions
- Ensure your pot has adequate drainage holes (bottom watering only works when water can enter through the bottom).
- Fill a shallow tray, bowl, or sink with 1–2 inches of water at room temperature.
- Place your pot in the water and let it sit for 20–30 minutes. You’ll see the soil surface gradually darken as moisture wicks upward.
- Remove the pot before the water reaches the soil surface — you want the bottom 2/3 of the soil saturated, with the top remaining dry.
- Allow excess water to drain completely before returning the pot to its usual spot. Never leave plants sitting in standing water long-term.
- Check how often your plants need this — factors like pot size, plant type, and ambient temperature all affect the schedule.
Advantages
- Produces stronger root systems
- Reduces risk of fungal gnats and surface mold
- Ensures thorough, even watering
- Protects sensitive foliage from water damage
Limitations
- Takes more time than quick overhead watering
- Can lead to salt buildup in soil over time (soluble minerals rise upward with water) — flush with top watering occasionally to reset
- Requires pots with drainage holes (no exceptions — plants in pots without drainage holes shouldn’t be bottom-watered or top-watered heavily)
- Not practical for large outdoor garden beds
Common Mistakes to Avoid
- Leaving pots sitting in water for hours (causes root rot — 20–30 minutes is the guideline)
- Never top-watering at all (occasional top flushing prevents mineral salt accumulation)
- Using very cold water, which can shock plant roots
Trick #8: Use Newspaper as Biodegradable Weed Barrier Mulch
Why It Seems Unusual
Laying newspaper on your garden soil feels like something you’d do if you ran out of options. But newspaper mulching is a well-established technique used by organic farmers and permaculture practitioners — and it works significantly better than most people expect.
Why It Actually Works
Newspapers create a physical light barrier that smothers weed seeds and prevents photosynthesis in young weed seedlings. Unlike plastic weed barrier fabric (which can impede soil health, restrict water flow, and eventually fragment into microplastics), newspaper:
- Blocks light effectively for a full growing season
- Gradually decomposes, adding carbon (organic matter) to the soil
- Retains moisture underneath, reducing your watering frequency
- Provides habitat and food for earthworms, which improve soil health
The inks used in modern newspaper printing are primarily soy-based and are considered safe for garden use by most university extension services, including those at Cornell University and Oregon State University. Avoid glossy magazine pages or heavily colored inserts, which may use different inks.
Which Plants Benefit Most
- Vegetable garden rows and beds (especially newly planted areas)
- Strawberry beds
- Around fruit trees and shrubs
- Pathways between raised beds
- Newly established perennial beds
Step-by-Step Instructions
- Collect several layers of plain newsprint (avoid glossy sections).
- Water the soil surface thoroughly before laying newspaper — moist soil is better for earthworms and helps the newspaper stay in place.
- Lay newspaper in overlapping layers 8–10 sheets thick around your plants, leaving a few inches of clearance from plant stems.
- Cover the newspaper with 2–3 inches of organic mulch (wood chips, straw, or compost) to hold it in place, prevent it from drying out, and improve the visual appearance.
- The newspaper will decompose within one growing season, adding organic matter to the soil beneath. Reapply the following season.
Advantages
- Extremely inexpensive (often free)
- Biodegradable — improves soil as it breaks down
- Highly effective weed suppression for the full season
- Retains soil moisture meaningfully
- Safe for organic gardening certification
Limitations
- Needs to be applied correctly (thin layers allow weeds through)
- Won’t suppress established perennial weeds with deep roots — remove these before laying newspaper
- Must be kept moist to maintain effectiveness (dry newspaper breaks down unevenly and may allow gaps)
- Only lasts one season — requires annual reapplication
Common Mistakes to Avoid
- Using too few layers (4 sheets isn’t enough — use 8–10)
- Laying on dry soil (wet the ground first)
- Not covering with additional mulch (newspaper exposed to sun dries out, cracks, and gaps appear)
- Using glossy magazine pages or heavily colored advertising inserts
FAQ: Common Questions About These Garden Tricks
1. Are these tricks safe for organic gardening?
Yes — every technique on this list is compatible with organic growing principles. Coffee grounds, banana peels, eggshells, cinnamon, and newspaper are natural materials. Hydrogen peroxide breaks down into water and oxygen. Companion planting and bottom watering involve no chemicals at all. Just use unbleached newspaper and standard 3% hydrogen peroxide.
2. Can I use banana peels on acid-loving plants like blueberries?
You can, with the understanding that banana peels primarily add potassium and some calcium — not acid. For blueberries, which need genuinely acidic soil (pH 4.5–5.5), you’ll still need acidifying agents like sulfur or acidic fertilizers specifically formulated for ericaceous plants. Banana peels won’t hurt blueberries, but won’t meet their main soil needs on their own.
3. Why isn’t banana peel tea effective even though peels contain potassium?
This comes down to bioavailability. Potassium in banana peels is primarily bound within the plant fiber. Soaking peels in water for a day or two extracts only a small fraction of that potassium in a form plants can use. Decomposition in soil — over several weeks through microbial activity — is a much more complete and efficient extraction process. University extension sources have confirmed this limitation of peel tea.
4. How often should I bottom water my plants?
This depends entirely on the plant type, pot size, and environmental conditions. As a general rule, bottom water when the top 1–2 inches of soil are dry. For succulents, this might be every 2–3 weeks. For actively growing vegetable seedlings in warm conditions, it might be every 3–5 days. Touch the soil — don’t just follow a calendar.
5. Will cinnamon kill beneficial insects or soil organisms?
When used as a surface dust around seedlings in the amounts recommended (a light, visible dusting), cinnamon poses negligible risk to soil-dwelling beneficial organisms like earthworms. Bees and other above-ground pollinators are not affected by cinnamon dust on soil. The antifungal effect is localized to the surface application area.
6. My newspaper mulch dried out and cracked after one week. What went wrong?
Two likely causes: either the sheets weren’t thick enough (8–10 layers minimum), or they weren’t covered with additional organic mulch. Newspaper exposed to direct sun dries and degrades quickly. Always cover with 2–3 inches of straw, wood chips, or compost to lock in moisture and protect the newspaper layer.
7. Can I use coffee grounds as mulch directly on top of the soil?
This is not recommended. Applied thickly as a mulch layer, used coffee grounds can form a dense, hydrophobic crust that actually repels water rather than allowing it to penetrate. The best uses are: mixing lightly into the top 2–3 inches of soil, adding to compost (up to 25% of the total volume), or applying a thin skim coat (less than 1/2 inch) that gets watered in.
Conclusion
The best gardening techniques aren’t always the flashiest or most expensive. Some of the most effective tools in a gardener’s kit are things you already have in your kitchen — coffee grounds, banana peels, eggshells, and cinnamon. Paired with smart practices like bottom watering, companion planting, and newspaper mulching, these approaches can meaningfully improve how your garden performs.
What separates these 8 weird garden tricks that actually work from the noise online is simple: they all have genuine reasons behind them. Not marketing, not viral video logic, but real mechanisms — biochemical, biological, or physical — that experienced gardeners and horticultural researchers can explain and support.
That said, no trick works in isolation. Healthy soil, consistent watering, appropriate plant selection, and observation are what your garden needs most. These techniques work with good fundamentals, not instead of them.
Try one or two this season, take notes, and see what you notice. Gardening is a long game, and every season gives you new information. The goal isn’t to find a magic shortcut — it’s to keep learning what works in your specific soil, with your specific plants, in your specific climate.
That’s where real gardening expertise grows.