Starting a backyard flower farm is one of those ideas that sounds dreamy until you actually dig in — and then it becomes genuinely addictive. Whether you’re growing for personal joy, weekly farmers’ market bouquets, or supplying a local florist, turning your backyard into a productive cut flower garden is more achievable than most people think.
I started my first small flower farm on a 20-by-40-foot strip of backyard that most people would’ve written off as “too shady” and “too weedy.” Three seasons later, that same patch was producing hundreds of stems per week from late spring through fall. No fancy equipment, no greenhouses, no huge budget — just thoughtful planning, good soil work, and choosing the right flowers.
This guide covers everything you need to know about how to start a flower farm in your backyard, from evaluating your site and building healthy soil to harvesting stems and selling your first bouquets. Whether you have a quarter-acre suburban yard or a few raised beds on a city lot, there’s a path forward for you.
What Is a Backyard Flower Farm?
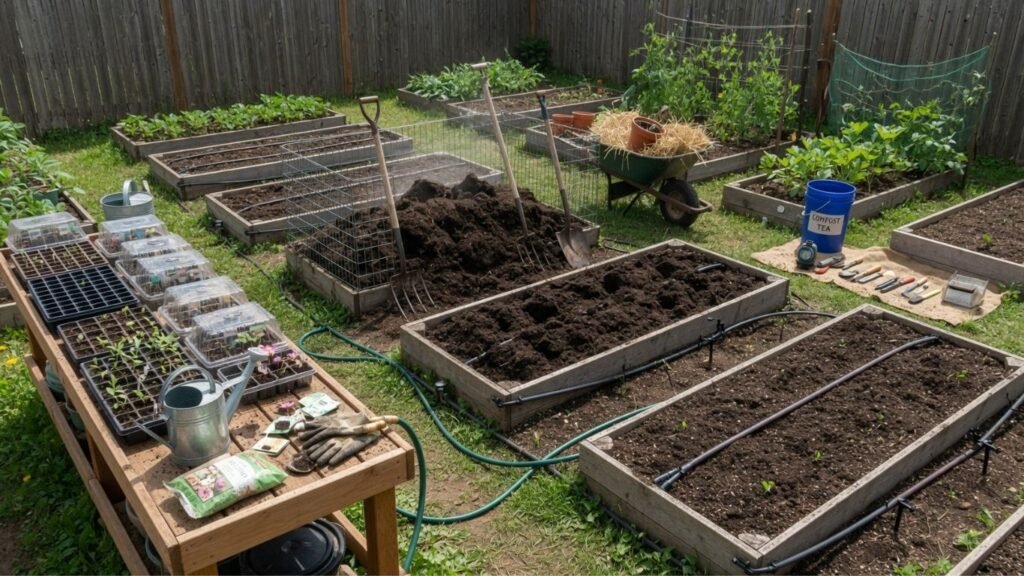
A backyard flower farm is simply a dedicated growing space — in your own yard — where flowers are cultivated intentionally, usually in rows or beds, for regular cutting and use. It’s different from a typical ornamental flower garden, where you plant for visual display and leave flowers in place. On a flower farm, even a small one, you’re growing with purpose: cut stems, dried arrangements, market bunches, or bouquets for your home.
You don’t need acres of land. Some of the most productive small flower farms I’ve seen operate in spaces under 1,000 square feet, using smart succession planting and high-yield varieties to keep blooms coming all season.
Step 1: Choose the Right Location
Look for Full Sun First
Sunlight is the single most important factor in flower farming. Most cut flowers — zinnias, sunflowers, dahlias, lisianthus, cosmos — need at least six hours of direct sun per day, and many perform best with eight or more. Before you do anything else, watch your yard throughout the day over two or three days and note which areas receive consistent sun.
Don’t rely on memory or guesswork. The spot that looks bright at noon might be shaded by 3 PM because of a neighbor’s fence or a tree to the west. Use a simple sun calculator app or just stake out the area yourself with markers.
Evaluate Your Available Space
Once you’ve identified your sunniest spots, think honestly about how much usable space you have. Here’s a rough guide:
- Under 200 sq ft: Focus on containers and a small raised bed system
- 200–500 sq ft: A beginner home flower farm with 4–6 dedicated rows
- 500–1,500 sq ft: A productive small flower farm capable of market sales
- 1,500+ sq ft: A serious backyard cut flower operation
Even 200 square feet, managed well, can produce enough stems for home bouquets plus some to share. If you’re working with a tight space, check out these 10 Best Backyard Plants That Bloom All Season to maximize every square foot you have.
Consider Proximity to Water
You’ll be watering frequently, especially in summer. Choose a location close to a water source — or be prepared to run drip lines or soaker hoses. Lugging heavy watering cans across the yard gets old fast.
Wind and Drainage
Avoid low spots where water pools after rain. Poor drainage suffocates roots and promotes fungal disease. Also consider wind exposure — tall flowers like dahlias and sunflowers may need staking if your location is exposed to strong prevailing winds.
Step 2: Test and Improve Your Soil
Why Soil Testing Matters
Most beginner flower farmers skip soil testing and regret it later. A basic soil test (available through your local cooperative extension office for around $15–25) tells you your soil’s pH, nutrient levels, and organic matter content. Flowers generally prefer a slightly acidic to neutral pH — somewhere between 6.0 and 7.0.
If your pH is off, your plants won’t be able to absorb nutrients properly, no matter how much fertilizer you add. That’s money and effort wasted.
Improving Your Native Soil
Once you have your test results, amend accordingly:
- Low pH (acidic): Add agricultural lime to raise pH
- High pH (alkaline): Add elemental sulfur or acidic compost to lower pH
- Low organic matter: Work in 3–4 inches of compost
- Compacted clay: Add compost plus coarse sand; consider raised beds
- Sandy soil: Add compost generously to improve water retention
Before your first season, work your amendments into the top 12 inches of soil. Flower roots go deep, especially dahlias and sunflowers.
Building Raised Beds (Recommended for Beginners)
If your native soil is challenging — heavy clay, rocky, or poor drainage — raised beds are worth the upfront cost. Fill them with a blend of quality topsoil, compost, and perlite (roughly 60/30/10). Raised beds also warm up faster in spring, extending your growing season by a few weeks.
Standard raised beds for cut flowers should be 4 feet wide (so you can reach the center without stepping in) and at least 12 inches deep, with 18–24 inches being better for root-heavy crops like dahlias.
Step 3: Plan Your Flower Farm Layout
Row Spacing and Bed Design
For a productive cut flower garden, planting in rows rather than clusters makes harvesting and maintenance much easier. A typical layout uses:
- Beds 3–4 feet wide
- Pathways 18–24 inches wide between beds
- Row length determined by your space, but 10–20 feet is a manageable starting point
This layout allows you to walk alongside every plant without compacting your growing area. It also makes weeding, mulching, and irrigation installation much simpler.
Grouping by Timing and Height
Group tall flowers (sunflowers, dahlias, tall zinnias) to the north side of your beds so they don’t shade shorter plants. Group flowers with similar bloom times together so you can succession plant that space efficiently once they finish.
If you’re new to laying out a productive garden space, this guide on How to Plan Your Next Garden Project walks through the planning process step by step and can save you a lot of backtracking.
Allow Space for a Staging Area
Even a small 4-by-4-foot staging area near your flower beds — a flat surface, a bucket of water, some basic tools — makes harvest and conditioning work much smoother. It doesn’t need to be fancy.
Step 4: Select Your Flowers
This is where most people get overwhelmed. There are thousands of flowers you could grow, but for a beginner backyard flower farm, you want varieties that are:
- High yield — lots of stems per plant
- Long vase life — at least 5–7 days
- Easy to grow — forgiving of beginner mistakes
- Reliable in your climate — don’t fight your zone
Best Annual Flowers for Cut Flower Gardens
Annuals complete their life cycle in one season, which means you’ll plant them fresh each year — but they also bloom heavily and quickly.
Zinnias are the backbone of most small flower farms. They grow fast, bloom prolifically from midsummer through frost, and thrive in heat. Choose cutting varieties like ‘Benary’s Giant’ or ‘Queen Series’ rather than dwarf bedding types.
Sunflowers are crowd-pleasers and easy to grow. For the longest season, choose a branching variety like ‘Lemon Queen’ or ‘Italian White’ rather than single-stem types. Direct sow every two to three weeks for continuous blooms.
Cosmos are airy, delicate, and surprisingly productive. They tolerate poor soil, reseed themselves, and attract pollinators constantly. ‘Double Click’ and ‘Cupcakes’ are great cut flower types.
Lisianthus takes patience (it’s slow from seed) but produces elegant, long-lasting blooms that florists love. Start seeds 5–6 months before your target bloom date, or buy transplants.
Celosia in both plumed and crested forms adds bold texture to bouquets and dries beautifully.
Strawflowers are another workhorse — they’re drought-tolerant, heat-loving, and produce papery blooms that last weeks in a vase and months when dried.
Best Perennial Flowers for a Home Flower Farm
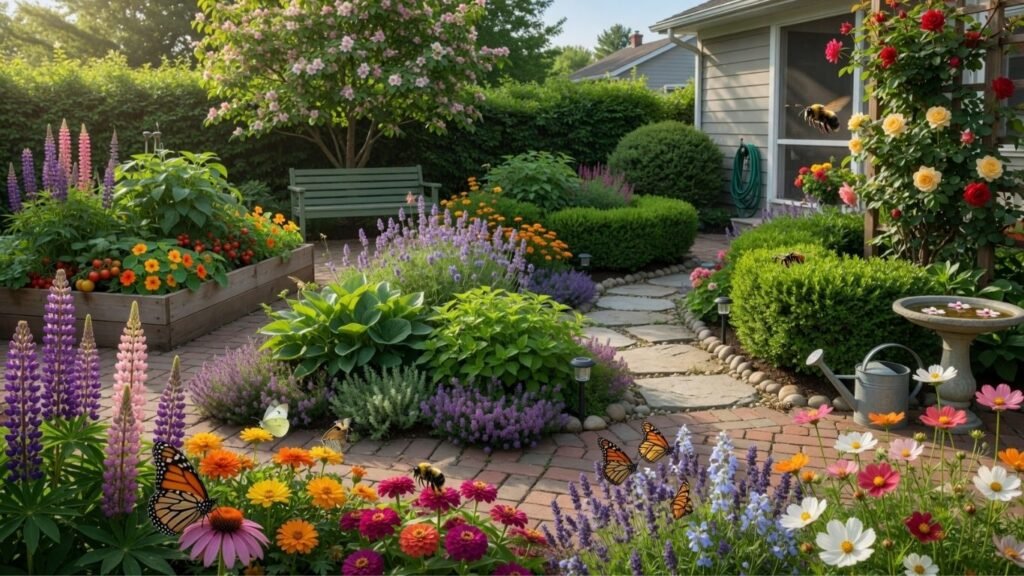
Perennials come back year after year, which reduces your annual seed costs and labor. The trade-off is that they take longer to establish. For a well-rounded small flower farm, mixing perennials with annuals makes sense.
Good perennial cut flowers include:
- Echinacea (coneflower): Long-lasting, pollinator-friendly, easy to grow
- Rudbeckia (black-eyed Susan): Reliable, heat-tolerant, long vase life
- Peonies: Highly sought-after, especially for weddings; takes 2–3 years to establish
- Yarrow: Drought-tolerant, beautiful in fresh and dried arrangements
- Salvia: Long spikes, great for filler, excellent pollinator plant
For a deeper dive into perennials that produce beautiful stems season after season, this resource on 11 Easy Perennial Flowers for Beautiful Cut Bouquets is packed with practical recommendations.
Dahlias: The Star of the Cut Flower World
Dahlias deserve their own mention. They are hands-down among the most profitable and beloved flowers in the cut flower market, with incredible variety in color, form, and size. Tubers go in the ground after your last frost date and reward you with armloads of blooms from midsummer through fall.
If space is limited, you can absolutely grow dahlias in large containers. This detailed guide on How to Grow Dahlias in Pots for Stunning Summer Blooms covers container selection, soil mixes, watering, and more.
Flowers to Grow for Pollinators
A healthy flower farm actively attracts bees, butterflies, and beneficial insects that help with pest control. Good pollinator-friendly flowers include phacelia, borage, sweet alyssum (excellent as a living mulch between rows), lavender, and any open-faced dahlia or cosmos variety.
Step 5: Start Seeds and Source Plants
When to Start Seeds Indoors
Starting your own seeds from scratch is the most economical approach, especially for high-volume annuals like zinnias, cosmos, and celosia. Here’s a general indoor seed-starting timeline:
- 12–16 weeks before last frost: Lisianthus, snapdragons
- 8–10 weeks before last frost: Dahlias (from seed), ranunculus
- 6–8 weeks before last frost: Zinnias, celosia, cosmos, sunflowers
- 4–6 weeks before last frost: Basil (great filler), strawflowers
Use a quality seed-starting mix (not regular potting soil — it’s too dense), provide bottom heat with a seedling heat mat, and ensure 14–16 hours of light daily under grow lights. Weak, leggy seedlings are almost always a light problem.
What to Direct Sow
Some flowers actually prefer to be sown directly in the garden where they’ll grow:
- Sunflowers — transplant shock stunts them
- Larkspur — needs cold stratification; direct sow in fall or early spring
- Zinnias — can go either way, but direct sowing works well in warm soil
- Bachelor’s buttons — direct sow in early spring
Buying Transplants and Tubers
For your first season, don’t feel obligated to start everything from seed. Buying transplants from a reputable nursery gets you to bloom faster. Dahlia tubers are almost always purchased rather than grown from seed, and they establish quickly once planted after your last frost date.
Step 6: Transplanting and Spacing
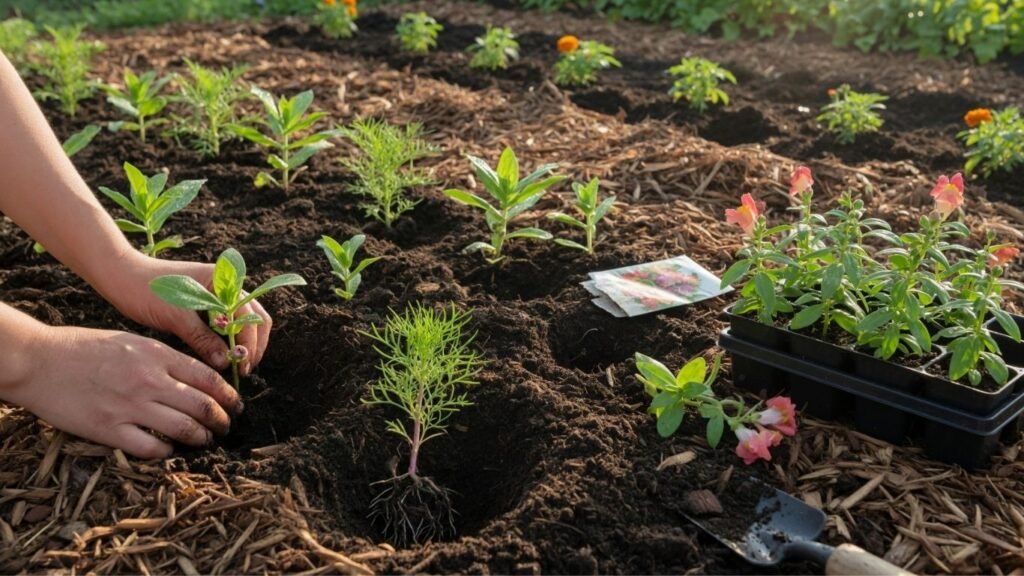
Transplant seedlings outdoors once nighttime temperatures are consistently above 50°F (55°F for heat-lovers like zinnias). Harden off your seedlings first by placing them outside in a sheltered spot for increasing amounts of time over 7–10 days.
Proper spacing matters more than most beginners realize:
- Too close: Poor airflow, disease pressure, smaller stems
- Too far apart: Wasted space, more weed pressure between plants
When in doubt, follow the spacing recommendations on seed packets and then add two inches. Crowded flowers fight for light and produce spindly stems with smaller blooms.
Water transplants in gently, and if possible, transplant in the late afternoon or on a cloudy day to reduce stress.
Step 7: Set Up Irrigation
Manual watering with a hose works for very small spaces, but once you’re growing more than a few beds, drip irrigation is worth every penny. It delivers water directly to the root zone, keeps foliage dry (reducing disease), and saves you hours of time each week.
A basic drip system for a small backyard flower farm can be installed for $100–$200 and connected to a timer for completely automated watering.
Soaker hoses are a cheaper alternative and work well in straight rows. Avoid overhead sprinklers if possible — wet foliage, especially on zinnias and dahlias, invites powdery mildew and botrytis.
Water deeply and less frequently rather than shallowly and often. Deep watering encourages deep roots, which makes plants more drought-tolerant and resilient.
Step 8: Fertilizing Your Flower Farm
Flowers are heavy feeders, especially high-yield annuals. Without adequate fertility, you’ll get shorter stems, fewer blooms, and smaller flowers.
Starting Fertilizer
Work a balanced slow-release fertilizer (like a 10-10-10 or organic granular blend) into your beds at planting time. This provides a steady nutrient base for the first 8–12 weeks.
Ongoing Feeding
Once plants are established and actively growing, supplement with a liquid fertilizer every 2–3 weeks. During the vegetative growth phase (before blooms appear), use a slightly higher-nitrogen formula to encourage strong stem development. Once budding begins, switch to a lower-nitrogen, higher-phosphorus formula (like 5-10-10) to support bloom production.
For organic growing, liquid fish emulsion, kelp meal, and compost tea are excellent options that feed both your plants and your soil biology.
Step 9: Mulching and Weed Control
Weeds are the enemy of a productive small flower farm. They compete for water, nutrients, and light. Staying ahead of weeds is far easier than trying to catch up after they’ve taken over.
Mulching Strategies
Apply 2–3 inches of straw, wood chips, or shredded leaves between your rows and around plants. Mulch:
- Suppresses weed germination by blocking light
- Retains soil moisture (reducing watering frequency)
- Moderates soil temperature
- Adds organic matter as it breaks down
Avoid placing mulch directly against plant stems to prevent rot.
Using Landscape Fabric
Many small flower farms use landscape fabric in their rows, cutting slits or holes for each plant. This dramatically reduces weeding time. It works best for transplants (not direct-seeded crops). Black landscape fabric also warms soil, which can extend your season and speed early growth.
Hand Weeding
Whatever system you use, some hand weeding will still be necessary. The trick is to do it early — tiny weeds are easy. Wait three weeks and you’re in for a battle. A hoe works well between rows; use a hand weeder or your fingers carefully around plant bases.
Step 10: Pest and Disease Management
Common Flower Farm Pests
Aphids cluster on soft new growth. A strong blast of water usually knocks them back. Ladybugs and parasitic wasps are natural predators — attracting them with pollinator-friendly flowers helps keep aphid populations in check.
Thrips cause silvery scarring on petals, particularly on dahlias and lisianthus. Yellow sticky traps help monitor populations. Spinosad (organic) is effective for heavy infestations.
Slugs and snails love cool, moist conditions and will shred young transplants overnight. Iron phosphate baits (like Sluggo) are safe for organic gardens and pets.
Japanese beetles are a serious pest of zinnias and dahlias in many regions. Hand-picking in the early morning is the most effective control method.
Spider mites thrive in hot, dry conditions. Keep plants well-watered and use insecticidal soap at first signs.
Common Diseases
Powdery mildew is almost inevitable on zinnias by late summer, but it rarely kills plants — it just reduces flower quality. Good airflow, proper spacing, and avoiding overhead watering minimizes it. Fungicidal sprays (sulfur-based or baking soda solutions) can slow its spread.
Botrytis (gray mold) is a fungal disease that affects densely packed, damp flowers. Good airflow and removing spent or damaged blooms promptly is your best prevention.
Fusarium wilt affects many flower crops and is soil-borne. Rotate your crops annually (don’t grow the same family in the same spot two years running) and choose resistant varieties when available.
Step 11: Succession Planting for Continuous Blooms
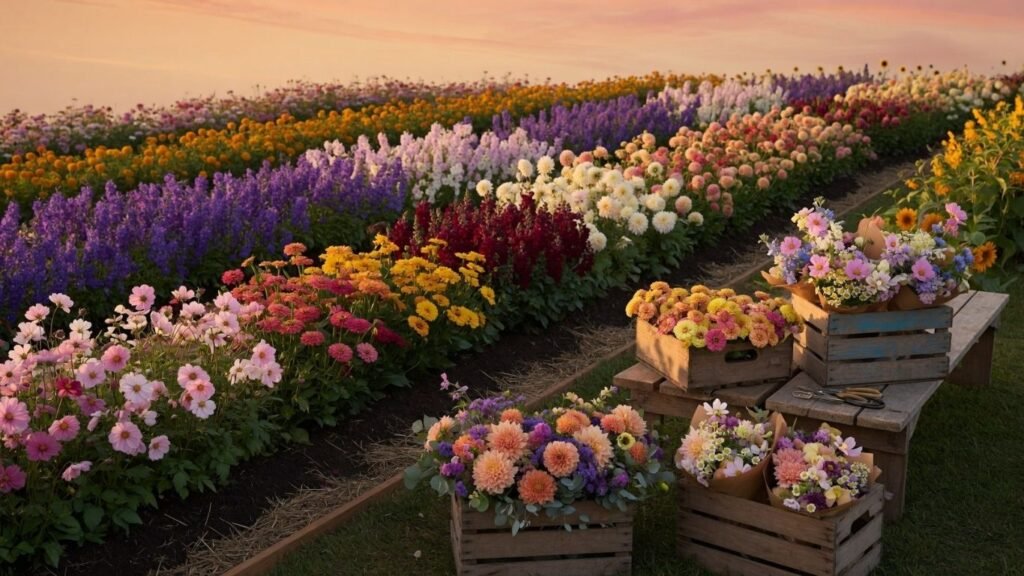
Succession planting is the secret behind consistent flower production all season. Instead of planting everything at once (leading to a glut of blooms followed by nothing), stagger your plantings every 2–3 weeks.
For example, with zinnias:
- First sowing: May 1 (or 2 weeks after last frost)
- Second sowing: May 15
- Third sowing: June 1
- Fourth sowing: June 15
Each successive planting comes into bloom 3–4 weeks after the previous one, giving you a continuous supply from July through frost rather than one big flush in August.
The same principle applies to sunflowers, cosmos, and direct-sown annuals. With perennials and dahlias, succession planting isn’t as applicable — they bloom on their own schedule — but pairing them with well-timed annuals fills gaps beautifully.
Step 12: Harvesting Cut Flowers
Knowing when and how to harvest is one of the most important skills in cut flower production. Harvest at the wrong time or incorrectly, and even perfect blooms won’t last in a vase.
When to Harvest
The golden rule: Harvest most flowers in the “marshmallow stage” — when buds are showing full color but petals haven’t fully opened. This gives you maximum vase life.
Specific timing by flower:
- Zinnias: When the stem is rigid and the bloom is about halfway open
- Sunflowers: When petals have just started to open but the center is still tight
- Dahlias: Fully open, but petals still firm (they don’t continue opening in the vase)
- Cosmos: At the “marshmallow” stage — just showing color, not fully open
- Lisianthus: When 1–2 buds on the stem have opened
When to Harvest During the Day
Harvest in the early morning — ideally before 8 AM or 9 AM, before the heat of the day. Stems that have had the cool night to hydrate are turgid and crisp. Midday harvesting leads to wilting within hours.
How to Harvest Properly
- Have a clean bucket of cool water ready before you go out
- Use sharp, clean scissors or pruning snips (dull blades crush stems)
- Cut stems at an angle with a clean, single cut
- Plunge stems immediately into water — don’t let them sit in the air
- Remove any foliage that will be below the waterline in your bucket
- Bring buckets into a cool, shaded location immediately after harvest
Step 13: Post-Harvest Care and Conditioning
Conditioning is the process of letting freshly cut flowers hydrate and recover before arranging or selling them. It makes a significant difference in vase life.
Basic conditioning:
- After harvesting, recut stems at an angle underwater or immediately before placing in water
- Place in clean buckets of cool water in a cool, dark location (ideally 34–40°F if you have a cooler; otherwise a cool garage or basement)
- Leave flowers to condition for 4–8 hours minimum, ideally overnight
- Remove all leaves below the waterline (they rot and contaminate water)
Floral preservative (the little packets that come with store-bought flowers) contains sugar, an acidifier, and a biocide. You can buy commercial versions in bulk or make a simple version with a teaspoon of sugar, a teaspoon of apple cider vinegar, and a teaspoon of bleach per quart of water.
Change vase water every 2–3 days and recut stems to extend vase life.
If you grow more than you can use fresh, don’t let anything go to waste. Many flower varieties — strawflowers, celosia, yarrow, lavender, statice — dry beautifully and retain their beauty for months. This guide on 12 Easy Ways to Preserve Flowers at Home covers air drying, pressing, silica gel, glycerin, and other methods you can use right at home.
Step 14: Selling Your Flowers
Once your flower farm is producing steadily, selling locally is a natural next step. Here are the most realistic channels for a backyard flower farmer:
Farmers Markets
Farmers markets are the most accessible entry point. You’ll typically need a vendor permit, possibly a cottage industry license depending on your state, and a consistent weekly supply. Bouquets priced at $10–$20 sell well. Build relationships with repeat customers who appreciate locally grown, seasonal stems.
Local Florists
Some independent florists actively seek out local growers, especially for specialty flowers they can’t easily source from wholesalers — heirloom varieties, unusual colors, or ultra-fresh dahlias and peonies. Start by introducing yourself and bringing a sample bunch. Be reliable and consistent above all.
Community Supported Agriculture (CSA) Shares
A flower CSA works like a vegetable CSA: customers pay upfront for a weekly bouquet throughout your growing season. This model gives you predictable income and helps you plan production. Market it through local social media groups, neighborhood apps, and your personal network.
U-Pick Events
If your property allows, a U-pick flower operation can be incredibly popular and profitable. Customers come to you, cut their own stems, and pay by the stem or by the bucket. It requires minimal post-harvest labor from you.
Home Bouquets and Gifting
Even without selling a single stem, a well-managed backyard flower farm provides constant joy — fresh flowers in every room, gifts for neighbors, beautiful arrangements for family celebrations. That value, while not financial, is very real.
Step 15: Seasonal Maintenance and Off-Season Planning
A productive flower farm doesn’t just happen during the growing season. What you do in fall and winter sets up your success the following year.
Fall Tasks
- Dig, clean, and store dahlia tubers before hard frost; pack in sawdust or coco coir in a cool, dark location (around 40–50°F)
- Save seeds from your best annuals (zinnias, cosmos, sunflowers) for next season
- Cut back perennials but leave some stems standing — they provide wildlife habitat and winter structure
- Apply a 3–4 inch layer of compost to beds; it’ll break down over winter and feed your soil
Winter Tasks
- Order seeds early (by January for most regions) — popular varieties sell out fast
- Review what worked and what didn’t; keep a simple garden journal
- Plan next year’s crop rotation so you’re not growing the same family in the same bed
- Amend soil in fall or early spring for the best results
Spring Prep
- Turn in any remaining compost amendments
- Test soil again if you’ve made significant changes
- Clean and sharpen all tools
- Set up irrigation before the chaos of planting season begins
Common Mistakes to Avoid
Learning from common beginner errors will save you time, money, and frustration.
1. Planting too many varieties too soon
It’s tempting to try everything in your first season. Focus on 5–7 proven varieties instead. Get to know them well before expanding.
2. Skipping soil prep
Planting beautiful flowers into poor soil and expecting great results is wishful thinking. Soil building is the single best investment you can make.
3. Not harvesting frequently enough
Many cut flowers stop producing when they’re allowed to set seed. Regular harvesting (every 2–3 days at peak season) signals the plant to keep blooming. This is especially true for zinnias, cosmos, and sweet peas.
4. Planting everything at once
Without succession planting, you’ll have a glut in August and nothing in September. Stagger your plantings.
5. Harvesting too late
Blooms that are too open don’t last long in a vase. Practice harvesting earlier than you think necessary.
6. Overwatering or underwatering
Both kill plants, but overwatering is more common among beginners. Learn to check soil moisture before watering. Stick your finger 2 inches into the soil — if it’s still damp, wait.
7. Neglecting records
Keep a simple garden journal — what you planted, when, what worked, what failed, what the weather did. This becomes incredibly valuable by your second and third season.
FAQ: Starting a Backyard Flower Farm
How much space do I need to start a flower farm in my backyard?
You can start a productive cut flower garden in as little as 100–200 square feet. Even a few well-managed raised beds can produce enough stems for weekly home bouquets. For selling at markets, aim for at least 500 square feet of productive growing space.
Can I start a flower farm with no experience?
Absolutely. Flowers like zinnias, sunflowers, and cosmos are genuinely forgiving for beginners. Start small, choose easy varieties, and expand as you gain confidence. Every season teaches you something valuable.
How much money can I make from a backyard flower farm?
This varies widely. A well-managed 500-square-foot operation can realistically generate $1,000–$3,000 per season selling at farmers markets or through a small CSA. Larger operations with specialty flowers can earn significantly more. Most small flower farmers start with the goal of covering their costs and enjoying the process rather than replacing a full income.
What are the easiest flowers to grow for cutting?
Zinnias, sunflowers, cosmos, celosia, and rudbeckia are among the easiest and most forgiving cut flowers for beginners. They grow quickly, bloom prolifically, and tolerate less-than-perfect conditions.
When should I plant flowers for a summer flower farm?
Most summer-blooming annuals are planted outdoors after your last frost date in spring. For earlier blooms, start seeds indoors 6–8 weeks before that date. Dahlia tubers go in the ground when soil temperatures reach 60°F.
Do I need a business license to sell flowers from my backyard?
In many areas, small-scale flower selling at farmers markets or through direct-to-customer arrangements falls under cottage industry or agricultural exemptions. Requirements vary by state and municipality. Check with your local cooperative extension office or city/county business licensing office to understand what applies in your area.
How do I keep cut flowers fresh longer?
Harvest in the early morning before heat sets in, recut stems at an angle, and place them immediately in clean, cool water. Remove leaves below the waterline, use floral preservative, keep arrangements away from direct sun and heat, and change the water every 2–3 days. Conditioning flowers overnight in a cool location before arranging them also significantly extends vase life.
Key Takeaways
- Choose the sunniest spot in your yard and build soil quality before planting anything
- Start small and focused — five to seven reliable varieties beat thirty mediocre attempts
- Succession plant every 2–3 weeks to keep blooms coming all season rather than all at once
- Harvest early and harvest often — regular cutting encourages more blooms, not fewer
- Post-harvest care is as important as growing; conditioning and clean water dramatically extend vase life
- Drip irrigation saves time, reduces disease, and pays for itself quickly
- Mix annuals and perennials for a balanced flower farm that reduces your annual workload over time
- Keep a journal — your experience is your most valuable farming tool over multiple seasons
Conclusion
Starting a flower farm in your backyard is a deeply rewarding project that combines creativity, physical work, patience, and ongoing learning. You don’t need perfect soil, unlimited space, or a hefty budget to begin. You need good planning, a few excellent flower varieties, and the willingness to observe and adapt.
The beauty of a small flower farm is that it grows with you. Your first season might be modest — a handful of zinnias, some volunteer cosmos, a few straggly dahlias. Your third season, with better soil and better knowledge, will be something else entirely.
Start with what you have, improve what you can, and harvest often. That’s the real heart of flower farming, at any scale.