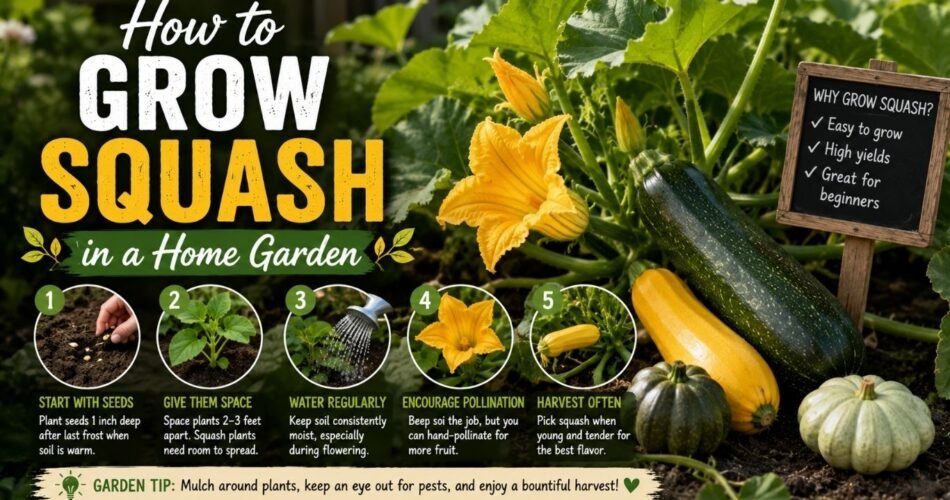
There’s something deeply satisfying about walking into your backyard and picking a perfect squash right off the vine. I’ve been growing squash in my home garden for over fifteen years now, and it’s still one of the crops I look forward to most every single season. Whether it’s a tender zucchini in July or a big butternut squash cured and waiting in the pantry come December, squash earns its place in the garden every year.
If you’re wondering how to grow squash in a home garden, you’re in the right place. Squash is one of the most rewarding vegetables you can grow. It’s forgiving for beginners, incredibly productive, and versatile in the kitchen. A single healthy plant can produce enough fruit to feed your family and share with your neighbors — sometimes whether they want it or not.
In this guide, I’ll walk you through everything you need to know about growing squash successfully. We’ll cover the differences between summer and winter squash, the best varieties for home gardens, soil prep, planting, watering, pest management, harvesting, and storage. I’ll also share tips for small spaces, raised beds, and containers. Let’s dig in.
Quick Squash Growing Guide
Before we get into the details, here’s a snapshot of what squash needs to thrive:
| Growing Factor | Details |
|---|---|
| Sunlight | Full sun (6–8+ hours daily) |
| Soil Type | Rich, loamy, well-draining soil |
| Soil pH | 6.0–6.8 (slightly acidic to neutral) |
| Watering Frequency | 1–2 inches per week, consistent and deep |
| Plant Spacing | Bush types: 24–36 inches apart; Vining types: 48–72 inches apart |
| Fertilizer Schedule | At planting, then side-dress every 3–4 weeks |
| USDA Hardiness Zones | 3–11 (grown as a warm-season annual) |
| Days to Harvest | Summer squash: 45–65 days; Winter squash: 75–110 days |
| Expected Yield | 5–25 lbs per plant depending on variety |
| Best Planting Season | After last frost, when soil reaches 60–70°F |
Understanding the Difference Between Summer Squash and Winter Squash
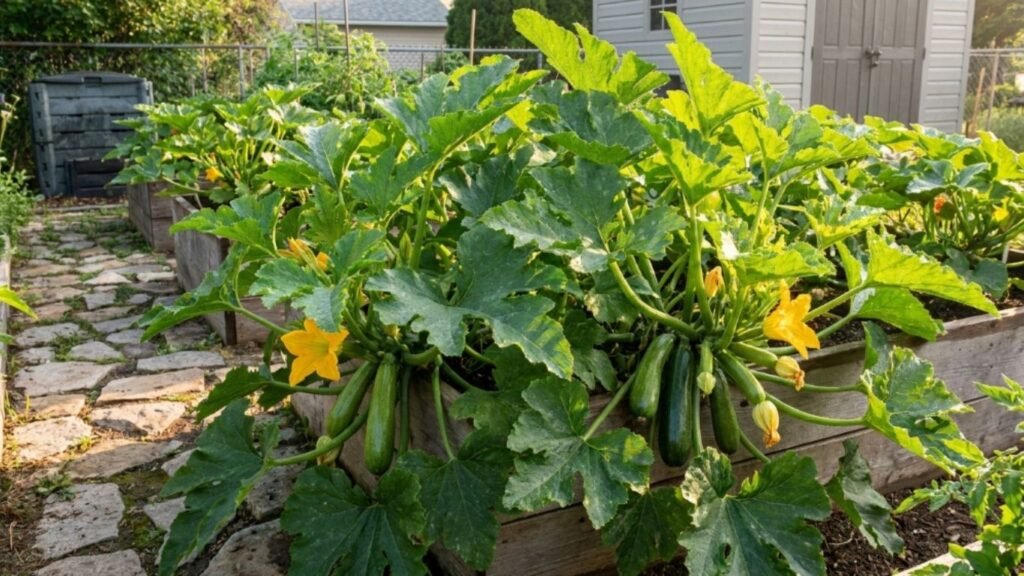
One of the first things that confused me as a new gardener was the naming. Summer squash and winter squash both grow during the warm summer months. The names actually refer to when and how you eat and store them, not when you grow them.
Summer Squash
Summer squash varieties — like zucchini, yellow crookneck, and pattypan — are harvested while immature. Their skin is thin and tender, and they’re meant to be eaten fresh, usually within a week or so of picking. They grow fast and produce heavily throughout the summer. If you’re looking for 11 Fast-Growing Vegetables for Beginner Gardeners, summer squash absolutely belongs on that list.
Winter Squash
Winter squash varieties — like butternut, acorn, spaghetti squash, and delicata — are left on the vine much longer until their rinds harden. Once cured, they can be stored for months in a cool, dry place. That’s why they’re called “winter” squash. You harvest them in fall and eat them through winter.
Summer Squash vs. Winter Squash: Side-by-Side Comparison
| Feature | Summer Squash | Winter Squash |
|---|---|---|
| Growth Habit | Mostly compact bush plants | Usually long trailing vines |
| Days to Harvest | 45–65 days | 75–110 days |
| Harvest Stage | Young, tender, immature fruit | Fully mature with hard rind |
| Skin | Thin, edible | Thick, tough (usually peeled) |
| Storage Life | 1–2 weeks (refrigerated) | 1–6 months (cool, dry storage) |
| Best Culinary Uses | Grilling, sautéing, salads, baking | Roasting, soups, pies, baking |
| Yield Per Plant | High (continuous harvest) | Moderate (fewer, larger fruits) |
| Space Required | Less (bush habit) | More (vining habit, can be trellised) |
| Best For Beginners | Yes — quick and easy | Yes — but requires more patience |
Both types belong to the Cucurbita family and share similar growing requirements. The main differences come down to harvest timing, storage ability, and how much garden space you’ll need.
Choosing the Best Squash Varieties for Your Garden
Picking the right variety matters more than most people think. Your choice should depend on your garden size, growing season length, and what you actually want to cook.
Best Summer Squash Varieties
- Black Beauty Zucchini — The classic. Reliable, prolific, and perfect for beginners. Bush habit.
- Yellow Crookneck — Sweet, nutty flavor. Great grilled or sautéed.
- Pattypan (Scallop Squash) — Fun flying-saucer shape. Tender when picked small.
- Costata Romanesco — Italian heirloom zucchini with ribbed skin and outstanding flavor. My personal favorite.
- Eight Ball Zucchini — Round zucchini, perfect for stuffing.
Best Winter Squash Varieties
- Butternut (Waltham) — Sweet, creamy flesh. Stores for months. A must-grow.
- Acorn — Smaller fruits, great for individual servings. Shorter storage life.
- Spaghetti Squash — Unique stringy flesh that acts as a pasta substitute.
- Delicata — Thin, edible skin. Sweet flavor. Compact vines compared to other winter squash.
- Blue Hubbard — Massive fruits, excellent for long-term storage. Needs lots of room.
- Red Kuri — Beautiful orange fruit with a chestnut-like flavor.
Best Squash for Containers and Small Spaces
If you’re working with a small garden, patio, or balcony, look for bush or compact varieties:
- Bush Baby Butternut — Compact vines, smaller fruits. Works well in large containers.
- Pattypan — Naturally bushy.
- Zucchini (any bush variety) — Most zucchini cultivars have a compact growth habit.
- Honeynut — A mini butternut with incredible sweetness. Shorter vines.
Winter squash is one of the crops I always recommend if you’re planning ahead for food security. It stores so well that it easily earns a spot among 9 Survival Crops That Feed You Year-Round.
Selecting the Ideal Planting Location
Squash loves warmth and sunshine. Getting the location right sets the foundation for everything else.
Sunlight Requirements
Squash needs full sun — a minimum of 6 hours of direct sunlight daily, though 8 or more is ideal. Less sun means fewer flowers, weaker plants, and lower yields. In my experience, the sunniest spot in your garden almost always produces the best squash.
Air Circulation
Good air circulation around squash plants helps prevent fungal diseases like powdery mildew, which is the most common problem squash growers face. Don’t crowd your plants or tuck them into tight corners with no airflow.
Protection from Wind
While airflow is good, strong winds can damage large squash leaves and dry out soil quickly. If your garden is exposed, a windbreak — like a fence, hedge, or row of taller plants — can help.
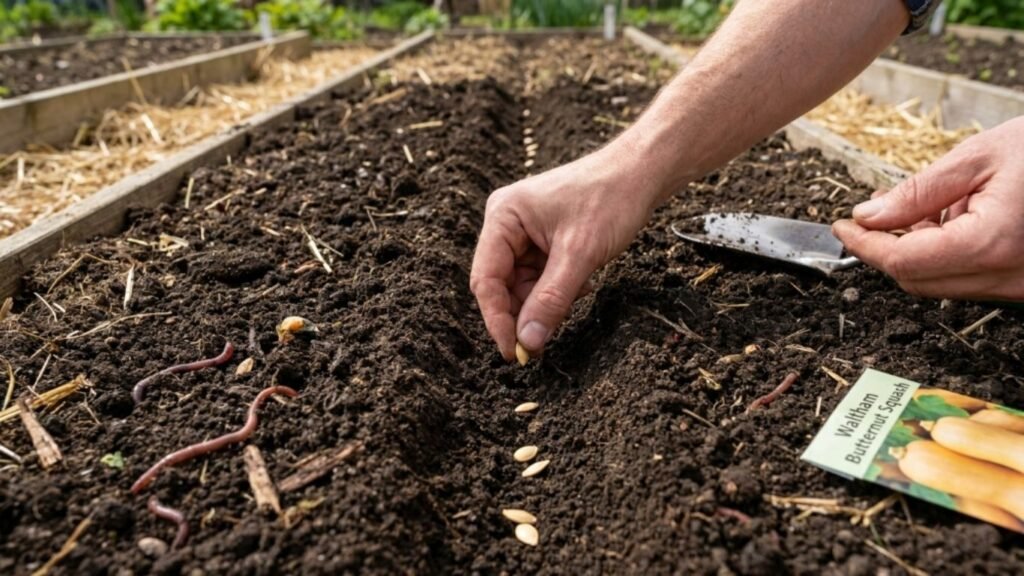
Growing Squash in Raised Beds
Raised beds are excellent for squash because you control the soil quality and drainage. Use beds at least 12 inches deep. Bush varieties fit well in 4×4 beds, but vining types will spill over the edges — which is fine. Just let them trail onto the ground or up a trellis.
Growing Squash in Containers
Yes, you can grow squash in containers. Use pots that are at least 18–24 inches wide and deep. Fill with high-quality potting mix amended with compost. Bush zucchini and compact varieties like Honeynut do best. Container squash needs more frequent watering and regular fertilizing since nutrients leach out faster.
Preparing Fertile Soil for Squash
Squash are heavy feeders. They pull a lot of nutrients from the soil, and they need rich, well-draining ground to really produce.
Soil Type and Structure
The ideal soil for squash is loamy — a balanced mix of sand, silt, and clay with plenty of organic matter. If your soil is heavy clay, amend it with compost and aged manure to improve drainage. If it’s too sandy, compost helps retain moisture and nutrients.
Soil pH
Squash grows best in soil with a pH between 6.0 and 6.8. A simple soil test kit from your local garden center will tell you where you stand. Most home gardens fall somewhere in this range naturally, but if your soil is too acidic, a light application of garden lime will bring it up.
How to Prepare the Planting Bed
Here’s what I do every spring before planting squash:
- Clear the area of weeds, debris, and old plant material.
- Spread 2–3 inches of compost over the planting area.
- Add a handful of balanced granular fertilizer (like 10-10-10) per planting hole.
- Work everything into the top 8–10 inches of soil with a garden fork or tiller.
- Rake smooth and water lightly to settle the soil.
Some gardeners build dedicated squash mounds or hills — small raised mounds of enriched soil about 12 inches high and 2–3 feet wide. Mounds warm up faster in spring and improve drainage. This is a traditional method, and it works well, especially in heavier soils.
When to Plant Squash
Timing is everything with squash. These are warm-season crops that absolutely cannot tolerate frost.
Soil Temperature
Wait until your soil temperature reaches at least 60°F (ideally 70°F) before planting squash seeds directly in the ground. Cold, wet soil causes seeds to rot before they germinate. I use a simple soil thermometer to check — it takes the guesswork out completely.
Last Frost Date
Plant squash seeds outdoors 1–2 weeks after your last expected frost date. In most areas, this falls somewhere between mid-April and early June depending on your zone.
Extending the Season
If you have a short growing season (zones 3–5), you can start seeds indoors 3–4 weeks before your last frost to get a head start. More on that below.
Direct Sowing vs. Transplanting Squash
Both methods work, and each has its advantages.
Direct Sowing (Recommended for Most Gardeners)
Squash germinates quickly in warm soil — usually within 5–10 days. Direct sowing is simpler, avoids transplant shock, and produces strong root systems. It’s the method I use most often.
How to direct sow squash seeds:
- Create planting hills or prepare individual planting spots.
- Poke 2–3 seeds into each spot, about 1 inch deep.
- Space hills or planting spots according to variety type (see spacing below).
- Water gently but thoroughly.
- Once seedlings develop their first true leaves, thin to the strongest one per spot.
Starting Seeds Indoors (For Short Seasons)
If your growing season is less than 100 days or you want an earlier harvest, start seeds indoors in biodegradable pots (like peat pots or cow pots). Squash doesn’t like having its roots disturbed, so avoid plastic cell trays where you’d need to pop seedlings out.
How to start squash indoors:
- Sow seeds 3–4 weeks before your transplant date.
- Plant one seed per pot, 1 inch deep.
- Keep soil moist and warm (70–85°F).
- Provide strong light — a sunny south-facing window or grow lights.
- Harden off seedlings for 5–7 days before transplanting.
- Transplant into the garden after all frost danger has passed, planting the entire biodegradable pot.
Important: Don’t start squash seeds too early indoors. Overgrown seedlings become rootbound and don’t transplant well. Three to four weeks is the sweet spot.
Planting Depth and Spacing
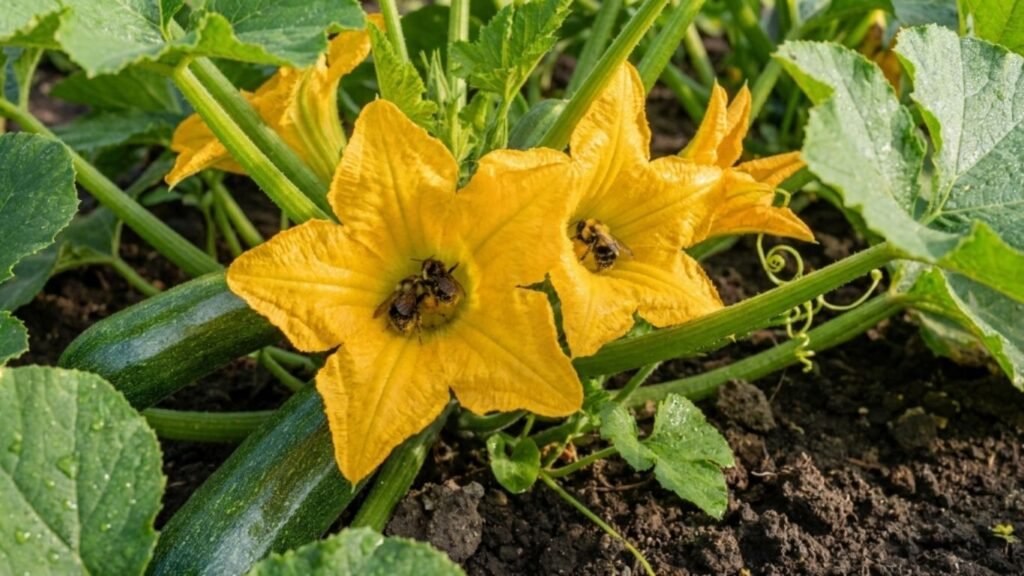
Planting Depth
Sow squash seeds 1 inch deep in moist soil. That’s it — not too deep, not too shallow.
Spacing Guidelines
Proper spacing gives squash plants room to grow, improves air circulation, and reduces disease pressure.
- Bush summer squash (zucchini, pattypan): 24–36 inches between plants, rows 3–4 feet apart
- Vining summer squash: 36–48 inches between plants, rows 6–8 feet apart
- Vining winter squash (butternut, spaghetti): 48–72 inches between plants, rows 6–10 feet apart
- Large winter squash (hubbard, pumpkins): 72–96 inches between plants, rows 8–12 feet apart
I know the spacing seems generous, especially for small gardens. But trust me — a healthy squash plant fills that space fast. Crowding leads to poor airflow, more disease, and lower yields.
Watering Squash Properly
Squash has big leaves and big fruits, which means it needs a lot of water. But how you water matters just as much as how much.
How Much Water
Aim for 1–2 inches of water per week, delivered through deep, consistent watering rather than frequent light sprinkles. During peak summer heat or fruit production, you may need to water more — especially in sandy soil or containers.
How to Water
- Water at the base of the plant, not overhead. Wet leaves invite fungal diseases like powdery mildew.
- Use drip irrigation or soaker hoses if possible. They deliver water right to the root zone.
- Water in the morning so any splashed foliage dries before evening.
- Stick your finger into the soil — if the top 2 inches are dry, it’s time to water.
Signs of Watering Problems
- Wilting in midday heat is normal and doesn’t always mean the plant needs water. Check the soil first. If it’s moist, the plant is just responding to heat and will perk up in the evening.
- Wilting in the morning or leaves that stay limp into the evening usually means the plant genuinely needs water.
- Blossom end rot (dark, sunken spots on the bottom of fruit) can be caused by inconsistent watering.
Fertilizing Squash for Maximum Yields
Because squash are heavy feeders, they benefit from regular fertilizing throughout the growing season.
Fertilizing Schedule
- At planting: Work balanced fertilizer (10-10-10) and compost into the soil.
- When vines start to run or first flowers appear: Side-dress with compost or a balanced fertilizer.
- During fruit set: Switch to a fertilizer slightly higher in phosphorus and potassium (like 5-10-10) to support fruit development.
- Every 3–4 weeks: Continue side-dressing until harvest tapers off.
Organic Fertilizer Options
- Compost — The gold standard. Improves soil structure and provides slow-release nutrients.
- Aged manure — Mix into soil at planting time. Don’t use fresh manure.
- Fish emulsion — Excellent liquid feed, especially during early growth.
- Bone meal — Adds phosphorus for root and flower development.
- Kelp meal — Provides trace minerals and supports overall plant health.
Avoid Over-Fertilizing
Too much nitrogen produces huge, lush plants with tons of leaves but very few fruits. I’ve made this mistake more than once. If your squash plant looks like it belongs in a jungle but isn’t producing squash, cut back on the nitrogen.
Mulching Around Squash Plants
Mulching is one of the simplest things you can do to improve your squash crop.
Benefits of Mulching
- Conserves soil moisture
- Suppresses weeds
- Keeps soil temperature consistent
- Keeps fruits clean and off the bare soil
- Reduces soil-borne disease splash onto leaves
Best Mulch Materials for Squash
- Straw (not hay, which contains weed seeds)
- Shredded leaves
- Grass clippings (applied in thin layers so they don’t mat)
- Wood chips (around plants, not mixed into the soil)
Apply 2–3 inches of mulch around squash plants once they’re established, keeping mulch a few inches away from the stem to prevent rot.
Companion Planting With Squash
Squash plays well with many other garden plants. The classic “Three Sisters” method — growing corn, beans, and squash together — has been used by Indigenous peoples in the Americas for centuries, and it still works beautifully today.
Good Companions for Squash
- Corn — Provides a natural support structure for vining squash.
- Beans — Fix nitrogen in the soil, benefiting heavy-feeding squash.
- Nasturtiums — Attract pollinators and may repel squash bugs.
- Marigolds — Deter various pests and attract beneficial insects.
- Radishes — Can be interplanted as a quick crop before squash fills in.
- Borage — Attracts bees and other pollinators.
- Sunflowers — Draw pollinators and provide light shade in hot climates.
Plants to Avoid Near Squash
- Potatoes — Compete for nutrients and can encourage blight.
- Fennel — Inhibits growth of many garden vegetables.
- Other cucurbits in very close proximity — Can attract concentrated pest populations.
When you’re planning your garden layout, thinking about companions makes a real difference. If you’re still deciding What Vegetables to Plant for a Successful Garden, squash should be near the top of your list — it pairs naturally with so many other crops.
Trellising Options for Vining Squash
If space is limited, growing squash vertically is a game-changer. Many vining squash varieties climb readily with a little help.
Best Varieties for Trellising
Smaller-fruited varieties work best on trellises:
- Delicata
- Acorn
- Honeynut
- Small Sugar pumpkins
- Spaghetti squash (with fruit support)
Large varieties like Hubbard or Blue Banana are too heavy for most trellises, though I’ve seen determined gardeners make it work with very sturdy structures and individual fruit slings.
Trellis Types
- A-frame trellises — Sturdy and simple to build. Great for raised beds.
- Cattle panels or welded wire panels — My favorite. Strong, reusable, and the openings are the perfect size for squash tendrils.
- Arbors and archways — Functional and beautiful. Walk underneath and harvest overhead.
- String trellis or netting — Works for lighter varieties but may need reinforcement.
Supporting Heavy Fruits on Trellises
When growing heavier squash vertically, create slings from old t-shirts, pantyhose, or mesh produce bags. Tie the sling to the trellis structure so the vine doesn’t bear all the fruit weight. Check slings regularly as fruits grow.
Pruning Squash Plants
Pruning isn’t strictly necessary for squash, but it can improve plant health and fruit quality, especially for winter squash.
When and How to Prune
- Remove dead or diseased leaves promptly. This improves airflow and slows disease spread.
- Trim secondary vines on winter squash after the plant has set 2–3 fruits. This directs the plant’s energy into ripening those fruits rather than producing more vine.
- Pinch off the growing tip of vining squash once you have enough developing fruits.
- For summer squash, remove any leaves touching the ground and any leaves showing signs of powdery mildew.
A Word of Caution
Don’t go overboard with pruning. Squash leaves are the plant’s energy factory. Removing too many leaves reduces the plant’s ability to photosynthesize and feed developing fruits. Only remove leaves that are clearly diseased, damaged, or severely shading fruits that need sun to ripen.
Pollination: The Key to Squash Fruit Set
Poor pollination is the number one reason squash plants flower but don’t produce fruit. Understanding how squash pollination works saves a lot of frustration.
How Squash Pollination Works
Squash plants produce separate male and female flowers on the same plant. Male flowers appear first — sometimes a week or more before any female flowers — so don’t panic if early flowers fall off without producing fruit. That’s completely normal.
How to tell them apart:
- Male flowers grow on a thin, straight stem.
- Female flowers have a tiny swollen bulge at the base (the baby squash).
Bees and other pollinators carry pollen from male flowers to female flowers. Without this transfer, the tiny fruit at the base of the female flower shrivels and falls off.
How to Improve Pollination Naturally
- Plant flowers near your squash to attract pollinators — borage, zinnias, sunflowers, and marigolds all work wonderfully.
- Avoid using broad-spectrum pesticides during bloom time. They kill pollinators.
- Water in the morning so flowers are dry and accessible when bees are most active.
- Don’t remove male flowers. You need them for pollen.
Hand Pollination
If pollinator activity is low in your garden — common in urban areas, during rainy spells, or early in the season — you can pollinate by hand.
How to hand-pollinate squash:
- Identify an open male flower in the morning.
- Pick it and peel back the petals to expose the pollen-covered stamen.
- Gently rub the stamen inside an open female flower, transferring pollen to the stigma.
- One male flower can pollinate 2–3 female flowers.
I hand-pollinate my squash regularly, especially early in the season before pollinator populations build up. It takes two minutes and dramatically improves fruit set.
Pest Prevention and Management
Squash has a few notorious pests. The good news is that healthy, well-maintained plants can handle most pressure, and there are effective organic solutions for the rest.
Common Squash Pests
Squash Vine Borers
The most destructive squash pest in many regions. The adult moth lays eggs at the base of stems, and the larvae bore inside, causing sudden wilting and plant death.
Prevention and control:
- Wrap the base of stems with aluminum foil or row cover fabric.
- Apply Bt (Bacillus thuringiensis) to stem bases when moths are active.
- If you spot frass (sawdust-like droppings) at the base, carefully slit the stem with a razor, remove the larva, and bury the wounded section in soil.
- Plant a second succession crop in midsummer after peak moth activity passes.
Squash Bugs
Gray-brown shield-shaped bugs that congregate on leaves and stems, sucking sap and causing wilting.
Prevention and control:
- Check the undersides of leaves for clusters of bronze-colored eggs and crush them.
- Hand-pick adults early in the morning when they’re sluggish.
- Lay boards near squash plants at night — bugs hide under them and you can collect and destroy them in the morning.
- Keep the garden clean of debris where adults overwinter.
Cucumber Beetles
Small striped or spotted beetles that feed on leaves, flowers, and young fruit. They also spread bacterial wilt.
Prevention and control:
- Use row covers until flowers appear.
- Hand-pick beetles.
- Apply kaolin clay (Surround) as a deterrent.
- Attract beneficial insects that prey on them.
Aphids
Small, soft-bodied insects that cluster on new growth and leaf undersides.
Prevention and control:
- A strong spray of water knocks them off.
- Encourage ladybugs and lacewings.
- Use insecticidal soap if infestations are heavy.
Common Squash Diseases
Powdery Mildew
The white, powdery coating that appears on squash leaves late in the season. It’s almost inevitable in humid climates.
Prevention and management:
- Space plants properly for airflow.
- Water at the base, never overhead.
- Remove affected leaves promptly.
- Spray with a solution of 1 tablespoon baking soda + 1 teaspoon liquid soap per gallon of water as a preventive.
- Some varieties have bred-in resistance — look for “PM-resistant” on seed packets.
Bacterial Wilt
Spread by cucumber beetles. Causes sudden, irreversible wilting. There’s no cure — prevention (controlling cucumber beetles) is the only option.
Downy Mildew
Yellow patches on leaf tops with fuzzy gray growth underneath. Improve airflow and remove affected foliage immediately.
Harvesting Squash at the Right Time
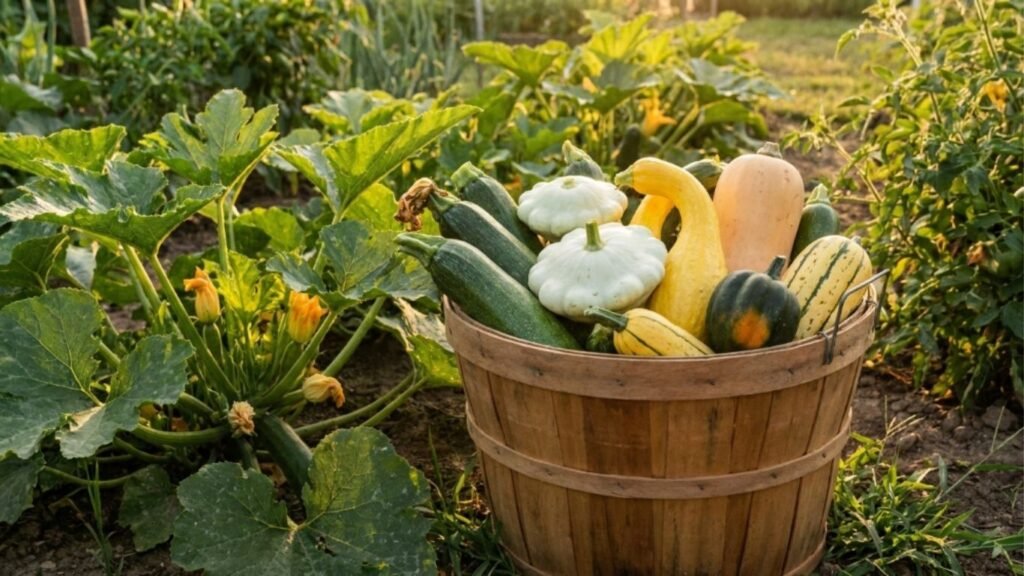
Knowing when to pick is just as important as knowing how to grow. Harvest timing differs significantly between summer and winter squash.
Harvesting Summer Squash
Pick summer squash when it’s young and tender. This is the single most important piece of advice for summer squash. Overgrown zucchini become watery, seedy, and tough.
- Zucchini: Harvest at 6–8 inches long.
- Yellow squash: Pick at 4–7 inches.
- Pattypan: Best at 2–4 inches across.
- Check plants every 1–2 days. Summer squash grows fast — a fruit can go from perfect to baseball bat overnight.
- Use a sharp knife or pruners to cut the stem. Don’t twist or pull, which can damage the plant.
Frequent harvesting encourages the plant to keep producing. If you let fruits get oversized, the plant shifts its energy to seed production and slows down.
Harvesting Winter Squash
Winter squash needs to fully mature on the vine before harvesting.
Signs winter squash is ready:
- The rind is hard — your fingernail shouldn’t easily dent it.
- The skin color has deepened and become matte rather than shiny.
- The stem has dried and turned woody.
- The vine may be starting to die back naturally.
- The “ground spot” (where the fruit rests on the soil) has turned from white to cream or yellow.
How to harvest:
- Use sharp pruners to cut the stem, leaving 2–3 inches of stem attached. A longer stem helps prevent rot during storage.
- Handle carefully — bruised squash won’t store well.
- Never carry squash by the stem. Hold the fruit itself.
Curing Winter Squash for Long-Term Storage
Curing is a critical step that many new gardeners skip. It toughens the skin and heals small scratches, dramatically extending storage life.
How to Cure Winter Squash
- Place harvested squash in a warm, dry spot (80–85°F) with good air circulation.
- Let them sit for 10–14 days.
- A sunny porch, greenhouse, or warm garage works well.
- Turn fruits occasionally to ensure even curing.
Note: Acorn squash and delicata squash don’t benefit from curing — they can go straight into cool storage.
Storing Cured Winter Squash
After curing, move squash to a cool, dry location:
- Ideal temperature: 50–55°F
- Humidity: 50–70%
- Location: Basement, unheated room, root cellar, or garage (above freezing)
- Don’t stack them. Arrange in a single layer with space between fruits for airflow.
- Check regularly and use any squash showing soft spots first.
Storage times by variety:
- Acorn: 1–2 months
- Delicata: 2–3 months
- Spaghetti squash: 2–3 months
- Butternut: 3–6 months
- Hubbard: 4–6 months
How to Maximize Squash Yields
Over the years, I’ve found several strategies that consistently produce bigger, better harvests.
Tips for Higher Yields
- Start with healthy soil rich in organic matter.
- Don’t skip fertilizing. Squash are hungry plants.
- Harvest summer squash frequently to keep plants producing.
- Ensure thorough pollination — hand-pollinate if needed.
- Water consistently — stress from drought or inconsistent moisture reduces yields.
- Mulch heavily to retain moisture and suppress weeds.
- Control pests early before they weaken plants.
- Succession plant summer squash every 3–4 weeks for a continuous harvest.
Extending the Harvest Season
- Start seeds indoors for an earlier first harvest.
- Plant a second crop of summer squash in midsummer for a fall harvest.
- Use row covers to protect plants from early fall frosts and gain extra weeks of production.
- Grow both summer and winter varieties so you’re eating fresh squash in summer and stored squash through winter.
Common Mistakes to Avoid When Growing Squash
Even experienced gardeners make these errors from time to time. Here’s what to watch out for:
- Planting too early in cold soil. Seeds rot. Wait until the soil is genuinely warm.
- Overcrowding plants. Tight spacing creates a humid microclimate perfect for disease.
- Overhead watering. Wet foliage invites powdery mildew and other fungal problems.
- Ignoring pest scouting. Check plants at least twice a week. Catching squash vine borers or squash bugs early makes all the difference.
- Letting summer squash get too big. Harvest small and harvest often.
- Harvesting winter squash too early. Immature fruits don’t store well and lack flavor.
- Cutting the stem too short on winter squash. Short or missing stems lead to faster rot in storage.
- Not rotating crops. Avoid planting squash (or any cucurbit) in the same spot year after year. Rotate on a 3-year cycle to prevent soil-borne disease buildup.
- Over-fertilizing with nitrogen. Lots of leaves, very few fruits.
- Skipping the soil test. Knowing your soil’s pH and nutrient levels takes the guesswork out of fertilizing.
Squash really is one of the most beginner-friendly crops you can grow. If you’re just starting out, it absolutely deserves a spot alongside other 8 Easy Vegetables to Grow for Beginner Gardeners.
Frequently Asked Questions
How many squash plants do I need for a family?
For summer squash, 2–3 plants per person is usually more than enough — often more than enough. For winter squash, plan on 1–2 plants per person, depending on how much you want to store.
Can I grow squash in a container?
Yes. Use containers at least 18–24 inches in diameter and depth. Bush varieties like zucchini and pattypan work best. Use quality potting mix, water frequently, and fertilize regularly since containers dry out and lose nutrients faster than garden beds.
Why are my squash flowers falling off without producing fruit?
This usually happens for two reasons. First, early flowers are often all male — they’re supposed to fall off. Second, if female flowers are falling off too, poor pollination is likely the cause. Attract more pollinators or hand-pollinate.
How do I prevent powdery mildew on squash?
Space plants properly, water at the base (never overhead), ensure good air circulation, remove affected leaves immediately, and choose mildew-resistant varieties when available. A preventive baking soda spray can also help.
Can I save seeds from my squash?
You can, but squash cross-pollinates easily with other varieties and even other species within the same Cucurbita group. If you grew multiple squash varieties, saved seeds may produce unexpected (sometimes bizarre) results. For reliable seeds, isolate varieties or hand-pollinate and bag the flowers.
When is the best time to plant squash?
Plant squash outdoors 1–2 weeks after your last frost date, once soil temperatures are consistently above 60°F. In most regions, this means late spring to early summer.
What’s the fastest squash to grow?
Summer squash varieties, especially zucchini, are among the fastest — producing harvestable fruit in as little as 45–50 days from seed. They’re among the quickest producers in any home vegetable garden.
Key Takeaways
- Squash is one of the most productive and beginner-friendly vegetables you can grow in a home garden.
- Summer squash is fast, prolific, and eaten fresh; winter squash takes longer but stores for months.
- Full sun, rich soil, consistent watering, and proper spacing are the four pillars of successful squash growing.
- Pollination is essential — attract bees or hand-pollinate for reliable fruit set.
- Harvest summer squash small and often; let winter squash fully mature on the vine.
- Cure winter squash for 10–14 days before long-term storage.
- Scout for pests weekly and act early. Squash vine borers and squash bugs are the biggest threats.
- Squash grows well in raised beds, containers, and small spaces with the right variety selection and vertical growing techniques.
Final Thoughts
Learning how to grow squash in a home garden is one of the most rewarding skills a gardener can develop. Whether you’re grilling zucchini in August or roasting butternut squash on a cold January evening, there’s a deep satisfaction in knowing you grew it yourself.
Start simple. Pick one or two varieties that excite you. Give them sun, good soil, and steady water. Check on them regularly. Harvest on time. And don’t be surprised when your neighbors start crossing the street to avoid another bag of zucchini on their doorstep.
Squash has been a staple of home vegetable gardens for thousands of years, and for good reason. It’s generous, resilient, and endlessly useful in the kitchen. Give it a try this season — I think you’ll find it quickly becomes one of your favorite things to grow.
Happy gardening.