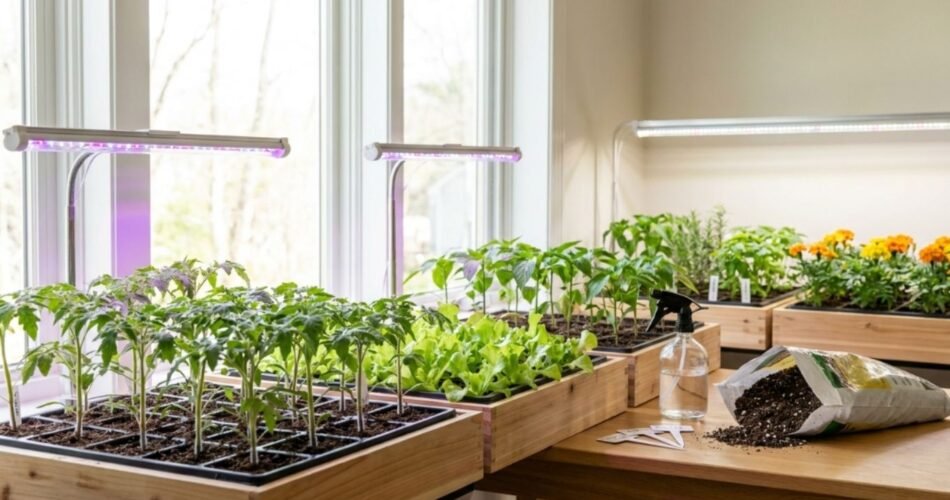
Starting seeds indoors is one of the most rewarding things you can do as a home gardener. There is something deeply satisfying about watching a tiny seed crack open and push its first green shoot toward the light — especially in the middle of February when your garden is still frozen solid.
But let me be honest with you. I killed a lot of seedlings before I figured out what actually works. Leggy plants flopping over on the windowsill, seedlings mysteriously collapsing overnight, trays of nothing that never germinated at all. If any of that sounds familiar, you are in the right place.
This guide covers everything you need to know about how to start seeds indoors successfully every time — from choosing the right seeds and containers to troubleshooting poor germination and getting those seedlings safely into the ground. Whether you are growing tomatoes, peppers, herbs, or flowers, the same core principles apply.
Let’s dig in.
Why Start Seeds Indoors?
Before we get into the how, it helps to understand the why.
Starting seeds indoors gives you a significant head start on the growing season. In many parts of the country, the outdoor growing window is surprisingly short. If you wait until outdoor conditions are warm enough to direct sow tomatoes, for example, you may only get a fraction of the harvest you could have gotten by starting plants inside six to eight weeks earlier.
Indoor seed starting also saves money. A single packet of heirloom tomato seeds costs a few dollars and contains 20 to 30 seeds. Those same varieties as transplants at a garden center could cost $5 to $8 per plant. The math is pretty obvious.
You also get access to far more variety. Most garden centers carry a limited selection of popular cultivars. Seed catalogs and online seed shops offer hundreds of options — rare heirlooms, disease-resistant hybrids, unusual colors and flavors — that you would never find as transplants locally.
Which Vegetables and Flowers Are Best Started Indoors?
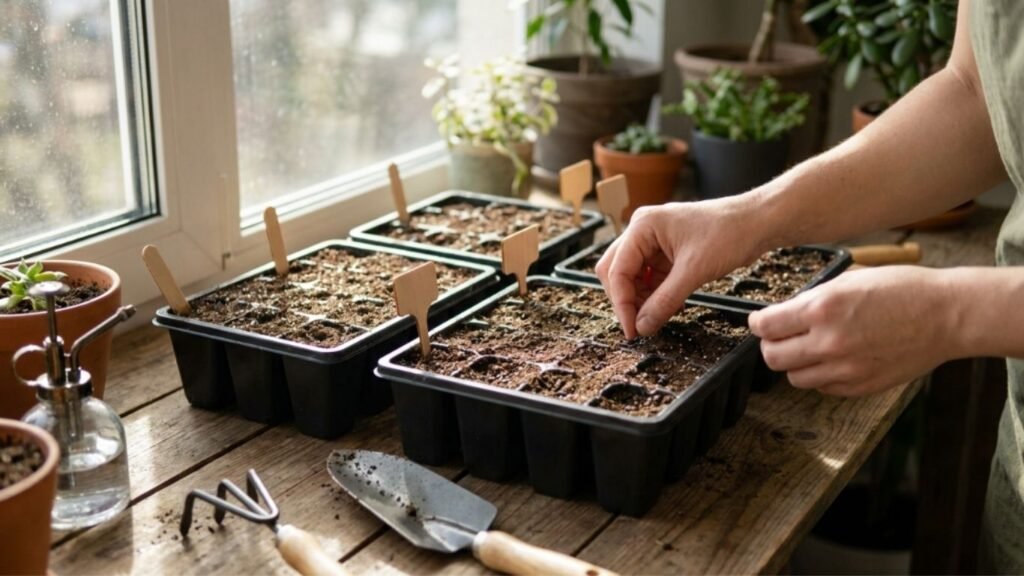
Not every plant benefits from being started indoors. Some crops actually do better when direct sown into the garden because they dislike having their roots disturbed. But a long list of vegetables and flowers thrive when given a head start under lights.
Vegetables That Should Be Started Indoors
- Tomatoes — Tomatoes need 6 to 8 weeks indoors before transplanting. If you are planning a big tomato season, check out these 10 High-Yield Tomato Varieties for Home Gardens to choose varieties worth growing from seed.
- Peppers — One of the slowest to germinate and grow; start 10 to 12 weeks before last frost.
- Eggplant — Similar timing to peppers; needs warmth to germinate.
- Celery and celeriac — Very long growing season; start 10 to 12 weeks indoors.
- Broccoli, cauliflower, and cabbage — Start 4 to 6 weeks before transplanting outdoors.
- Lettuce — Can be started indoors for early spring planting. If you love salad greens, How I Grow Fresh Lettuce All Year Round in Containers will give you a lot of useful ideas beyond just seed starting.
- Kale and chard — Start 4 to 6 weeks before last frost.
- Leeks and onions — Start 10 to 12 weeks indoors.
Vegetables That Prefer Direct Sowing
- Carrots, beets, radishes, and turnips — root crops that hate transplanting
- Beans and peas — fast growers that do better sown directly
- Squash and cucumbers — technically can be started indoors but only 2 to 3 weeks before transplanting; too early and they become rootbound and stressed
If you are new to vegetable gardening and wondering where to start, 11 Fast-Growing Vegetables for Beginner Gardeners is a great resource that will help you pick easy crops that reward your effort quickly.
Flowers That Benefit From Indoor Starting
- Petunias — Need 10 to 12 weeks; tiny seeds that need light to germinate
- Impatiens — Slow growing; start 10 to 12 weeks ahead
- Snapdragons — Need light to germinate; start 8 to 10 weeks before last frost
- Marigolds — Start 6 to 8 weeks ahead; extremely easy for beginners
- Lobelia — Tiny seeds; need 10 to 12 weeks
- Verbena — Slow germinator; start 10 to 12 weeks ahead
- Zinnias — Can be direct sown, but starting indoors gives you blooms weeks earlier
- Coleus — Start 8 to 10 weeks indoors; needs warmth and light to germinate
When To Start Seeds Before the Last Frost Date
Timing is everything in seed starting. Start too early and your seedlings will be overgrown and rootbound by transplant time. Start too late and you lose the whole advantage of growing indoors.
The anchor for all your timing decisions is your last frost date — the average date in spring when temperatures are reliably above freezing in your area. You can look this up using your zip code on the USDA Plant Hardiness Zone Map or the Old Farmer’s Almanac website.
Once you know your last frost date, count backward. If your last frost date is May 15 and tomatoes need 6 to 8 weeks indoors, you should be starting tomato seeds between March 20 and April 3.
A general rule of thumb:
- 10 to 12 weeks before last frost: Peppers, eggplant, celery, onions, leeks, petunias, impatiens, lobelia
- 8 to 10 weeks before last frost: Tomatoes, snapdragons, verbena, coleus
- 6 to 8 weeks before last frost: Broccoli, cabbage, cauliflower, kale, marigolds, zinnias
- 4 to 6 weeks before last frost: Lettuce, chard, basil, cucumbers, squash (but no earlier)
Choosing Quality Seeds
It starts with the seed. Buying cheap, bargain seeds from an unnamed source is a common beginner mistake. Seeds from reputable seed companies have higher germination rates, accurate variety labeling, and often better disease resistance.
Look for seeds from trusted seed companies that specialize in home garden varieties. Many gardeners love heirloom seeds for their flavor and history, while others prefer disease-resistant F1 hybrids for reliability and yield.
Check the seed packet date. Seeds have a shelf life. Most vegetable seeds are good for 2 to 4 years if stored correctly, but germination rates decline over time. If you are using older seeds from your stash, do a quick germination test before planting: place 10 seeds between two damp paper towels, seal them in a plastic bag, and keep them warm for the number of days listed on the packet. Count how many sprout. If 7 out of 10 germinate, you have a 70% germination rate and should plant your seeds a bit more densely to compensate.
Selecting Seed Trays and Containers
The container you choose affects drainage, root development, airflow, and how easily you can transplant seedlings without disturbing them. There is no single right answer — each option has trade-offs
For most home gardeners starting out, a standard 72-cell or 128-cell plastic tray works well for small-seeded crops like tomatoes, peppers, and flowers. For larger seeds or crops that resent root disturbance, individual pots or soil blocks are a better choice.
Always sanitize reused trays. Rinse them with a diluted bleach solution (1 part bleach to 9 parts water) before each season to kill any lingering pathogens that could cause damping-off.
Choosing the Best Seed Starting Mix
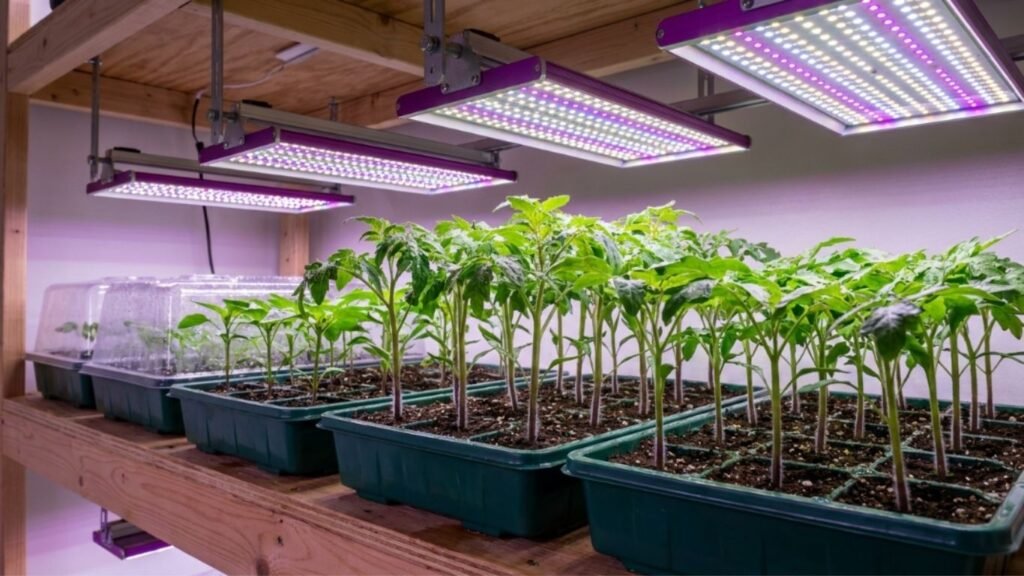
This is one of the most important decisions you will make, and it is one that many beginners get wrong by using regular potting soil or, worse, garden soil.
Never use garden soil for starting seeds indoors. It is too dense, drains poorly, and is full of pathogens that thrive in the warm, humid conditions of a seed starting setup. It will suffocate roots and introduce diseases.
A good seed starting mix is:
- Fine-textured and lightweight
- Well-draining but moisture retentive
- Sterile (free of pathogens and weed seeds)
- Low in nutrients (seeds contain everything they need to germinate; high fertilizer levels can burn delicate roots)
Most commercial seed starting mixes are made from a combination of peat moss or coir fiber, perlite, and sometimes vermiculite. You can buy pre-made seed starting mix or make your own.
DIY Seed Starting Mix Recipe:
- 2 parts coir fiber (more sustainable than peat)
- 1 part perlite
- 1 part vermiculite
This blend holds moisture well without becoming waterlogged and provides good aeration for developing roots.
Before filling your trays, pre-moisten the mix. Place it in a large bucket or tub, add warm water, and mix thoroughly with your hands until it holds together when squeezed but doesn’t drip. Filling trays with dry mix and then watering leads to uneven moisture distribution and air pockets.
Step-by-Step Guide: How To Start Seeds Indoors
Step 1: Gather Your Supplies
Before you sit down to sow seeds, have everything ready:
- Seeds (checked for freshness)
- Seed trays or containers (clean and sanitized)
- Seed starting mix (pre-moistened)
- Labels and a permanent marker
- A spray bottle or watering can with a fine rose
- Humidity dome (optional but helpful)
- Heat mat (highly recommended for warm-season crops)
- Grow lights or a very bright south-facing window
Step 2: Label Everything First
This sounds obvious, but it is the step most people skip and then regret. Before you sow a single seed, write your labels. Include the variety name and the date sown. Multiple seedling trays of similar-looking plants become completely impossible to identify once you mix them up.
Use a permanent waterproof marker on plastic labels, popsicle sticks, or tape. I also keep a simple notebook where I record what I planted, when, and in which tray — a habit that has saved me from a lot of confusion.
Step 3: Fill Containers and Create Planting Holes
Fill your trays or containers with pre-moistened seed starting mix to just below the rim. Gently firm it down so there are no large air pockets, but don’t compact it.
Use a pencil, your finger, or a chopstick to create a small planting hole at the correct depth for your seeds.
Sowing depth rule of thumb: Plant seeds to a depth of about 2 to 3 times their diameter. Tiny seeds like lettuce, petunias, and snapdragons need to be sown right at the surface or barely covered. Larger seeds like tomatoes and peppers go about ¼ inch deep.
Some seeds — notably petunias, snapdragons, and lettuce — actually need light to germinate. Do not cover these with mix; simply press them gently onto the surface.
Step 4: Sow Your Seeds
Place 1 to 2 seeds per cell for reliable germination, or sow seeds in a thin line if using a flat tray. Using 2 seeds per cell gives you a backup in case one doesn’t germinate; you thin to the strongest seedling later.
Resist the urge to over-sow. Crowded seedlings compete for light and air, are harder to thin, and are more susceptible to disease.
Gently cover seeds with a thin layer of seed starting mix or, for very fine seeds, use finely sifted mix or vermiculite, which allows light through while retaining surface moisture.
Step 5: Water Carefully
After sowing, water gently using a spray bottle to avoid disturbing the seeds. Alternatively, you can bottom water immediately by setting the tray into a shallow container of water and allowing it to absorb moisture from below.
Never drench newly sown trays from the top with heavy water flow. You will shift seeds, break apart delicate mix structure, and create uneven moisture levels.
The goal at this stage is to have the mix evenly moist — like a wrung-out sponge — not soaking wet.
Step 6: Cover With a Humidity Dome
A clear plastic humidity dome placed over your tray dramatically improves germination rates by maintaining consistent moisture and warmth. Seeds need consistent humidity to germinate; without a dome, surface moisture evaporates quickly and seeds dry out.
Keep the dome on until you see seedlings emerging. Once most of the seeds in a tray have sprouted, remove the dome to improve airflow and prevent damping-off disease.
Step 7: Apply Heat
Most vegetable seeds — especially warm-season crops like tomatoes, peppers, and eggplant — germinate best when the growing medium is between 70°F and 85°F. Room temperature is often cooler than this, especially in winter.
A seedling heat mat is one of the most worthwhile investments you can make for indoor seed starting. Placed under your seed trays, it warms the growing medium to the ideal germination temperature, often cutting germination time in half compared to cool room conditions.
Remove the heat mat once most seeds have germinated; seedlings grow best with slightly cooler temperatures (65°F to 70°F days, 60°F to 65°F nights).
Light Requirements After Germination
This is where many indoor seed starting efforts fall apart. Once seeds germinate, they need a lot of light — far more than most people expect.
A bright windowsill in winter provides nowhere near the light intensity that growing seedlings need. Even a south-facing window in January or February often provides only 3 to 4 hours of usable light per day. The result? Etiolated (leggy) seedlings that stretch desperately toward the light, become weak-stemmed, and are difficult to transplant successfully.
Grow Lights vs. Windowsills
| Factor | Grow Lights | South-Facing Windowsill |
|---|---|---|
| Light intensity | High and consistent | Low to moderate in winter |
| Duration control | Full control with a timer | Dependent on day length and weather |
| Risk of leggy seedlings | Low | High in winter/early spring |
| Cost | Initial investment required | Free |
| Ease of use | Simple once set up | No setup needed |
| Best for | All crops, all seasons | Cool-season crops in late winter/spring only |
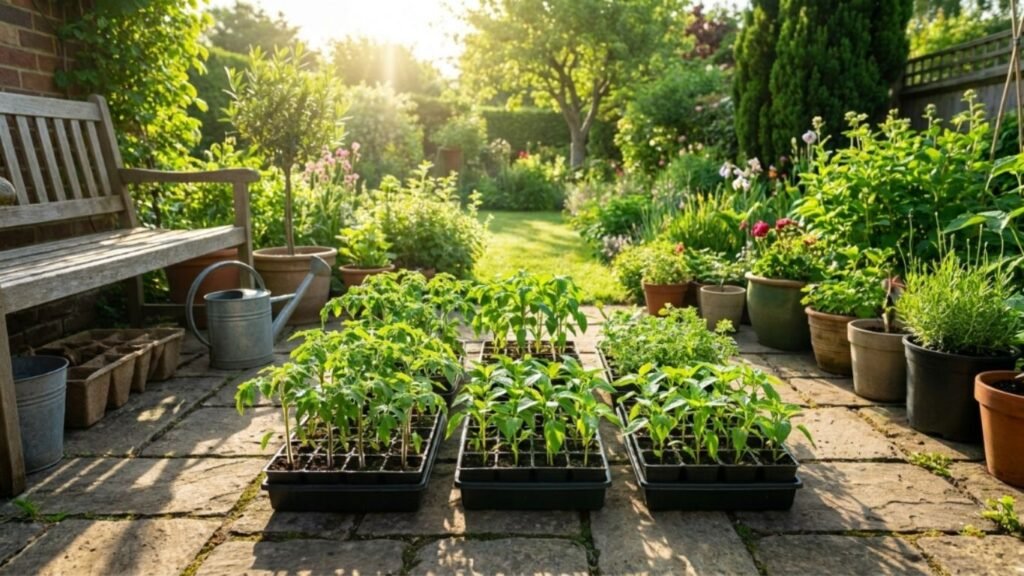
Grow lights are not optional if you are serious about indoor seed starting. The good news is you don’t need expensive specialty lights. A standard 4-foot LED shop light hung 2 to 4 inches above seedlings works extremely well and costs very little to run.
Run your grow lights for 14 to 16 hours per day using a simple plug-in timer. This mimics the long days of summer and gives seedlings the energy they need for compact, sturdy growth.
Adjust the light height as seedlings grow, keeping the fixture just a few inches above the tops of the plants to maximize intensity.
Caring for Seedlings After Germination
Watering Techniques: Bottom Watering
Once seedlings have emerged and the humidity dome is off, you need to transition your watering approach. This is where bottom watering becomes one of the most important techniques in your toolkit.
Bottom watering means placing your seed tray into a shallow container — a boot tray, a large roasting pan, or even a baking dish — and adding water to the bottom. The growing mix wicks water up from below through capillary action.
Why bottom water?
- Keeps the surface of the mix drier, which dramatically reduces the risk of damping-off disease
- Encourages roots to grow downward toward moisture, creating stronger root systems
- Doesn’t disturb delicate seedlings or wash away fine seeds
- Ensures even moisture throughout the root zone
Let the tray sit in water for 20 to 30 minutes, then lift it out and allow any excess to drain. The top of the mix should feel damp but not wet. Never let trays sit in standing water indefinitely — roots need oxygen.
Check moisture levels daily. Seedlings in small cells dry out surprisingly fast, especially under grow lights. Underwatering is just as harmful as overwatering — wilted seedlings suffer root damage and setbacks they may never fully recover from.
Preventing Damping-Off Disease
Damping-off is a seedling killer caused by several soil-borne fungal pathogens — most commonly Pythium, Rhizoctonia, and Fusarium species. It causes seedlings to rot at the soil line, collapse, and die — often seemingly overnight and with no warning.
It is heartbreaking, especially when it wipes out a whole tray.
How to prevent damping-off:
- Always use sterile, commercial seed starting mix — never garden soil or used potting mix
- Sanitize reused trays with diluted bleach solution
- Remove the humidity dome as soon as seeds germinate
- Improve air circulation around seedlings (a small fan helps enormously)
- Water from the bottom to keep the soil surface drier
- Avoid overwatering — let the top of the mix surface dry slightly between waterings
- Don’t overcrowd seedlings
- Some growers lightly dust the soil surface with cinnamon, which has mild antifungal properties
If damping-off strikes, remove affected seedlings immediately. Increase airflow and reduce watering frequency for the remaining plants.
Air Circulation
Good airflow is something most guides mention briefly but it deserves more emphasis. Running a small oscillating fan near your seed starting setup does two important things:
- It reduces the humidity at the soil surface, which discourages the fungal pathogens that cause damping-off
- It gently stresses the stems, which stimulates them to produce more structural tissue — resulting in stronger, thicker stems that hold up better when transplanted outdoors
Set a small fan to run on low for a few hours each day, positioned so it creates gentle movement in the leaves without blowing the trays around. This simple step will noticeably improve seedling stem strength.
Thinning Seedlings
If you sowed 2 seeds per cell for insurance, you will likely have cells with 2 seedlings in them once germination is complete. Those need to be thinned to 1 seedling per cell.
Most people resist this step because it feels wasteful. But 2 seedlings crammed into a small cell will compete for nutrients, light, and space, and both will suffer for it.
How to thin properly: Use small scissors or nail scissors to snip the weaker seedling off at soil level. Do not pull it out — you risk disturbing the roots of the seedling you want to keep.
Choose the stronger, more upright seedling to keep. Discard the thinned seedling or try very gently transplanting it to an empty cell (this works with some crops but not all).
Fertilizing Seedlings
Seeds contain enough stored nutrients to germinate and produce their first set of leaves (called seed leaves or cotyledons) without any outside feeding. But once true leaves appear, your seedlings are ready for a nutritional boost.
Start fertilizing when the first true leaves are visible — usually 1 to 2 weeks after germination.
Use a balanced, water-soluble fertilizer at half the recommended strength. Full-strength fertilizer is too concentrated for delicate seedlings and can cause fertilizer burn. A half-diluted application once a week is plenty.
Good fertilizer options for seedlings:
- Fish emulsion (smelly but effective; great balanced nutrition)
- Liquid kelp fertilizer (excellent for trace minerals and growth hormones)
- Balanced synthetic fertilizer like 20-20-20 at half strength
- Worm castings tea (gentle and effective)
As seedlings grow larger — especially once they are potted up into bigger containers — you can gradually increase fertilizer to full strength.
Potting Up Seedlings
Potting up means moving seedlings from their small starting cells into larger containers before they go outside. Not all crops need this step, but fast-growing or large-rooted plants like tomatoes, peppers, and eggplant almost always benefit from an intermediate pot size of 3 to 4 inches before transplanting into the garden.
Signs a seedling needs potting up:
- Roots growing out of the drainage holes
- Plant wilting very quickly after watering despite moist mix
- Yellow lower leaves indicating nutrient depletion
- Plant visibly too large for its container
When potting up, switch from seed starting mix to a higher-quality potting mix with some added compost or slow-release fertilizer. This gives seedlings the richer nutrition they need for their next growth phase.
Tomatoes can be buried deeper when potted up — up to two-thirds of the stem can go underground, and the buried stem will develop additional roots, making the plant stronger.
Hardening Off Seedlings
This step is the bridge between your indoor setup and the outdoor garden, and skipping it is one of the most common mistakes home gardeners make.
Seedlings that have been growing under lights in a stable indoor environment are completely unprepared for the outdoor world — direct sun, wind, temperature swings, and rain. Moving them outside directly will cause severe shock, sun scald, wilting, and potentially kill them.
Hardening off gradually acclimates seedlings to outdoor conditions over 7 to 14 days.
Hardening Off Schedule:
| Day | Exposure |
|---|---|
| 1–2 | Bring outside for 1–2 hours in a shaded, sheltered spot |
| 3–4 | Increase to 3–4 hours; introduce a little morning sun |
| 5–6 | 5–6 hours outside; can include filtered sun |
| 7–8 | Leave outside for most of the day in a location with morning sun |
| 9–10 | Full day outside including direct afternoon sun |
| 11–14 | Leave outside overnight if temperatures are safe; fully acclimated |
Watch the weather during hardening off. Bring plants back inside if temperatures drop below 50°F for cold-sensitive crops, if heavy rain is forecast, or if wind is strong enough to damage stems.
Transplanting Outdoors
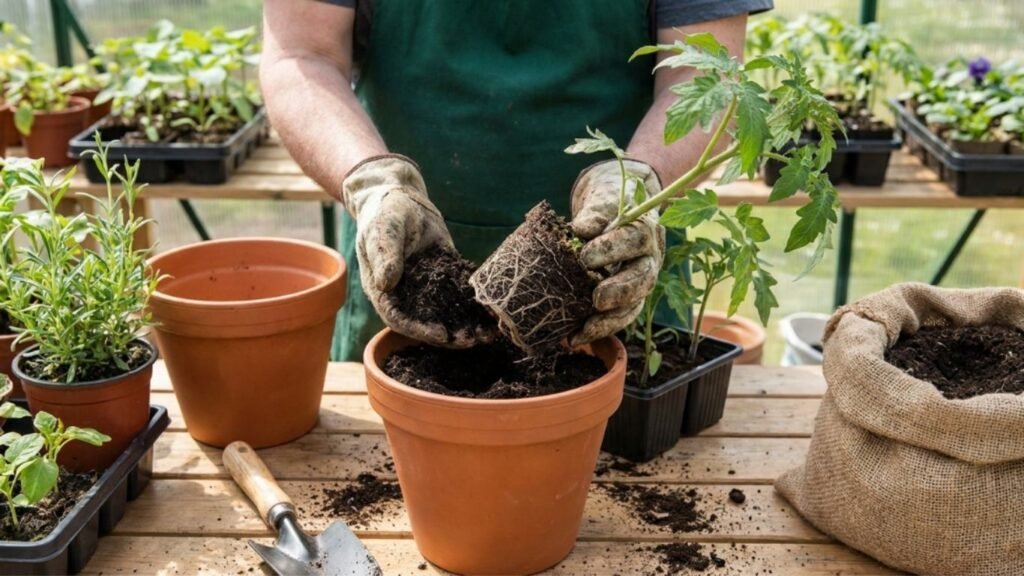
Once seedlings are hardened off and the timing is right based on your last frost date, it is time to get them into the ground.
Tips for a successful transplant:
- Transplant on a calm, cloudy day or in the evening. Bright midday sun stresses newly transplanted seedlings. Evening planting gives them the whole night to settle in before facing sun.
- Water the garden bed thoroughly before transplanting. Planting into dry soil stresses roots.
- Dig a hole larger than the root ball. Loosen soil around the planting hole so young roots can penetrate easily.
- Remove the seedling carefully from its cell. Turn the cell upside down and gently squeeze or push from the bottom to pop the root ball out intact.
- Plant at the right depth. Most vegetables go in at the same level they were growing. Tomatoes are the exception — bury the stem deeply.
- Water thoroughly immediately after planting. Then again daily for the first week to establish roots.
- Consider a shade cloth or row cover for the first week if temperatures are unpredictable.
If you want a comprehensive overview of planning what to grow in your garden after your seedlings are ready, What Vegetables to Plant for a Successful Garden gives excellent guidance on crop selection and garden layout.
Troubleshooting Poor Germination
Even experienced gardeners occasionally face trays that refuse to germinate. Here is how to diagnose what went wrong.
Seeds Didn’t Germinate At All
Likely causes:
- Seeds are old and no longer viable — test germination before planting next time
- Soil temperature was too cold — heat mats solve this problem for warm-season crops
- Seeds were planted too deep — tiny seeds can’t push through too much soil
- Mix was too dry — needs consistent moisture to trigger germination
- Mix was too wet and waterlogged — seeds rotted before germinating
Solution: Check seed packet expiration date, use a heat mat, review planting depth, and monitor moisture levels more carefully.
Seeds Germinated but Seedlings Are Leggy
Likely causes:
- Insufficient light — the most common cause
- Lights set too far above seedlings
- Not enough hours of light per day
Solution: Move lights 2 to 4 inches above seedling tops, increase to 14 to 16 hours of light per day, or move to a brighter location.
Seedlings Are Falling Over and Dying
Likely cause: Damping-off disease
Solution: Remove affected plants, increase airflow with a fan, switch to bottom watering, let the soil surface dry slightly between waterings.
Seedlings Have Yellow Leaves
Likely causes:
- Overwatering (most common)
- Nutrient deficiency, especially nitrogen
- Rootbound plants that have depleted available nutrients
Solution: Review watering frequency, begin fertilizing with a diluted liquid fertilizer, and pot up into fresh mix if plants are rootbound.
Seedlings Are Purple on the Undersides of Leaves
Likely cause: Phosphorus deficiency, often triggered by cold soil temperatures
Solution: Keep seedlings warm (remove from cold windowsills), and fertilize with a balanced fertilizer that includes phosphorus.
Common Mistakes to Avoid
Even with good intentions, these errors trip up a lot of gardeners:
- Starting too early. Bigger is not always better at transplant time. A 12-week-old pepper seedling that is rootbound and stressed will be beaten in the garden by a healthy 10-week-old plant every time.
- Using the wrong mix. Garden soil, straight compost, or standard potting mix are not substitutes for seed starting mix. Use the right tool for the job.
- Relying on a windowsill. In winter and early spring, windowsills don’t provide enough light. Invest in a basic LED grow light.
- Overwatering. More seedlings are killed by overwatering than by drought. Check moisture with your finger before watering.
- Skipping labels. Label everything the moment you sow it. Memory is not reliable when you have ten trays of seedlings.
- Skipping hardening off. This is non-negotiable. Seedlings that go directly from indoors to the garden almost always suffer badly.
- Planting too many seeds. It is exciting to start seeds indoors, but be realistic about how many plants you can actually use. Starting 30 tomato plants when you have space for 6 creates a lot of work and waste.
- Not accounting for crop-specific timing. Squash started too early, for example, will become large and stressed in its pot long before it is safe to go outside. For tips on growing squash in the garden, How to Grow Squash in a Home Garden covers timing, spacing, and care in detail.
FAQ: Starting Seeds Indoors
1. What is the best seed starting mix to use?
The best seed starting mix is lightweight, sterile, and well-draining. Commercial mixes labeled specifically for seed starting are ideal. Look for mixes made with peat or coir, perlite, and vermiculite. Avoid using regular potting soil or garden soil, which are too heavy and often introduce disease.
2. Do I need a grow light to start seeds indoors?
For most crops, yes. A south-facing window can work for cool-season crops in late winter, but for tomatoes, peppers, and most flowers, a grow light set 2 to 4 inches above seedlings and run for 14 to 16 hours per day produces dramatically better results than any windowsill.
3. How do I know when to transplant seedlings outdoors?
Most warm-season crops should go outdoors after your last frost date, once they have been hardened off over 7 to 14 days. Cool-season crops can go out 2 to 4 weeks before the last frost. The seedling itself should have at least 2 sets of true leaves and a healthy root system.
4. Why are my seedlings falling over?
Seedlings that collapse at the soil line are almost certainly suffering from damping-off disease. This is caused by fungal pathogens that thrive in wet, humid conditions. Remove affected plants, increase airflow with a small fan, and switch to bottom watering to keep the soil surface drier.
5. How often should I water seedlings?
Check your seedlings daily by pressing your finger about half an inch into the growing mix. Water when it feels slightly dry at that depth, not before. Most seedlings need watering every 1 to 2 days under grow lights, but this varies depending on container size, room temperature, and humidity levels.
6. Can I start seeds in regular potting soil?
You can, but it is not recommended. Regular potting soil is too coarse and dense for small seeds and young roots. It also often contains fertilizers at levels too high for seedlings and may not be fully sterile. A dedicated seed starting mix gives you much better results.
7. Why aren’t my pepper seeds germinating?
Peppers are notorious slow germinators, especially when temperatures are cool. They need soil temperatures of 75°F to 85°F to germinate reliably and may take 14 to 21 days even under ideal conditions. Use a seedling heat mat and keep the mix consistently moist. Also, peppers planted too deep will struggle — aim for ¼ inch depth.
Key Takeaways
- Start seeds at the right time based on your last frost date — timing matters more than most beginners realize.
- Use a sterile, lightweight seed starting mix — never garden soil.
- Provide enough light: grow lights set 2 to 4 inches above seedlings, running 14 to 16 hours daily.
- Use a heat mat for warm-season crops to hit the ideal germination temperature.
- Water from the bottom to keep the soil surface dry and prevent damping-off.
- Remove humidity domes immediately after germination to improve airflow.
- Run a small fan to strengthen stems and reduce disease risk.
- Label everything the moment you plant it.
- Harden off seedlings for 7 to 14 days before transplanting — no shortcuts.
- Thin to one seedling per cell using scissors, not by pulling.
- Begin fertilizing with half-strength liquid fertilizer once true leaves appear.
- Pot up fast-growing crops like tomatoes and peppers into larger containers before they become rootbound.
Conclusion
Learning how to start seeds indoors successfully every time is a skill that builds on itself. Your first season, you will probably make a few mistakes — maybe leggy seedlings from too little light, or a tray of damping-off that breaks your heart. That is normal. Every experienced gardener has been there.
What separates successful seed starters from frustrated ones is not talent — it is understanding the why behind each step. Seeds need warmth to germinate, light to grow strong, moisture balanced with airflow to stay healthy, and a gradual introduction to the outdoor world before they can thrive in the garden.
Get those fundamentals right, and the results will genuinely amaze you. In a few weeks, you can go from a small paper seed packet to dozens of healthy, productive plants that cost you a fraction of what transplants would have run at the garden center — and in varieties you never would have found anywhere locally.
Start small if you are new to this, master the basics, and add complexity as your confidence grows. Your garden will thank you for it.