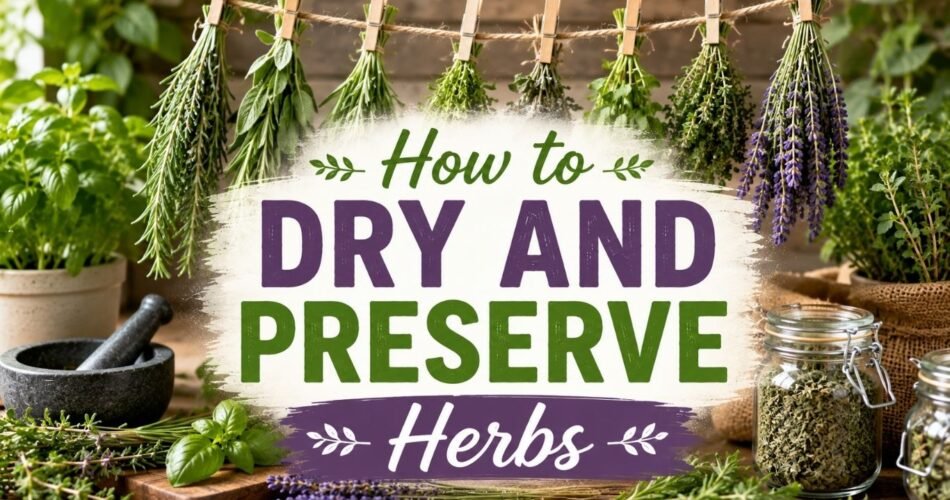
There’s something deeply satisfying about stepping into your garden, snipping a handful of fresh rosemary or lavender, and knowing you can keep that flavor and fragrance going all year long. If you’ve ever watched a bumper crop of basil or mint go to waste at the end of summer, you already know exactly why learning how to dry and preserve herbs is one of the most useful skills a home gardener can pick up.
The good news? It’s not complicated. Whether you have a sprawling herb garden or a few pots on a windowsill, you can preserve herbs at home using simple techniques that don’t require fancy equipment. I’ve been growing and preserving herbs for over a decade, and in this guide, I’ll walk you through everything — from the best time to harvest to choosing the right preservation method for each herb.
Let’s get into it.
Why Bother Drying and Preserving Herbs?
Before we dive into techniques, let’s talk about why this matters. Fresh herbs taste incredible, but they have a frustratingly short shelf life. Store-bought dried herbs are often old, faded, and barely fragrant by the time they reach your kitchen. When you dry and store your own herbs, you get:
- Stronger flavor — homegrown herbs are more potent than commercial ones
- Cost savings — a single plant can yield months’ worth of dried herbs
- Year-round access — you’re not stuck buying expensive fresh bunches in winter
- Control over quality — no pesticides, no additives, no mystery ingredients
- Medicinal benefits — many herbs retain healing properties when dried correctly
And honestly, having rows of labeled jars filled with herbs you grew yourself feels pretty great.
Best Herbs for Drying and Preserving
Not all herbs dry equally well. Some hold up beautifully through the drying process, while others lose most of their flavor and are better preserved using alternative methods.
Herbs That Dry Exceptionally Well
These herbs have lower moisture content and dry without losing much of their essential oils:
- Rosemary — woody stems make it ideal for air drying or hanging
- Thyme — tiny leaves dry quickly and retain strong flavor
- Oregano — one of the best herbs to dry; actually gets more flavorful when dried
- Lavender — keeps its fragrance beautifully for months
- Sage — dries well and keeps its earthy, savory flavor
- Marjoram — similar to oregano, dries with great results
- Bay leaves — air drying is the traditional and best method
- Dill — seeds and leaves both dry well
- Chamomile — flowers dry perfectly for teas
- Mint — dries nicely though it loses some freshness
Herbs That Are Trickier to Dry
These herbs have high moisture content and can lose significant flavor when dried. They’re better frozen or stored in oil:
- Basil — tends to turn dark and lose its bright flavor when dried
- Chives — best frozen or used fresh
- Cilantro (coriander) — loses a lot of its distinctive flavor when dried
- Parsley — can be dried but freezing preserves flavor better
- Tarragon — delicate flavor fades quickly when dried
That said, even “tricky” herbs can be dried with the right method — I’ll cover those options later.
When Is the Right Time to Harvest Herbs?
Timing your harvest is arguably the most important factor in drying and preserving herbs successfully. The difference between harvesting at the right and wrong time can dramatically affect flavor and aroma.
General Harvesting Rules
Harvest in the morning, after the dew has dried. Morning is when herbs contain the highest concentration of essential oils, which is where all that flavor and fragrance lives. Once the sun heats up and the plant starts “sweating,” some of those oils evaporate.
Harvest before the plant flowers (bolts). This is a biggie. The moment a herb plant starts putting energy into producing flowers and seeds, the leaves start to lose flavor. Once you see flower buds forming, harvest immediately. If the plant has already flowered, the leaves will still work — they’re just slightly less potent.
Don’t harvest more than one-third of the plant at once. This keeps the plant healthy and allows it to keep producing through the season.
Seasonal Harvesting Tips
- Spring: Start harvesting young growth, but go light — plants are still establishing
- Early to midsummer: The prime window for most herbs, especially leafy ones like basil, mint, and parsley
- Late summer: Ideal for woody herbs like rosemary, thyme, and sage
- Before first frost: Do a final major harvest of tender herbs that won’t survive winter
If you’re also planning your kitchen garden more broadly, it’s worth reading about What Vegetables to Plant for a Successful Garden — pairing herbs with vegetables makes for a productive and beautiful growing space.
Preparing Herbs Before Drying
Good preparation makes a big difference in the quality of your dried herbs. Don’t skip these steps.
Step-by-Step Preparation
1. Select the best stems. Look for healthy, disease-free stems. Avoid any with spots, yellowing, insect damage, or signs of disease. Larger leaves tend to dry better than very young, small ones.
2. Shake off any insects. Do this gently in the garden before bringing herbs inside.
3. Rinse gently — only if necessary. This is debated among herb gardeners. If your herbs are from your own clean garden, a rinse may not be needed. If there’s visible dirt or you’re unsure of pesticide exposure, rinse them under cool water. Avoid hot water, which starts to break down essential oils.
4. Pat thoroughly dry with a clean towel. Or use a salad spinner to remove as much moisture as possible. Moisture left on the surface before drying encourages mold — especially in air-drying methods.
5. Remove lower leaves from stems. This is especially important for hanging bundles; lower leaves tend to trap moisture and mold.
6. Tie stems loosely in small bundles. Small bundles (5–10 stems) dry more evenly than large, dense ones. Large bundles trap moisture in the center, leading to slow drying and sometimes mold.
Drying and Preservation Methods: A Full Breakdown
Now let’s get into the actual methods. I’ll cover each one in detail so you can choose what works best for your situation, your herbs, and your patience level.
Method 1: Air Drying (The Classic Approach)
Air drying is the oldest, simplest method of drying herbs at home, and for many herbs, it’s still the best. It requires no equipment, costs nothing, and produces excellent results for low-moisture, woody herbs.
How It Works
You simply spread herbs out in a single layer or tie them in bundles and let warm, dry, circulating air do the work over several days or weeks.
Step-by-Step Instructions
- Prepare your herbs as described above — clean, dry, trimmed
- Lay herbs in a single layer on a clean mesh drying rack, window screen, or baking rack
- Place in a warm, dry location with good airflow — not in direct sunlight, which fades color and degrades oils
- Flip herbs every day or two to ensure even drying
- Allow to dry for 1–3 weeks depending on the herb and humidity in your home
- Test for dryness: leaves should crumble between your fingers, not bend or feel leathery
Best Herbs for This Method
Thyme, oregano, marjoram, chamomile flowers, bay leaves, rosemary
Advantages
- Zero cost, zero equipment
- Gentle process that preserves essential oils well
- Large quantities can be dried at once
Disadvantages
- Takes the longest of all methods (1–3 weeks)
- Requires warm, dry conditions — difficult in humid climates
- Risk of dust accumulation if not covered
- Herbs can mold if not dry enough before starting
Drying Time
1–3 weeks
Storage Life
1–2 years when stored correctly
Common Mistakes to Avoid
- Using bundles that are too large and dense
- Placing in direct sunlight
- Drying in a humid room like a bathroom
- Not checking regularly for mold
Method 2: Hanging Bundle Drying
This is a variation of air drying and honestly one of the most charming methods. You’ve probably seen photos of rustic kitchens with bunches of herbs hanging from the ceiling — that’s this method.
Step-by-Step Instructions
- Gather 5–10 herb stems into a small bundle
- Secure the stem ends tightly with a rubber band (rubber bands contract as stems shrink, keeping the bundle together; string can loosen)
- Optionally, place the bundle upside-down inside a small paper bag with holes punched in the sides — this protects from dust and catches any leaves or seeds that fall
- Hang upside-down in a warm, well-ventilated, dark or dimly lit space — a pantry, spare room, or covered porch works well
- Leave for 2–4 weeks until fully dried
Why Upside-Down?
When hung upside-down, essential oils naturally migrate from the stems into the leaves as the plant dries, giving you more flavorful dried herbs. It also helps the leaves hold their shape better.
Best Herbs for This Method
Rosemary, lavender, sage, thyme, oregano, mint, dill, marjoram
Advantages
- Preserves flavor very well
- Aesthetically pleasing — doubles as kitchen décor
- Hands-off process
Disadvantages
- Takes weeks
- Takes up vertical space
- Not suitable for high-moisture herbs
Drying Time
2–4 weeks
Storage Life
1–2 years
Common Mistakes to Avoid
- Bundles too thick (more than 10 stems)
- Hanging in direct sunlight
- High-humidity locations causing mold
- Not securing stems tightly enough
Method 3: Oven Drying
Oven drying is faster than air methods and works well when you need dried herbs quickly or live in a humid climate where air drying is impractical.
Step-by-Step Instructions
- Preheat your oven to its lowest possible setting — ideally 95°F–115°F (35°C–46°C). If your oven’s lowest setting is 170°F, leave the door slightly ajar during drying
- Line a baking sheet with parchment paper
- Spread herb leaves or sprigs in a single, non-overlapping layer
- Place in the oven and check every 30 minutes
- Total drying time is usually 1–4 hours depending on the herb’s moisture content
- Remove when herbs crumble easily and feel dry, not rubbery
Best Herbs for This Method
Rosemary, thyme, oregano, sage, mint, parsley, dill
Advantages
- Fast — done in hours instead of weeks
- Works in any climate
- No special equipment needed
Disadvantages
- Higher heat can degrade essential oils and reduce flavor potency
- Risk of scorching if temperature is too high
- Requires monitoring
- Not energy-efficient for small batches
Drying Time
1–4 hours
Storage Life
6–12 months (slightly shorter due to heat exposure)
Common Mistakes to Avoid
- Setting the oven too hot (above 120°F/49°C damages herbs noticeably)
- Leaving herbs unattended
- Overcrowding the baking sheet
- Not using parchment paper (herbs can stick and discolor)
Method 4: Food Dehydrator
A food dehydrator is the most consistent and reliable method for drying herbs at home. It gives you precise temperature control and consistent airflow, resulting in evenly dried herbs with excellent flavor retention.
Step-by-Step Instructions
- Set your dehydrator to 95°F–115°F (35°C–46°C) — most dehydrators have a dedicated “herbs” setting
- Arrange herb leaves or sprigs in a single layer on the dehydrator trays, not overlapping
- Run the dehydrator for 1–4 hours, checking periodically
- Herbs are done when they crumble easily between your fingers
- Allow to cool completely before storing
Best Herbs for This Method
Works excellently for virtually all herbs, including basil, parsley, and other high-moisture herbs that don’t do as well with air drying
Advantages
- Consistent, reliable results
- Gentle low heat preserves flavor and color well
- Can process large quantities
- Works in any weather or climate
- Fast compared to air drying
Disadvantages
- Requires purchasing a dehydrator (cost ranges from $40–$300+)
- Takes up counter space
- Mild noise during operation
Drying Time
1–4 hours
Storage Life
1–2 years
Common Mistakes to Avoid
- Temperature set too high
- Overcrowding trays (air needs to circulate)
- Not checking herbs regularly and over-drying them (becomes too brittle)
- Mixing strong-smelling herbs on the same tray (flavors can cross-contaminate)
Method 5: Microwave Drying
Microwave drying isn’t the first method most experienced gardeners recommend, but it does work in a pinch when you need dried herbs very quickly — and done carefully, results are actually decent.
Step-by-Step Instructions
- Place a single layer of clean, dry herb leaves between two sheets of paper towel
- Microwave on HIGH for 1 minute
- Check and rotate, then microwave in 20-second intervals until dry and crumbly — usually 2–3 minutes total
- Let cool completely before testing for dryness
- If not fully dry, microwave in additional 10-second bursts
Best Herbs for This Method
Rosemary, thyme, sage, oregano, mint — small-leafed or woody herbs work best
Advantages
- Extremely fast — dried in minutes
- Good for small, urgent batches
- Reasonable color retention
Disadvantages
- Easy to scorch if not careful
- Small batches only
- Can reduce some medicinal properties due to rapid heating
- Uneven results
Drying Time
2–5 minutes
Storage Life
6–12 months
Common Mistakes to Avoid
- Not monitoring closely (herbs can catch fire if overdone)
- Using wet herbs (they steam rather than dry)
- Trying to do large batches at once
Method 6: Freezing Herbs
Freezing is the best preservation method for herbs with high moisture content that don’t dry well, like basil, cilantro, chives, and parsley. Frozen herbs won’t have the crunch of fresh ones, but they retain flavor and color far better than dried versions of these particular herbs.
Method A: Freezing in Ice Cube Trays with Water or Oil
This is my favorite method for herbs I use in cooking. Here’s how:
- Wash and thoroughly dry your herbs
- Finely chop or leave as whole leaves
- Pack into ice cube trays
- Fill each compartment with water or olive oil (oil gives richer flavor)
- Freeze until solid (overnight)
- Pop cubes out and store in labeled freezer bags
When cooking, simply drop a cube directly into soups, sauces, stews, or sautés.
Method B: Freezing Whole Sprigs
- Wash and dry herbs completely
- Lay in a single layer on a parchment-lined baking sheet
- Freeze for 2–3 hours until solid
- Transfer to freezer bags, removing as much air as possible
- Label with the herb name and date
Whole frozen sprigs work best for herbs you’d add to cooked dishes. Strip leaves from frozen stems easily — they fall right off.
Best Herbs for Freezing
Basil, cilantro, chives, parsley, tarragon, lemon balm
Advantages
- Excellent flavor retention for high-moisture herbs
- Maintains color far better than drying
- Easy and quick process
- Great for pre-portioning
Disadvantages
- Requires freezer space
- Texture becomes limp once thawed (only suitable for cooking, not garnishing)
- Risk of freezer burn if not sealed properly
Drying Time
2–24 hours to freeze solid
Storage Life
6–12 months in the freezer
Common Mistakes to Avoid
- Not drying herbs before freezing (water crystals cause poor texture)
- Using thin freezer bags that allow freezer burn
- Forgetting to label (frozen herb cubes all look the same!)
Method 7: Preserving Herbs in Oil
Herb-infused oils are beautiful, flavorful, and incredibly useful in the kitchen. This method works wonderfully for herbs like rosemary, thyme, basil, and garlic.
Step-by-Step Instructions
- Wash and completely dry your herbs — any water can cause spoilage
- Lightly bruise the herbs by gently pressing with the back of a spoon or rolling with a rolling pin
- Place in a clean, sterilized glass jar or bottle
- Pour over high-quality olive oil, ensuring all herbs are fully submerged
- Seal and store in the refrigerator
Important safety note: Homemade herb oils carry a risk of Clostridium botulinum (botulism) if stored improperly. Always refrigerate herb oils and use within 1–2 weeks. Alternatively, use commercially acidified oils or add dried (not fresh) herbs to oil for longer storage.
For longer-term infused oil, use fully dried herbs only, which significantly reduces the risk.
Best Herbs for This Method
Rosemary, thyme, oregano, basil, garlic, lavender (for beauty/aromatherapy use)
Advantages
- Creates a flavorful cooking ingredient
- Beautiful for gifting
- Preserves flavor and color well
Disadvantages
- Short shelf life when using fresh herbs (safety concern)
- Requires refrigeration
- Not suitable for large quantities
Storage Life
1–2 weeks (fresh herbs in oil), 1–3 months (dried herbs in oil), refrigerated
Method 8: Preserving Herbs in Salt
Salt preservation is an old technique that pulls moisture from fresh herbs while absorbing their flavor. The result is intensely flavored herb salt that you can use directly in cooking — no rehydrating needed.
Step-by-Step Instructions
- Wash and thoroughly dry your herbs
- Finely chop the herbs
- Mix with coarse salt — roughly 1 part herbs to 3 parts salt by volume
- Spread the mixture on a parchment-lined baking sheet and let it air dry for 24–48 hours, stirring occasionally
- Once completely dry, transfer to an airtight jar and label
The herb-salt mixture can also be pulsed in a food processor for a finer blend.
Best Herbs for This Method
Rosemary, thyme, sage, oregano, lavender, lemon zest + thyme combinations
Advantages
- Long shelf life
- Creates a ready-to-use seasoning
- Great for gifting
- Minimal equipment required
Disadvantages
- Significantly increases sodium content of your food
- Not suitable for those on low-sodium diets
- Herbs can’t be separated from salt once combined
Storage Life
Up to 1 year in an airtight container
Expert Tips for Preserving Flavor, Aroma, and Color
After years of drying and preserving herbs, here are the tips that make the biggest difference:
Keep Leaves Whole Until Ready to Use
Crumbling or grinding dried herbs releases their volatile oils — which is exactly what you want, but only right before cooking. Keep dried herbs as whole as possible during storage to preserve flavor and aroma longer.
Temperature Is Everything
For any heat-based drying method, staying below 115°F (46°C) is the sweet spot. Above this temperature, you start to noticeably damage the essential oils that give herbs their flavor, fragrance, and medicinal value.
Darkness Preserves Color and Potency
Light degrades chlorophyll (which gives herbs their green color) and breaks down volatile compounds. Always store dried herbs in opaque or dark-colored containers, or in a dark cupboard.
Moisture Is the Enemy
Even a small amount of residual moisture in dried herbs leads to clumping, mold, and significantly shorter shelf life. If you notice any condensation inside your storage jar after closing it, the herbs aren’t fully dry yet. Spread them out again and let them dry further.
Preserving Medicinal Properties
Many herbs — like chamomile, echinacea, lavender, and peppermint — are valued for their medicinal properties. To preserve these:
- Use the lowest effective drying temperature
- Store in dark, airtight glass containers
- Avoid storing near heat sources (above stoves, for example)
- Use within 12 months for best medicinal potency
How to Tell When Dried Herbs Should Be Discarded
Even well-stored herbs don’t last forever. Here’s how to tell when it’s time to replace them:
Smell test: Crush a small amount between your fingers. If you get little to no aroma, the herb is past its prime. Good dried herbs should release a clear, recognizable scent immediately.
Color: Significantly faded, gray, or brown herbs have usually lost most of their potency. Some color change is normal, but dramatic fading signals deterioration.
Visible mold: Any signs of mold, fuzzy growth, or unusual spots — discard immediately.
Clumping or moisture: If herbs have clumped into solid masses, moisture has gotten into the container and the herbs are likely compromised.
Insects: If you spot any tiny insects or webbing, discard the entire jar and check neighboring containers.
Indoor and Container Herb Growing Tips
Many people who want to dry and preserve herbs start with indoor or container growing. If you’re growing herbs on a windowsill or in small containers, you can absolutely still produce enough to dry and preserve — especially if you grow multiple plants of the same herb.
For indoor growing success, light is the biggest challenge. If you’re short on bright window space, you might be interested in 5 Indoor Plants That Grow Without Sunlight — some herbs like mint and chives can tolerate lower light better than others.
If you enjoy the idea of bringing more plant life into your home beyond just herbs, 10 Indoor Plants That Flower All Year Round is worth exploring for beautiful, year-round indoor color.
Conclusion
Learning how to dry and preserve herbs is one of those skills that keeps paying you back season after season. Once you get into the rhythm of it — snipping bundles in midsummer, hanging them in a warm corner, and filling jars that line your kitchen shelves — it starts to feel less like a chore and more like a genuinely enjoyable part of gardening.
You don’t need to use every method covered in this guide. Start simple: pick one or two herbs you use regularly, try air drying or hanging bundles, and go from there. Once you taste the difference between home-preserved herbs and dusty store-bought jars, you won’t look back.
If you’re building out your garden beyond herbs, check out How to Grow Dahlias in Pots for Stunning Summer Blooms for a gorgeous way to add seasonal color alongside your productive herb garden.
The garden always gives back what you put in. Happy harvesting.