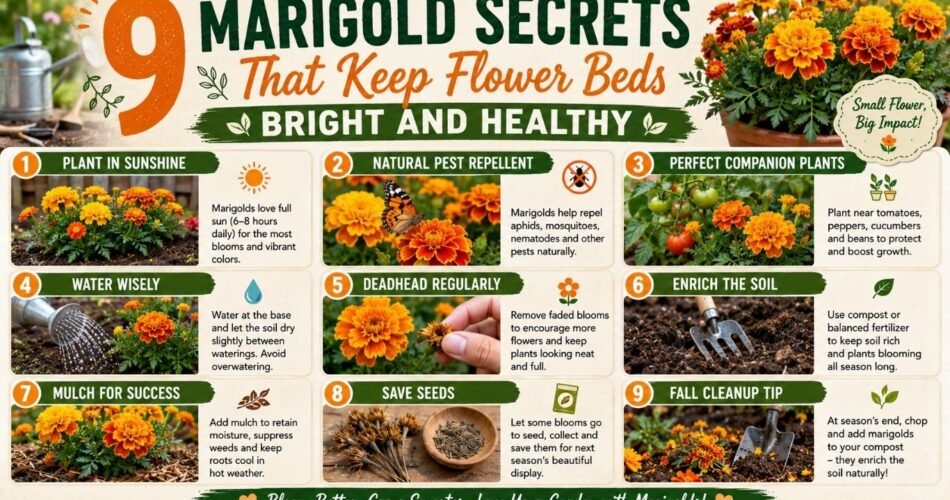
Marigolds are one of the most rewarding flowers you can grow. They’re tough, they’re cheerful, and when you know how to grow them right, they bloom from spring all the way through the first frost without much fuss. But here’s the thing — most gardeners only scratch the surface with these plants. They toss some seeds in the ground, water occasionally, and wonder why their flower beds look tired by midsummer.
The truth is, there are specific marigold growing tips that separate a so-so display from a genuinely stunning one. After years of growing marigolds in different soil types, climates, and garden settings, I’ve learned that a handful of smart practices make all the difference. These aren’t complicated tricks — they’re practical, proven methods that any gardener can apply.
In this guide, I’m sharing 9 marigold secrets that will transform your flower beds into something you’ll genuinely be proud of. Whether you’re growing French marigolds along a border, African giants as focal points, or compact Signet varieties in containers, these tips apply across the board.
Marigold Quick-Reference Care Guide
Before we dive into the secrets, here’s a handy summary of marigold growing essentials:
| Care Factor | Details |
|---|---|
| Sunlight | Full sun — minimum 6 hours daily (8+ hours ideal) |
| Soil Type | Loamy, well-draining garden soil |
| Soil pH | 6.0 – 7.0 (slightly acidic to neutral) |
| Watering Schedule | Once or twice weekly; allow soil to dry slightly between watering |
| Plant Spacing | French: 6–9 inches; African: 10–18 inches; Signet: 8–12 inches |
| Bloom Season | Late spring through fall frost |
| Mature Height | 6 inches to 4 feet depending on variety |
| USDA Hardiness Zones | Grown as annuals in Zones 2–11; perennial in Zones 9–11 |
| Fertilizer Schedule | Light feeding at planting; monthly during growing season |
| Maintenance Level | Low to moderate |
Secret #1: Choose the Right Marigold Variety for Your Garden Goals
Why Variety Selection Matters More Than Most People Think
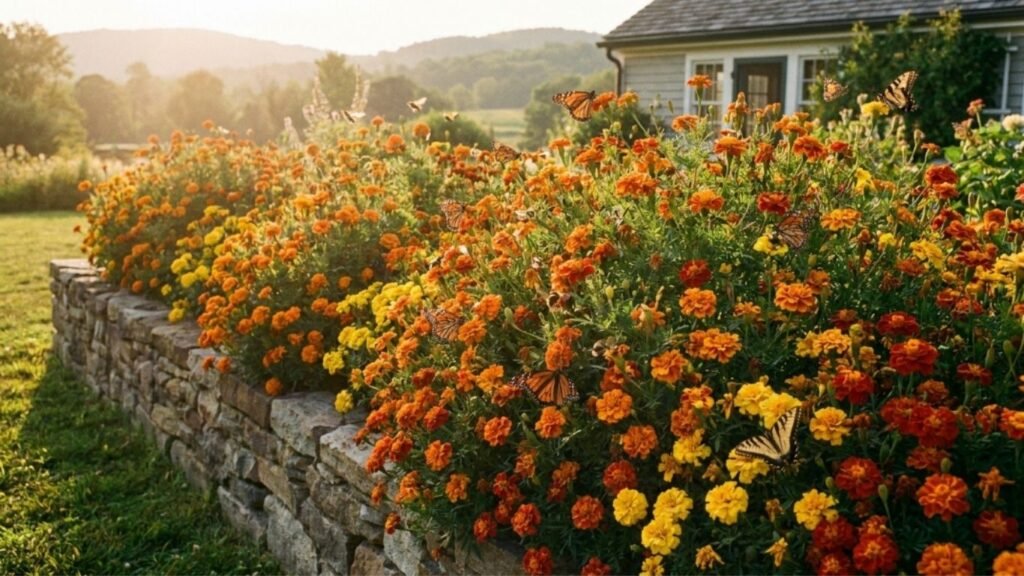
Walk into any garden center in spring and you’ll find a wall of marigold options. Grabbing whatever looks prettiest that day is tempting, but the variety you choose determines everything — plant height, bloom timing, sun tolerance, and even how well they resist disease.
Most gardeners treat all marigolds the same way, and that’s where they go wrong. A French marigold and an African marigold behave very differently in the garden.
How to Choose the Best Marigold Variety
Step-by-step selection process:
- Measure your available space. Compact French marigolds (6–12 inches tall) are perfect for borders and container arrangements. African marigolds can reach 3–4 feet, so they need room at the back of a bed.
- Consider your bloom timing goals. French and Hybrid varieties bloom earlier and more continuously. African types bloom heavily but sometimes take longer to kick in, especially in hot weather.
- Think about your end use. Want cut flowers for the house? Go with large-flowered African types like ‘Crackerjack’ or ‘Inca.’ Want a neat edging plant? French ‘Bonanza’ or ‘Hero’ series are excellent.
- Check disease resistance. In humid climates, look for varieties labeled as powdery mildew resistant.
Best Growing Conditions by Variety
- French marigolds perform well in both hot and cool conditions and are the most forgiving variety for beginners
- African marigolds thrive in hot summers but can sulk in prolonged heat — they need consistent moisture
- Signet marigolds handle heat and drought better than either French or African types
Expert Care Tip
If you’re planning a flower bed that needs to look good all season long, mix French and Hybrid marigolds together. French varieties bloom early and continuously, while Hybrids often add size and variety to the display.
Common Mistakes to Avoid
- Don’t plant tall African marigolds in a windy, exposed spot without staking — they’ll topple over by late summer
- Avoid buying generic, unlabeled transplants if you care about specific heights or bloom times — you often won’t know what you’re getting
Secret #2: Time Your Planting to Get Maximum Blooms
Why Planting Time Is a Game-Changer
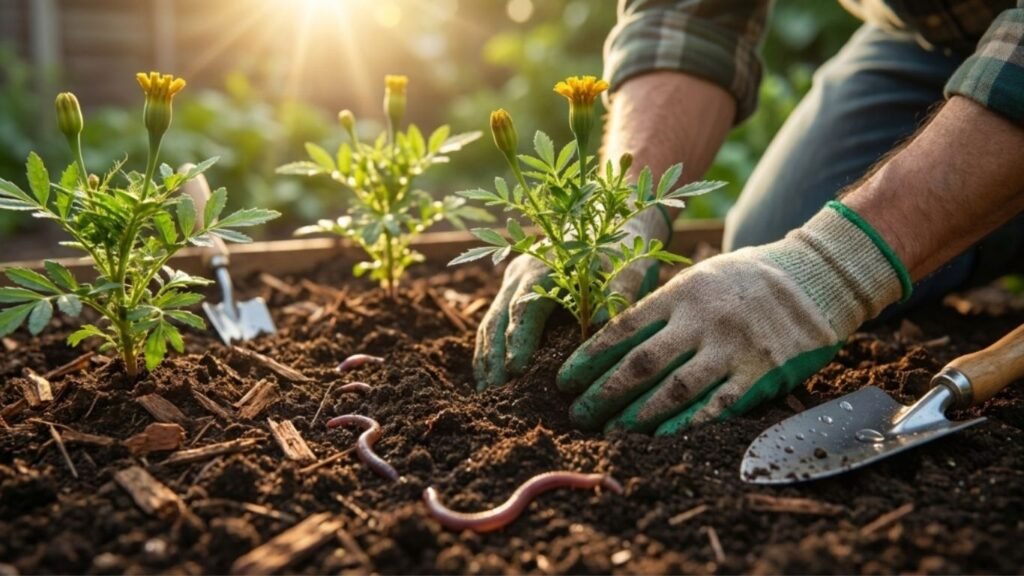
Marigolds are warm-season annuals. Plant them too early in cold soil and they’ll sit there looking sorry for weeks. Plant them at the right time and they practically leap out of the ground.
Getting the planting window right is one of the most overlooked marigold growing tips, and it directly affects how quickly and abundantly your flower beds fill in.
Step-by-Step Planting Timing Guide
Starting from seed indoors:
- Count back 6–8 weeks from your last expected frost date
- Sow seeds ¼ inch deep in seed-starting mix
- Keep soil temperature at 70–75°F for best germination (seeds sprout in 4–7 days)
- Provide 14–16 hours of light daily under grow lights or in a bright south-facing window
- Harden off seedlings for 7–10 days before transplanting outdoors
Direct sowing outdoors:
- Wait until soil temperature reaches at least 60°F (65°F is even better)
- Sow seeds ¼ inch deep and thin to proper spacing once seedlings are 2 inches tall
- Expect blooms 8–10 weeks after germination
Transplanting purchased starts:
- Plant after your last frost date when nighttime temperatures stay above 50°F
- Set transplants at the same depth they were growing in their pot
- Water in well with plain water — no fertilizer at planting if your soil is already enriched
Benefits for Your Flower Bed
Getting the timing right means your marigolds establish a strong root system before summer heat arrives. Well-established plants handle drought and heat stress far better than those scrambling to root in hot, dry soil.
Expert Care Tip
In regions with long growing seasons (USDA Zones 8–11), you can make a second sowing in late July or August for fresh fall blooms. This is a secret that keeps flower beds looking vibrant when most other annuals are winding down.
Common Mistakes to Avoid
- Planting too early is worse than planting a bit late — marigolds planted in warm soil quickly catch up to those planted in cold soil weeks before
- Don’t skip hardening off transplants, even if the weather looks warm; a sudden cold snap on unprepared seedlings can set plants back significantly
Secret #3: Give Them the Sunlight They’re Begging For
Why Sunlight Is Non-Negotiable for Healthy Marigolds
Marigolds are sun lovers, full stop. They come from Mexico and Central America, where they evolved under intense, direct sunlight. When gardeners try to grow them in partial shade, the results are consistently disappointing — lanky stems, fewer blooms, and increased disease problems.
This is one of the most straightforward marigold secrets, but it’s also one most commonly ignored when people are trying to fill a shady spot in their yard.
How to Evaluate and Maximize Sunlight
Step-by-step sunlight assessment:
- Track sunlight in your planting area by observing the spot every two hours from 7 AM to 7 PM on a clear day
- Count total hours of direct sun — marigolds need at least 6 hours, but 8 or more hours produces the best results
- Identify any obstructions — trees, fences, or buildings that cast shade during peak sunlight hours (10 AM to 3 PM) are problematic
- Choose your sunniest bed for marigolds and save the shadier spots for shade-tolerant plants
Best Growing Conditions
- Ideal: 8–10 hours of direct sunlight daily
- Acceptable: 6–7 hours of morning sun
- Not recommended: Fewer than 6 hours or primarily afternoon shade
Benefits for Your Flower Bed
Plants receiving full sun produce more compact, bushy growth with significantly more blooms. They also dry off faster after rain or irrigation, which reduces fungal disease problems dramatically.
Expert Care Tip
If your garden has limited full-sun spots, choose Signet marigolds — they tolerate light shade better than other types and still produce a decent floral display. That said, they’ll always perform better with more sun.
Common Mistakes to Avoid
- Don’t assume “partial shade” on a plant tag means marigolds are flexible about light — that description typically means the plant can survive in shade, not that it will thrive
- Avoid planting marigolds under trees, where competing roots and shade create a double challenge
Secret #4: Prepare Your Soil Like You Mean It
Why Soil Preparation Is the Foundation of a Thriving Flower Bed
Marigolds are often praised as “grow anywhere” plants, and while they’re certainly adaptable, they perform at their absolute best in properly prepared soil. Rich, well-draining soil with good structure allows roots to spread easily, access nutrients efficiently, and resist both drought and waterlogging.
Skipping soil preparation is one of the most common mistakes gardeners make when setting up colorful garden flowers displays.
Step-by-Step Soil Preparation Process
- Test your soil pH using an inexpensive test kit from your local garden center. Marigolds prefer a pH between 6.0 and 7.0. Outside this range, nutrients become less available even if they’re present in the soil.
- Adjust pH if needed:
- To raise pH (if too acidic): add garden lime at the rate recommended on the package
- To lower pH (if too alkaline): add elemental sulfur or incorporate acidic organic matter like pine bark
- Add organic matter generously. Work 2–3 inches of compost into the top 8–10 inches of soil. This improves drainage in heavy clay soils and helps sandy soils retain moisture longer.
- Break up compacted layers. Use a garden fork or tiller to loosen soil to at least 10–12 inches. Marigold roots like to travel, and compacted soil stops them short.
- Remove rocks, clods, and debris that can interfere with root development and proper drainage.
- Let the soil settle for a few days before planting, especially if you’ve just tilled.
Best Growing Conditions
Marigolds genuinely prefer average garden soil over overly rich soil. Too much organic matter or nitrogen creates lush, leafy plants with fewer flowers. Aim for soil that’s moderately fertile rather than heavily amended.
Expert Care Tip
If you’re gardening in containers or raised beds, use a blend of two parts quality potting mix and one part perlite for excellent drainage. Avoid garden soil in containers — it compacts badly and drains poorly.
Common Mistakes to Avoid
- Don’t add too much compost or fertilizer before planting — excess nitrogen pushes foliage at the expense of flowers
- Never plant marigolds in poorly draining spots where water pools after rain — they’ll develop root rot quickly
Secret #5: Master the Art of Proper Spacing and Arrangement
Why Spacing Affects Both Beauty and Plant Health
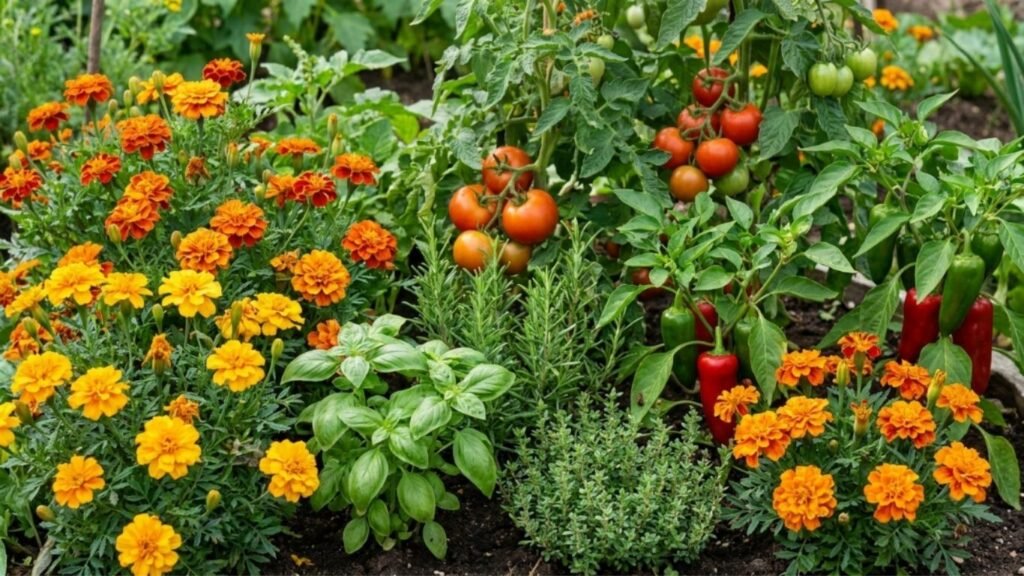
Cramming marigolds together to create a fuller look sooner is one of those gardening decisions that backfires. Overcrowded plants compete for water, nutrients, and light. More importantly, poor air circulation between plants creates the perfect environment for fungal diseases like powdery mildew and botrytis.
Proper spacing is one of those marigold growing tips that pays off in both aesthetics and plant health.
Step-by-Step Spacing and Arrangement Guide
- Measure your planting area and sketch a simple grid on paper or use stakes and string in the garden
- Follow variety-specific spacing guidelines:
- French marigolds: 6–9 inches apart
- African marigolds: 10–18 inches apart
- Signet marigolds: 8–12 inches apart
- Hybrid types: follow the tag, typically 10–14 inches
- Plant in staggered rows rather than straight lines — this creates a more natural, full appearance and actually improves air circulation
- For border plantings, plant a single row of French marigolds 4–6 inches from the edge of the bed for a clean, defined look
- For mass plantings, use the diagonal planting method — offset each row by half the spacing distance for efficient ground coverage
Benefits for Your Flower Bed
Proper spacing means each plant has room to grow to its natural, bushy shape. Well-spaced marigolds also look more professional and intentional than crowded clusters that eventually merge into an untidy mass.
If you’re thinking about expanding your garden into something more productive, check out this guide on How to Start a Flower Farm in Your Backyard — it covers spacing and layout strategies that work beautifully with marigolds and other high-impact annuals.
Expert Care Tip
Plant taller African marigolds in the center or back of beds, medium French types in the middle rows, and compact Signets along the front edges. This layered approach creates visual depth and ensures all plants receive adequate sunlight.
Common Mistakes to Avoid
- Don’t rely on seedling size at planting time to judge spacing — tiny transplants will grow considerably larger within weeks
- Avoid planting in large, unmulched open patches between plants — this invites weeds while the marigolds establish
Secret #6: Water Wisely — Not Too Much, Not Too Little
Why Watering Technique Directly Impacts Bloom Quality
Marigolds have a reputation for drought tolerance, and while that’s somewhat true once established, inconsistent watering is one of the top reasons healthy-looking plants suddenly decline or refuse to bloom well.
Understanding how and when to water is central to marigold care and directly affects the vibrancy of your flower bed all season.
Step-by-Step Watering Guide
- Check soil moisture before watering by pushing your finger 1–2 inches into the soil. If it feels dry at that depth, it’s time to water. If it still feels slightly moist, wait another day.
- Water deeply and infrequently. Apply enough water to penetrate 6–8 inches into the soil. This encourages roots to grow deep, making plants more drought-resistant.
- Water at the base of the plant, not overhead. Wet foliage — especially in the evening — is a direct pathway to fungal disease.
- Use a soaker hose or drip irrigation for large plantings. These systems deliver water directly to the root zone without wetting leaves.
- Adjust watering frequency by season:
- Cool spring weather: once per week is usually sufficient
- Hot summer weather: twice per week may be needed, especially for African marigolds
- Fall cooling: reduce back to once weekly
- Mulch around plants with 2–3 inches of shredded leaves, straw, or wood chips to slow evaporation and keep soil temperature stable.
Best Growing Conditions
Marigolds prefer consistent moisture but absolutely hate soggy roots. Well-draining soil combined with deep, infrequent watering produces the healthiest, most floriferous plants.
Expert Care Tip
Newly transplanted marigolds need more frequent watering for the first 2–3 weeks while they establish their root systems. After that, gradually extend the interval between waterings to encourage deeper root growth.
Common Mistakes to Avoid
- Overwatering is more damaging than underwatering — marigolds will tolerate a brief dry spell far better than sitting in wet soil for days
- Don’t water lightly every day — shallow, frequent watering keeps roots near the surface where they’re vulnerable to heat and drought
- Avoid overhead watering in the evening — leaves that stay wet overnight are extremely prone to fungal issues
Secret #7: Feed Strategically for Non-Stop Blooms
Why Fertilizing Strategy Affects Bloom Quantity
Marigolds are not heavy feeders, but they do benefit from smart fertilization. The key word there is smart — the right fertilizer at the right time pushes blooms, while the wrong approach pushes foliage and produces disappointing flowering.
This is one of the marigold secrets that genuinely surprises people because it goes against the instinct to feed more for better results.
Step-by-Step Fertilization Plan
- Amend soil at planting time with compost rather than synthetic fertilizer. Compost provides gentle, balanced nutrition without the nitrogen spike that reduces flowering.
- At transplanting, use a phosphorus-rich starter fertilizer (look for a formula like 10-52-10) to encourage root establishment. Apply once, then wait.
- During the growing season, apply a balanced granular fertilizer (10-10-10 or similar) once every four to six weeks. Don’t overdo it — one moderate application is better than frequent heavy feeding.
- Choose a fertilizer with balanced or lower nitrogen. High-nitrogen fertilizers (like those formulated for lawns) create leafy, dark green plants that barely bloom.
- For a quick midseason boost, liquid kelp or fish emulsion applied once during the height of summer encourages fresh flowering on established plants.
- Stop fertilizing about six weeks before your expected first fall frost. Late-season feeding can push tender new growth that gets damaged by early cold snaps.
Benefits for Your Flower Bed
Well-fed but not over-fertilized marigolds produce compact, bushy plants loaded with blooms. They also resist stress better — whether that’s heat, drought, or pest pressure — because they have balanced nutrition rather than a nitrogen surplus.
Growing marigolds isn’t the only way to keep a flower bed stunning all season. For example, How to Grow Dahlias in Pots for Stunning Summer Blooms is a great companion read if you’re combining marigolds with other summer powerhouses in your garden design.
Expert Care Tip
If your marigolds are blooming heavily and looking healthy, skip the fertilizer application for that month. Plants that are performing well don’t need intervention — unnecessary feeding is a waste of money and can actually slow blooming.
Common Mistakes to Avoid
- Using a high-nitrogen lawn fertilizer on marigolds is one of the most common reasons for lush plants with almost no flowers
- Don’t fertilize drought-stressed plants — water thoroughly first, then fertilize once the plant has recovered
- Avoid liquid fertilizers during heatwaves, as salts in concentrated fertilizers can burn roots when soil is hot and dry
Secret #8: Deadhead Consistently for Maximum Bloom Time
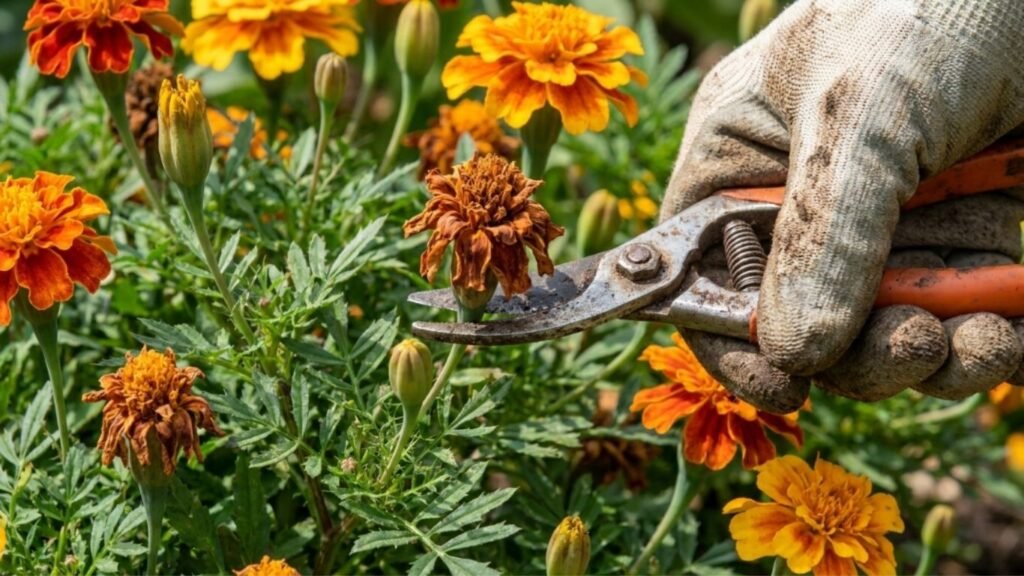
Why Deadheading Transforms a Good Display Into a Great One
If there’s one practice that single-handedly extends the blooming season of marigolds by weeks or even months, it’s deadheading — the regular removal of spent flowers. When a marigold finishes blooming, its instinct is to set seed. Once seed is forming, the plant dramatically slows new flower production.
By removing faded blooms before seed sets, you essentially trick the plant into continuing to produce flowers in an ongoing effort to reproduce. It’s one of the most effective and simple marigold growing tips available.
Step-by-Step Deadheading Guide
- Check your marigolds every 3–5 days during peak blooming season — they produce flowers quickly, and spent ones need prompt removal
- Identify spent blooms. A fading marigold bloom will look dull in color, the petals will feel papery or limp, and the flower head may begin to droop or close
- Pinch or cut just below the spent flower head, down to the next set of leaves or to a side bud. This encourages branching and new bud formation at the same point
- Use clean, sharp scissors or pruners — this makes cleaner cuts and reduces the risk of introducing disease
- Dispose of spent blooms in the compost unless you’re seeing signs of disease, in which case bag and bin them instead
- Do a more substantial trim in midsummer if plants look tired. Cut plants back by about one-third, water well, and give a light fertilizer application — they’ll often flush with new growth and blooms within 2–3 weeks
Benefits for Your Flower Bed
Consistent deadheading produces dramatically more blooms over the season — some gardeners report flowering lasting right up to frost when deadheading is done religiously. It also keeps plants looking tidy and professional rather than ragged and seed-headed.
Expert Care Tip
If you want to save seeds (covered in a later section), let a few blooms on each plant go to full seed maturity near the end of the season without deadheading. This gives you seeds for next year while still keeping most of the plant flowering.
Common Mistakes to Avoid
- Deadheading too high on the stem, leaving a bare stub without nearby buds, which slows regrowth
- Letting spent blooms accumulate on the plant for weeks — by then, seed formation has already diverted the plant’s energy
- Skipping deadheading altogether and assuming marigolds are self-cleaning — while some modern varieties are marketed as “self-cleaning,” most produce noticeably more blooms with regular deadheading
Secret #9: Use Marigolds Strategically as Companion Plants and Natural Pest Repellers
Why Companion Planting With Marigolds Is Genuinely Powerful
Marigolds have been used as companion plants for centuries, and modern research backs up what farmers and gardeners have observed for generations. These plants produce chemical compounds — particularly thiophenes — that suppress certain soil nematodes. Their strong scent also confuses and deters a range of common garden pests.
This makes marigold companion planting one of the most versatile and genuinely useful garden strategies available to home gardeners.
How Marigold Pest Repelling Works
Marigold roots release alpha-terthienyl, a compound that is toxic to root-knot nematodes — microscopic soil pests that attack tomatoes, peppers, and many other vegetables and flowers. French marigolds are particularly effective at this, and studies have found that planting them densely for a full season significantly reduces nematode populations in treated soil.
Their airborne chemical compounds and strong scent also deter aphids, whiteflies, and spider mites — pests that can devastate a flower bed or vegetable garden.
Step-by-Step Companion Planting Guide
- Plant French marigolds around tomatoes and peppers — space a marigold every 12–18 inches around the perimeter of vegetable beds
- Interplant marigolds among roses — they help deter aphids and add color at the base where roses are bare. Speaking of roses, this guide on 7 Secrets to Planting Roses at the Perfect Time offers excellent advice on building the perfect rose garden environment.
- Line vegetable garden pathways with Signet marigolds — their dense planting creates a pest-deterring border around the entire growing area
- Plant in rotation — for nematode suppression to work effectively, marigolds need to grow in the same area for a full season, then be turned into the soil at the end of the year
- Combine marigolds with basil and nasturtiums for a triple-layer pest deterrent that covers multiple pest types
- Use marigolds near brassicas (cabbage, broccoli, kale) to deter cabbage worms and aphids
What Marigolds Don’t Repel
It’s worth being honest here — marigolds are sometimes oversold as a universal pest solution. They do not effectively repel all insects. Slugs, earwigs, and spider mites can still be problematic even in beds with marigolds. They work best as part of an integrated pest management approach rather than as a standalone solution.
Disease Prevention Benefits
Beyond pest control, marigolds’ chemical compounds also have some antifungal properties that may help reduce soil-borne disease pressure over time. While they’re not a cure for existing disease problems, they contribute to a healthier overall garden ecosystem.
If you’re growing a diverse flower garden, pairing marigolds with tropicals can create stunning contrast. 7 Hibiscus Flower Care Tips That You Need to Know is worth reading if you’re planning a summer bed that combines marigolds with showier tropical bloomers.
Expert Care Tip
For nematode control, plant French marigolds (specifically the variety ‘Nematode Fighter’ or ‘Tangerine’) as a cover crop in a problem area and till them in at the end of the season. Repeat for two consecutive seasons for best results.
Common Mistakes to Avoid
- Planting just a few marigolds and expecting dramatic pest control results — effective companion planting requires decent plant density
- Using African marigolds instead of French marigolds for nematode control — African types are less effective for this specific purpose
- Expecting immediate results — companion planting with marigolds is a season-long and sometimes multi-season strategy, not a quick fix
Bonus Tips: Seed Saving and Seasonal Maintenance
How to Save Marigold Seeds for Next Year
One of the most satisfying things about growing marigolds is that they’re incredibly easy to save seeds from. At the end of the season, let some blooms fully mature and dry on the plant.
Steps for saving marigold seeds:
- Allow selected blooms to fully dry on the plant until the petals are brown and papery
- Remove the entire dried flower head and hold it over a paper bag
- Separate the seeds (they look like thin, elongated slivers — dark at one end, pale at the other)
- Spread seeds on a paper plate and let them air dry indoors for 1–2 weeks
- Store in a labeled paper envelope in a cool, dry location
- Aim to use saved seeds within two years for best germination rates
Note: Seeds from hybrid varieties may not produce plants identical to the parent — open-pollinated or heirloom varieties produce more reliable results from saved seeds.
Fall Seasonal Maintenance
As temperatures drop and blooming slows:
- Continue deadheading until plants are damaged by frost
- Remove all plant material after the first hard frost to reduce overwintering disease and pest habitat
- Compost healthy plant debris; dispose of diseased material in the trash
- Take notes on which varieties performed best so you can prioritize them next year
- Till or fork in the soil where marigolds grew to improve soil structure for the following season
Frequently Asked Questions About Marigolds
How long do marigolds bloom?
Marigolds bloom from late spring through the first killing frost — typically 4 to 6 months, depending on your climate and planting date. With regular deadheading and proper care, long-lasting marigold blooms are very achievable throughout the entire warm season.
Do marigolds come back every year?
In most of the United States, marigolds are grown as annuals and complete their life cycle in one season. In USDA Zones 9–11, they may behave as short-lived perennials. To have marigolds each year, either save seeds from the previous season or purchase new transplants each spring.
How many hours of sunlight do marigolds need?
Marigolds need a minimum of 6 hours of direct sunlight daily, but they perform significantly better with 8 or more hours. Full sun is essential for compact growth, abundant blooming, and disease resistance.
Why are my marigolds not blooming?
The most common reasons marigolds fail to bloom include insufficient sunlight, excessive nitrogen fertilizer, skipping deadheading, or planting too close together. Evaluate each of these factors before assuming there’s a more complicated problem.
Are marigolds truly effective at repelling pests?
Yes, with some nuance. French marigolds are proven to suppress root-knot nematodes in the soil. Their scent also deters some above-ground pests like aphids and whiteflies. However, they are not a universal pest repellent and work best as part of a broader approach to garden pest management.
Can marigolds grow in containers?
Absolutely. French and Signet marigolds are particularly well-suited to containers and window boxes. Use a pot at least 8 inches deep with good drainage holes, fill with quality potting mix, and water more frequently than in-ground plants since containers dry out faster.
When should I plant marigold seeds outdoors?
Direct sow marigold seeds outdoors after your last frost date when soil temperatures are consistently 60°F or warmer. In most of the US, this is between late March and mid-May, depending on your region.
Key Takeaways
- Variety selection matters — match the marigold type to your garden size, goals, and climate
- Timing is critical — plant in warm soil, not cold ground, for fast establishment
- Full sun is non-negotiable — at least 6 hours, preferably 8 or more
- Good soil preparation with compost (not excess nitrogen) creates the foundation for healthy growth
- Proper spacing improves air circulation, appearance, and long-term plant health
- Deep, infrequent watering at the base of plants prevents both drought stress and disease
- Strategic fertilization with balanced, low-nitrogen products supports blooming without excess foliage
- Consistent deadheading is the single most effective way to extend bloom time
- Companion planting puts marigolds to work as natural pest deterrents throughout your garden
Conclusion
Marigolds are genuinely one of gardening’s great gifts — accessible, beautiful, and surprisingly multifunctional. But the difference between a marigold bed that limps along and one that dazzles from May to October comes down to these 9 specific practices.
None of these secrets require specialized knowledge or expensive products. They’re all about timing, placement, and thoughtful attention to what these plants actually need versus what we might assume they need.
Start with the right variety for your space, give them honest full sun, prepare your soil properly, and stay on top of deadheading. Add companion planting into the mix, and you’ll have a flower bed that works harder than most — looking gorgeous while quietly protecting your other plants in the process.
If you apply even half of what’s covered in this guide, your marigold results next season will be noticeably better. Apply all nine, and you’ll understand why experienced gardeners keep coming back to these cheerful, hard-working flowers year after year.