There’s something genuinely exciting about pulling your first homegrown tomato off the vine or snipping fresh lettuce for a salad you planted yourself. If you’ve been thinking about starting a vegetable garden but feel overwhelmed by where to begin, you’re in the right place.
The truth is, you don’t need a huge backyard, years of experience, or a green thumb passed down through generations. What you need is the right plants — ones that forgive beginner mistakes, grow quickly enough to keep you motivated, and actually produce food you’ll want to eat.
Over the years, I’ve grown vegetables in everything from raised beds and clay-heavy suburban yards to five-gallon buckets on a tiny apartment balcony. Through plenty of trial and error (and a few complete failures), I’ve learned which vegetables genuinely work for beginners and which ones will have you pulling your hair out.
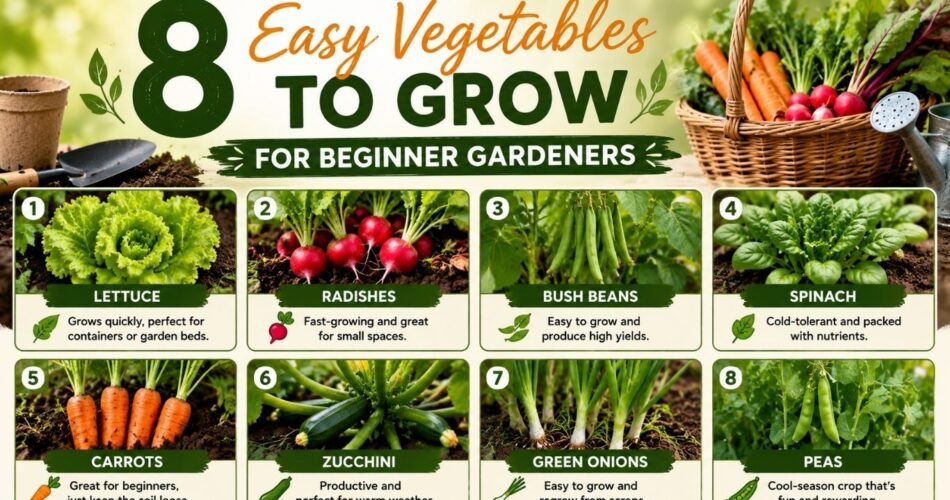
This guide covers 8 easy vegetables to grow for beginner gardeners — complete with planting tips, watering schedules, common mistakes, and everything else you need to go from bare soil to your first harvest with confidence.
Let’s dig in.
1. Lettuce — The Perfect Starter Crop
Why Lettuce Is Great for Beginners
If I had to recommend just one vegetable for a first-time gardener, lettuce would be it — every single time. It grows fast, doesn’t demand much space, thrives in containers, and you can start harvesting within weeks. There’s almost no waiting period, which makes it especially satisfying for impatient new gardeners (I count myself among them).
Lettuce is also remarkably forgiving when it comes to soil quality and light conditions. Unlike sun-hungry crops, it actually prefers a bit of shade during the hottest part of the day, making it ideal for spots in your yard that don’t get full sun all day.
Best Planting Season
Lettuce is a cool-season crop, which means it thrives in spring and fall when temperatures are between 45°F and 75°F (7°C–24°C). Plant it outdoors 2–4 weeks before your last frost date in spring, or 6–8 weeks before your first frost in fall for a second harvest.
In warmer climates like the American South or Mediterranean regions, plant lettuce in late fall or winter when temperatures cool down. In northern climates with harsh winters, start seeds indoors in late winter and transplant after frost danger passes.
Sunlight Requirements
Lettuce prefers 4–6 hours of sunlight per day. It can handle partial shade, which actually helps during warmer weather and prevents the plant from bolting (going to seed) too quickly. If you’re gardening in a hot climate, afternoon shade is your best friend for extending the harvest window.
Soil Type
Loose, well-draining soil rich in organic matter works best. A pH between 6.0 and 7.0 is ideal. Work in compost before planting to improve both drainage and nutrients. Avoid compacted soil — lettuce has shallow roots and needs to push through easily.
Watering Schedule
Lettuce needs consistent moisture to grow tender, flavorful leaves. Water every 1–2 days, keeping the soil evenly moist but never waterlogged. Drought-stressed lettuce turns bitter quickly. Mulching around plants helps retain moisture and keeps roots cool.
Spacing
Plant lettuce seeds or transplants 6–8 inches apart for head varieties like romaine or butterhead. Loose-leaf types can be planted closer — about 4 inches apart — and harvested by cutting individual outer leaves.
Growing Time
Loose-leaf varieties can be harvested in as little as 30 days. Head lettuce types take 45–60 days to full maturity.
Common Pests and Diseases
- Aphids: Tiny green or black insects on the undersides of leaves. Blast them off with water or use neem oil spray.
- Slugs and snails: Leave ragged holes in leaves overnight. Use diatomaceous earth around plants as a barrier.
- Downy mildew: A fungal disease that causes yellow patches on leaves. Improve air circulation and avoid overhead watering.
- Bolting: Not a pest, but a common problem — hot weather causes lettuce to shoot up a flowering stalk and become bitter. Choose heat-tolerant varieties and provide shade.
Harvesting Tips
For loose-leaf lettuce, harvest outer leaves first and let the center continue growing — this is called “cut-and-come-again” harvesting and can give you multiple harvests from a single plant. For head lettuce, wait until the head feels firm and harvest the whole plant at once by cutting at the base.
Harvest in the morning when leaves are crisp and hydrated for the best flavor.
Common Mistakes to Avoid
- Planting in summer heat without shade protection
- Overwatering to the point of root rot
- Planting too densely and not thinning seedlings
- Waiting too long to harvest (leads to bitterness)
Container Gardening Tip
Lettuce is one of the best vegetables for containers. A 12-inch wide, 6-inch deep pot can hold 3–4 loose-leaf plants easily. Window boxes work beautifully too. Use a quality potting mix (not garden soil) and water more frequently since containers dry out faster.
To maximize your lettuce harvest and keep your plants healthy, it’s worth knowing which companion plants support its growth — check out this guide on 6 Plants That Help Lettuce Thrive for some smart planting combinations.
2. Radishes — The 30-Day Garden Reward
Why Radishes Are Great for Beginners
Radishes might be the most underrated beginner vegetable out there. They mature incredibly fast — sometimes in as little as three weeks — which gives new gardeners a quick confidence boost early in the season. They’re also great for loosening compacted soil when grown alongside other vegetables.
I always recommend radishes to anyone who’s never gardened before, simply because the short harvest time keeps you engaged. There’s nothing quite like pulling up your first bright red radish just weeks after planting the seed.
Best Planting Season
Like lettuce, radishes are a cool-season crop. Sow seeds directly into the ground in early spring (2–4 weeks before last frost) or in fall (4–6 weeks before first frost). Radishes struggle in summer heat and tend to become spicy, pithy, and woody — so timing matters.
In mild climates, you can grow radishes nearly year-round.
Sunlight Requirements
Radishes prefer full sun — at least 6 hours per day — though they can tolerate light partial shade. In hot climates, some afternoon shade actually slows bolting and improves flavor.
Soil Type
Loose, sandy, or loamy soil is best. Heavy clay soil causes deformed roots and stunted growth. Radishes prefer a pH of 6.0–7.0. Avoid planting in recently fertilized soil with excess nitrogen — this encourages leafy growth at the expense of the root (the part you eat).
Watering Schedule
Water consistently but lightly — every other day is usually sufficient, or whenever the top inch of soil feels dry. Irregular watering leads to cracked radishes and hollow centers.
Spacing
Sow seeds 1–2 inches apart, then thin seedlings to 2–3 inches apart once they sprout. Overcrowded radishes don’t form proper roots. Thin ruthlessly — I know it feels wasteful, but it makes a real difference.
Growing Time
Most spring radish varieties are ready in 20–30 days. Daikon and winter radish varieties take longer — up to 50–60 days — but they’re still considered easy to grow.
Common Pests and Diseases
- Flea beetles: Tiny holes in the leaves. Use row cover fabric to protect young plants.
- Root maggots: Tunnels in the root. Rotate crops annually and use floating row covers.
- Cabbage worms: Though more common on broccoli, they sometimes affect radish leaves in the same family.
Harvesting Tips
Harvest radishes as soon as they reach the size indicated on the seed packet (usually 1 inch in diameter for spring varieties). Leave them in the ground too long and they become pithy, hot, and cracked. When the top of the root is visible pushing out of the soil, that’s usually your sign they’re ready.
Common Mistakes to Avoid
- Planting in summer (they’ll bolt immediately)
- Planting too deep (seeds should be just ¼ inch deep)
- Skipping thinning (results in tiny, unusable roots)
- Forgetting to harvest on time
Container Gardening Tip
Radishes grow wonderfully in containers at least 6 inches deep. A window box or shallow planter works fine for spring varieties. Fill with loose potting mix for the best root formation.
3. Green Beans — Reliable and Incredibly Productive
Why Green Beans Are Great for Beginners
Green beans (also called snap beans or string beans) are one of those vegetables that almost always reward the effort you put in. They grow vigorously, produce abundantly, and don’t require much fuss once established. Bush varieties (as opposed to pole varieties) are especially beginner-friendly because they don’t need staking or trellising.
I remember planting my first row of bush beans expecting a small handful of pods. What I actually got was more beans than my family could eat for two weeks. That’s the kind of generous return that makes you want to keep gardening.
Best Planting Season
Green beans are warm-season crops. Plant them directly outdoors after your last frost date, when soil has warmed to at least 60°F (15°C). Cold soil causes poor germination and disease. In most of the US, that means planting between May and early July. In warmer climates, you can plant in early spring or fall.
Don’t start green beans indoors — they really don’t like transplanting and do best when direct-sown.
Sunlight Requirements
Green beans need full sun — at least 6–8 hours per day. Shade reduces yields significantly.
Soil Type
Well-draining, loamy soil with a pH of 6.0–7.0 works best. Like radishes, avoid over-fertilizing with nitrogen — beans actually fix their own nitrogen from the air through beneficial root bacteria, so too much nitrogen in the soil leads to lots of leaves and few pods.
Watering Schedule
Water 2–3 times per week, giving plants about 1 inch of water per week total. Water at the base of the plant rather than overhead to reduce disease risk. Beans are especially sensitive to drought during flowering — inconsistent watering at that stage can cause flower drop and reduced yields.
Spacing
Plant seeds 2–4 inches apart in rows 18 inches apart. After germination, thin to about 4–6 inches between plants. Pole beans need more room and should be planted near a trellis or support structure.
Growing Time
Bush green beans typically mature in 50–60 days from seed. Pole beans take slightly longer — around 60–70 days — but they produce continuously over a longer period.
Common Pests and Diseases
- Mexican bean beetle: Looks like a spotted ladybug; eats leaves from underneath. Hand-pick or use neem oil.
- Aphids: Clusters on new growth. Spray with water or insecticidal soap.
- Bean rust: Orange powdery spots on leaves. Improve air circulation; remove affected leaves.
- Root rot: Caused by overwatering or poorly draining soil.
Harvesting Tips
Harvest beans when the pods are firm, crisp, and about pencil-width thick — before the seeds inside start to bulge. Pick frequently (every 2–3 days) to encourage continuous production. Left on the plant too long, pods become tough and the plant stops flowering.
Common Mistakes to Avoid
- Planting too early when soil is cold
- Over-fertilizing with nitrogen
- Letting pods stay on the plant too long
- Watering overhead (invites fungal disease)
Container Gardening Tip
Bush beans grow well in containers at least 12 inches deep and wide. A 5-gallon bucket works perfectly for a small planting. Pole beans in containers need a trellis or stake — choose a container at least 12 inches deep and provide a support structure at least 4–5 feet tall.
4. Zucchini — One Plant Feeds a Family
Why Zucchini Is Great for Beginners
If you’ve heard gardeners joke about leaving bags of zucchini on neighbors’ doorsteps anonymously — that’s because zucchini is genuinely, almost hilariously productive. A single well-tended plant can produce 10–20 pounds of squash in a season. It grows vigorously, tolerates minor neglect, and produces visible fruit quickly, which keeps beginners motivated.
Zucchini is also very satisfying to watch grow — the large yellow flowers and rapid expansion of young fruit make it one of the more dramatic vegetables in a garden.
Best Planting Season
Zucchini is a warm-season crop. Plant after the last frost when soil temperatures reach at least 60°F (15°C). In most regions, this means late May through early June. Start seeds indoors 2–3 weeks before transplanting if you want a head start.
In warm climates (Zones 9–11), you can grow zucchini in late winter or early fall to avoid peak summer heat, which can reduce pollination.
Sunlight Requirements
Zucchini needs full sun — 6–8 hours minimum. Shade leads to small, misshapen fruit and increased disease susceptibility.
Soil Type
Rich, well-draining soil with plenty of compost works best. A pH of 6.0–7.5 is ideal. Zucchini is a heavy feeder, so mix a generous amount of compost into planting holes before transplanting.
Watering Schedule
Water deeply 2–3 times per week, giving plants about 1–2 inches per week. Zucchini has large leaves that transpire a lot of water. Inconsistent watering causes blossom end rot and poor fruit development. Water at the base — wet foliage invites powdery mildew.
Spacing
Give each zucchini plant 2–3 feet of space in all directions. They sprawl considerably. In a raised bed, one or two plants are usually plenty for a family.
Growing Time
Zucchini matures quickly — most varieties are ready to harvest in 45–55 days from transplanting.
Common Pests and Diseases
- Squash vine borers: The biggest threat to zucchini in North America. The larvae bore into stems, causing sudden wilting. Use row covers early in the season and remove them when flowers appear for pollination.
- Powdery mildew: White powdery coating on leaves. Improve air circulation; apply diluted baking soda spray as a preventive measure.
- Cucumber beetles: Striped or spotted beetles that damage foliage. Hand-pick or use row covers.
Harvesting Tips
Harvest zucchini when they’re 6–8 inches long — this is when they’re most tender and flavorful. Larger zucchini are edible but tend to be seedy and watery. Check plants every 1–2 days once they start producing because zucchini grows surprisingly fast.
Cut rather than pull to avoid damaging the plant.
Common Mistakes to Avoid
- Planting too many (one or two plants is genuinely enough)
- Letting fruit get too large before harvesting
- Not removing diseased leaves promptly
- Forgetting to hand-pollinate if bee activity is low in your area
Container Gardening Tip
Zucchini can grow in containers, but you’ll need a large one — at least 15–20 gallons. Choose compact or bush varieties like ‘Patio Star’ or ‘Bush Baby’ for container growing. You’ll likely need to hand-pollinate by transferring pollen from male to female flowers with a small paintbrush.
5. Tomatoes — The Crown Jewel of the Beginner Garden
Why Tomatoes Are Great for Beginners (With the Right Variety)
Let me be honest with you: tomatoes are listed as “easy” in many guides, but they’re slightly more demanding than lettuce or radishes. They need consistent care, warm temperatures, and some pest management. That said, the right beginner-friendly varieties — like cherry tomatoes — are genuinely straightforward to grow and produce abundantly even with minor mistakes.
Cherry tomatoes are particularly forgiving. They’re disease-resistant, crack-resistant, and produce fruit even in less-than-ideal conditions. If you’re a first-time gardener, start with cherry or grape tomato varieties before moving on to large beefsteaks or heirlooms.
Best Planting Season
Tomatoes are warm-season crops that hate frost. Start seeds indoors 6–8 weeks before your last frost date. Transplant outdoors when nighttime temperatures stay consistently above 50°F (10°C) and soil has warmed.
In hot climates like the American South or Southwest, plant in early spring or late summer/fall to avoid peak summer heat, which inhibits fruit set above 90°F (32°C).
Sunlight Requirements
Tomatoes need full sun — a minimum of 6–8 hours daily. More sun generally means more fruit. This is non-negotiable for good production.
Soil Type
Rich, deep, well-draining soil with a pH of 6.0–6.8 is ideal. Tomatoes are heavy feeders — amend soil generously with compost. Add calcium (like crushed eggshells or garden lime) to prevent blossom end rot.
Watering Schedule
Tomatoes need consistent, deep watering — about 1–2 inches per week. In hot weather, this may mean watering daily. Irregular watering causes blossom end rot and fruit cracking. Use a soaker hose or water at the base to keep foliage dry and reduce disease risk.
Mulch heavily around plants to conserve moisture and regulate soil temperature.
Spacing
Space tomato plants 24–36 inches apart depending on the variety. Indeterminate varieties (those that keep growing) need caging or staking. Determinate varieties (compact, bush types) are better for containers and small spaces.
Growing Time
Depending on the variety, tomatoes take 60–85 days from transplanting to first harvest. Cherry tomatoes are on the quicker end; large slicing varieties take longer.
Common Pests and Diseases
- Tomato hornworm: Large green caterpillars that devour foliage overnight. Hand-pick; look for white egg cases that indicate parasitic wasps are already doing the work.
- Early blight and late blight: Brown spots on lower leaves that spread upward. Remove affected leaves; improve air circulation; avoid overhead watering.
- Aphids: Spray with water or neem oil.
- Whiteflies: Tiny white insects. Use yellow sticky traps and insecticidal soap.
Harvesting Tips
Harvest tomatoes when they’re fully colored (red, yellow, or whatever color your variety reaches) and give slightly when gently squeezed. They should pull away from the vine easily. For cherry tomatoes, taste is the best guide.
If frost threatens before your tomatoes ripen, bring unripe ones indoors and let them ripen on a countertop (not in the refrigerator — cold temperatures destroy the flavor of tomatoes).
Common Mistakes to Avoid
- Planting outdoors too early when nights are still cold
- Not providing support (staking or caging) early enough
- Skipping calcium amendment in the soil
- Overwatering young seedlings
- Neglecting to “harden off” seedlings before transplanting outdoors
Container Gardening Tip
Tomatoes grow well in containers at least 5 gallons in size (bigger is better). Choose determinate or compact varieties like ‘Patio,’ ‘Tumbling Tom,’ or ‘Bush Early Girl.’ Container-grown tomatoes need more frequent watering and fertilizing than those in the ground.
6. Cucumbers — Fast, Refreshing, and Low-Maintenance
Why Cucumbers Are Great for Beginners
Cucumbers grow fast, produce reliably, and thrive in warm weather — making them a natural choice for summer gardens. Once plants take off, you’ll be harvesting cucumbers almost daily at peak season. They’re also versatile in the kitchen, from fresh eating to pickling.
Bush cucumber varieties are especially beginner-friendly since they don’t require extensive trellising, though vining types trained up a simple fence or stake actually produce more fruit and take up less ground space.
Best Planting Season
Cucumbers are warm-season vegetables. Direct sow seeds or transplant outdoors after your last frost, when soil is at least 65–70°F (18–21°C). In most regions, that’s late May or June. Cucumbers grow quickly enough that there’s rarely a need to start them indoors more than 2–3 weeks before transplanting.
Sunlight Requirements
Cucumbers need full sun — 6–8 hours minimum. They love heat and grow noticeably faster in warm weather.
Soil Type
Well-draining, fertile soil with a pH of 6.0–7.0 is best. Amend with compost before planting. Cucumbers are moisture-sensitive — they need good drainage to avoid root rot but consistent moisture to prevent bitterness.
Watering Schedule
Cucumbers are mostly water (around 95%), so consistent moisture is essential. Water deeply every day during hot weather, aiming for 1 inch per week minimum. Inconsistent watering is the #1 cause of bitter cucumbers. Mulch heavily to conserve moisture.
Spacing
Plant seeds or transplants 12–18 inches apart in rows 3–4 feet apart for vining types. Bush varieties can be planted slightly closer at 24–36 inches between plants.
Growing Time
Most cucumber varieties are ready in 50–65 days from direct sowing.
Common Pests and Diseases
- Cucumber beetles: Striped or spotted; transmit bacterial wilt. Use row covers early in the season.
- Powdery mildew: Very common late in the season. Remove affected leaves and improve air circulation.
- Squash bugs: Less common on cucumbers but possible in squash family beds.
- Angular leaf spot: Bacterial disease causing water-soaked spots. Avoid overhead watering.
Harvesting Tips
Harvest cucumbers when they’re firm, dark green, and 6–8 inches long (for slicing varieties) or 3–5 inches long for pickling types. Leaving cucumbers on the vine too long causes them to turn yellow, become bitter, and signal the plant to stop producing new fruit.
Check plants every day or two at peak production.
Common Mistakes to Avoid
- Planting in cold soil (seeds will rot)
- Underwatering (causes bitterness)
- Leaving overripe cucumbers on the vine
- Not providing trellis support for vining varieties
Container Gardening Tip
Bush cucumber varieties grow well in 5-gallon containers or larger. Vining types work in containers if you provide a tall trellis or fence. Place containers where they’ll receive maximum sun and water frequently — containers dry out faster than garden beds.
7. Kale — The Hardy Green That Almost Grows Itself
Why Kale Is Great for Beginners
Kale has earned its reputation as a nutritional powerhouse, but from a gardening perspective, what makes it exceptional for beginners is its toughness. Kale tolerates light frost, can handle partial shade, resists many common pests, and produces leaves over a very long season — sometimes from spring all the way through winter in mild climates.
It’s genuinely hard to kill kale. I’ve had plants survive temperatures in the mid-20s°F (-4°C) and bounce back completely. If you’re looking for a set-it-and-mostly-forget-it vegetable that delivers nutritious food for months, kale is it.
Best Planting Season
Kale is a cool-season crop but is more cold-tolerant than most vegetables. Plant seeds outdoors 4–6 weeks before your last frost in spring, or in late summer for a fall/winter harvest. Kale actually tastes sweeter after a frost — the cold converts starches to sugars.
In mild climates (Zones 8–11), kale can be grown nearly year-round.
Sunlight Requirements
Kale prefers full sun (6+ hours) but tolerates partial shade (4 hours) better than most vegetables. In hot climates, afternoon shade is beneficial during summer.
Soil Type
Well-draining soil rich in nitrogen works best — kale is a leafy green and needs nitrogen to produce large, healthy leaves. A pH of 6.0–7.5 is ideal. Work in compost before planting and side-dress with a balanced fertilizer halfway through the growing season.
Watering Schedule
Water 2–3 times per week, keeping soil consistently moist but not waterlogged. Kale is relatively drought-tolerant compared to lettuce but produces better with consistent moisture.
Spacing
Plant kale seedlings 12–18 inches apart. They grow large, and crowded plants reduce airflow and increase disease risk.
Growing Time
Kale leaves can be harvested as baby greens in 25–30 days or as full-size leaves in 55–75 days.
Common Pests and Diseases
- Cabbage worms (imported cabbageworm): Green caterpillars that can strip plants. Hand-pick; use Bacillus thuringiensis (Bt) spray as a safe organic option.
- Aphids: Particularly the gray-green cabbage aphid. Spray with water or neem oil.
- Flea beetles: Small holes in leaves. Use row covers on young plants.
- Downy mildew: Avoid overhead watering; improve spacing.
Harvesting Tips
Harvest outer leaves first, leaving the central growing point intact. This encourages the plant to keep producing new leaves from the center. A healthy kale plant can provide harvests for 6–8 months if managed this way.
Always harvest from the bottom and work upward. The youngest, inner leaves are the most tender and mild.
Common Mistakes to Avoid
- Harvesting from the center (kills the plant’s production)
- Planting in summer heat without shade (causes bitterness)
- Not fertilizing midseason (kale is a nitrogen-hungry crop)
- Ignoring caterpillar damage until it’s severe
Container Gardening Tip
Kale grows beautifully in containers at least 12 inches deep and wide. One large plant per pot works well. It can even double as an attractive ornamental in decorative containers on a patio.
8. Broccoli — A Rewarding Cool-Season Crop
Why Broccoli Is Great for Beginners
Broccoli takes slightly longer to mature than the other vegetables on this list, but it’s still well within reach for beginners — and harvesting your own head of broccoli feels enormously satisfying. Modern hybrid varieties have made broccoli more pest-resistant and easier to grow than older cultivars, and the plant is adaptable to a range of conditions.
Broccoli also gives you a second chance after the main head is harvested — most varieties produce smaller side shoots for weeks afterward, extending your harvest significantly.
Best Planting Season
Broccoli is a cool-season crop that does best in spring or fall. Start seeds indoors 6–8 weeks before your last spring frost, or sow seeds in midsummer for a fall harvest (count backward from your first fall frost by about 10–12 weeks).
Broccoli can tolerate light frost and is actually damaged by prolonged high heat — temperatures above 80°F (27°C) can cause premature bolting (flowering) before the head fully develops.
Sunlight Requirements
Broccoli needs full sun — 6–8 hours per day for best head development. Shade reduces yields and head quality.
Soil Type
Rich, well-draining soil with a pH of 6.0–7.0 works best. Broccoli is a heavy feeder, so incorporate plenty of compost before planting and consider a balanced granular fertilizer at planting time.
Watering Schedule
Water 2–3 times per week, providing about 1–1.5 inches of water per week. Keep moisture consistent during head formation — drought stress at this stage can cause small, loose heads.
Spacing
Transplant broccoli seedlings 18–24 inches apart in rows 2–3 feet apart. They need good air circulation to reduce disease risk.
Growing Time
Broccoli takes 80–100 days from seed, or approximately 55–65 days from transplant. This is the longest of any vegetable on this list, but the wait is worth it.
Common Pests and Diseases
- Cabbage worms: The biggest threat to broccoli. These green caterpillars blend in perfectly with leaves and heads. Inspect plants regularly; use Bt spray or row covers.
- Aphids: Grey-green aphids love broccoli. Check the undersides of leaves and the florets of developing heads.
- Club root: A soilborne fungal disease that deforms roots. Prevent by maintaining proper soil pH and rotating crops annually.
- Downy mildew and black rot: Caused by wet, humid conditions. Improve drainage and airflow.
If you want to maximize your broccoli harvest and keep pests at bay naturally, learning about the Best Companion Plants for Broccoli can make a big difference in your garden’s overall health and productivity.
Harvesting Tips
Harvest the main broccoli head when it’s tight, firm, and dark green — before individual flower buds start to loosen or turn yellow. Cut the central head with a sharp knife, leaving several inches of stem. This prompts the plant to produce side shoots that you can harvest over the following weeks.
Don’t wait for the head to get larger if the buds are starting to separate — flavor declines rapidly once flowering begins.
Common Mistakes to Avoid
- Planting too late in spring (heat exposure causes premature bolting)
- Missing aphids hiding inside developing heads (check carefully)
- Harvesting too late (yellow heads are past their prime)
- Not checking for cabbage worms regularly
Container Gardening Tip
Broccoli can be grown in containers, but you’ll need a pot at least 12–15 inches deep and 18 inches wide per plant. It’s not the most efficient container vegetable, but it’s certainly possible. Use a nutrient-rich potting mix and fertilize every 2–3 weeks.
Practical Tips for Starting Your First Vegetable Garden
Start Small and Build Confidence
One of the most common beginner mistakes is planting too much at once. Start with 3–4 vegetables from this list that you actually enjoy eating. A 4×8 foot raised bed or even a few large containers is plenty for a first season.
Soil Is Everything
The single best investment you can make in your vegetable garden is good soil. Whether you’re planting in the ground or in containers, quality soil with added compost gives your plants the best possible start and reduces the need for chemical fertilizers.
Know Your Last Frost Date
This is the most important date for any vegetable gardener. Search “[your city] last frost date” to find yours. It determines when you can safely plant warm-season crops outdoors and when to start seeds indoors.
Choose Climate-Appropriate Varieties
Not all varieties of a given vegetable perform equally in all climates. If you’re in a hot climate, choose heat-tolerant lettuce varieties (like ‘Jericho’ or ‘Buttercrunch’). If you’re in a short-season northern region, choose early-maturing tomato varieties (like ‘Early Girl’ or ‘Stupice’). Your local garden center is a great resource for what works in your area.
Consider Raised Beds
Raised beds give you complete control over soil quality, drain better than in-ground beds, warm up faster in spring, and are easier on your back. A simple 4×8 foot raised bed filled with a mix of quality topsoil and compost can support multiple vegetable crops and dramatically improve your gardening success rate.
FAQ: Beginner Vegetable Gardening Questions Answered
Q1: What’s the easiest vegetable to grow for absolute beginners?
Lettuce and radishes are the easiest vegetables for true beginners. Both can be grown in containers or small spaces, mature quickly, tolerate minor mistakes, and give you a harvest in weeks rather than months. Radishes are especially satisfying because you can see results in as little as three weeks.
Q2: Can I grow vegetables without a yard?
Absolutely. Many of the vegetables on this list thrive in containers on balconies, patios, or even sunny windowsills. Lettuce, radishes, herbs, cherry tomatoes, and bush beans are particularly well-suited to container gardening. All you need is a large enough container, quality potting mix, and adequate sunlight.
Q3: How do I know when to water my vegetable garden?
The simplest method: stick your finger about an inch into the soil. If it feels dry, it’s time to water. If it still feels moist, wait another day. Most vegetables prefer consistently moist (not soggy) soil. Wilting during cooler morning hours (rather than afternoon heat) is another sign that plants need water.
Q4: Do I need to use chemical fertilizers on my vegetable garden?
No. Many successful gardeners grow vegetables without any synthetic fertilizers by using compost, aged manure, and organic amendments like fish emulsion or worm castings. These improve soil structure over time and feed plants more gently than synthetic fertilizers. That said, a balanced slow-release granular fertilizer is a practical option for beginners who want simplicity.
Q5: How do I deal with pests organically without harsh chemicals?
Start with prevention: use floating row covers, maintain good air circulation, and practice crop rotation. For active infestations, neem oil (a plant-derived insecticide and fungicide), insecticidal soap, and diatomaceous earth are effective organic options. Hand-picking larger pests like caterpillars and hornworms is tedious but highly effective. Encouraging beneficial insects by planting flowers near your vegetable garden also helps naturally manage pest populations.
Q6: What’s the difference between determinate and indeterminate tomatoes?
Determinate tomatoes (also called bush tomatoes) grow to a set size, produce fruit over a relatively short window, and then stop. They’re better for containers and small spaces.
Indeterminate tomatoes keep growing and producing until frost kills them. They need staking or caging and produce over a longer season. Most cherry tomato varieties are indeterminate. For beginners, determinate varieties are simpler to manage.
Q7: Can I grow vegetables in partial shade?
Some vegetables tolerate or even prefer partial shade — particularly lettuce, kale, spinach, and herbs like parsley and cilantro. Most fruiting vegetables (tomatoes, cucumbers, zucchini, beans) need full sun to produce well. If your garden has limited sun, stick with leafy greens and herbs rather than fruiting crops.
Key Takeaways
- Start with quick-growers like lettuce and radishes to build confidence early in the season.
- Soil quality and consistent watering are the two most important factors in vegetable gardening success.
- Know your climate and frost dates — planting at the right time makes a bigger difference than most beginner gardeners realize.
- Most beginner vegetables grow well in containers, making them accessible even for those without yard space.
- Harvest regularly and on time — many vegetables actually produce more when harvested frequently.
- Don’t over-plant — a few well-tended plants will outperform a crowded, neglected garden every time.
- Pest problems are manageable with observation, early intervention, and organic control methods.
- Each season teaches you something new — even experienced gardeners have failures. What matters is learning from them and trying again.
Conclusion: Your First Garden Starts With One Seed
Starting a vegetable garden doesn’t require expensive equipment, a large space, or years of experience. It requires a bit of patience, some quality soil, consistent watering, and the willingness to learn as you go.
The 8 vegetables in this guide — lettuce, radishes, green beans, zucchini, tomatoes, cucumbers, kale, and broccoli — represent some of the most rewarding, forgiving, and delicious crops you can grow at home. Start with two or three that you genuinely enjoy eating. Pay attention to what works and what doesn’t. Take notes, adjust, and try again next season.
Your garden will teach you more than any article can. But this guide should give you a solid, honest starting point — one based on what actually works in a real garden, not just what sounds good on paper.
If you’re interested in expanding your gardening knowledge beyond vegetables, there’s a lot to explore. From caring for ornamental plants — like these 7 Hibiscus Flower Care Tips That You Need to Know — to creative projects like learning 12 Easy Ways to Preserve Flowers at Home, your gardening journey can grow as big as you want it to.
But for now? Pick one vegetable from this list, grab some seeds, and get your hands in the dirt. That’s where it all begins.