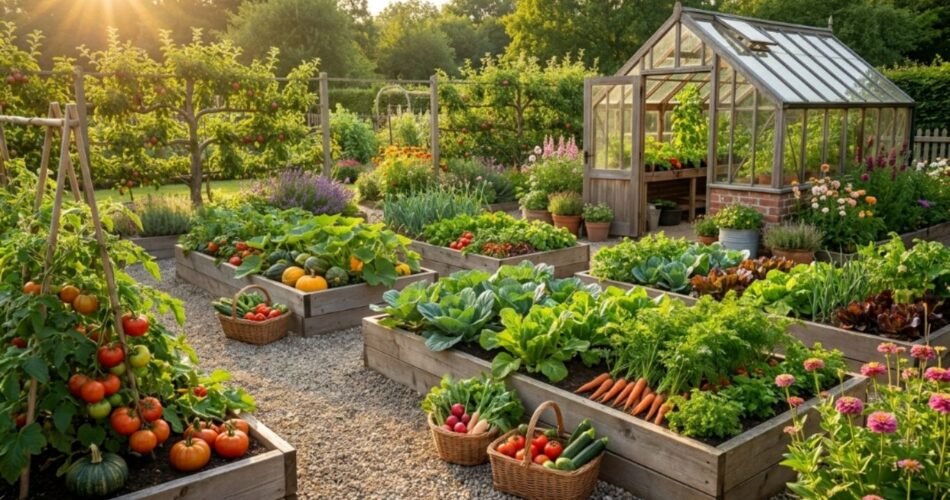
Whether you’re starting from scratch or reworking an existing plot, learning how to plan and map your beds for a vegetable garden is one of the best investments you can make before you ever touch a shovel. A little planning on paper saves you from a lot of frustration in the ground.
I’ve made plenty of mistakes over the years — planting tall corn where it blocked my pepper plants, cramming tomatoes too close together, and forgetting to leave any pathways until I was literally tiptoeing through a tangle of zucchini vines. These days, I spend a Saturday afternoon in late winter with a cup of coffee, some graph paper, and a pencil — and my growing seasons are dramatically more productive because of it.
This guide walks you through everything you need to know about vegetable garden layout and design, from picking the right spot in your yard to planning irrigation, managing crop rotation, and getting harvests spread across the whole season. Whether you have a small backyard or a sprawling half-acre, the same planning principles apply.
Let’s dig in.
Why Garden Bed Planning Actually Matters
Most people underestimate how much a good plan affects yields. A well-designed home vegetable garden:
- Gets more sun exposure to more plants
- Uses water efficiently
- Makes weeding and harvesting easier
- Prevents disease through smart crop rotation
- Allows companion planting that naturally deters pests
- Keeps pathways clear so you’re not compacting your soil
In contrast, a poorly planned garden often results in shading problems, waterlogged corners, plants competing for nutrients, and a bed that’s more work than it’s worth by midsummer.
Planning your vegetable garden design before planting also helps you figure out your seed and transplant budget, your soil amendment needs, and your watering setup — all before you spend a single dollar at the nursery.
Step 1: Choose the Right Garden Location
Why Location Is Everything
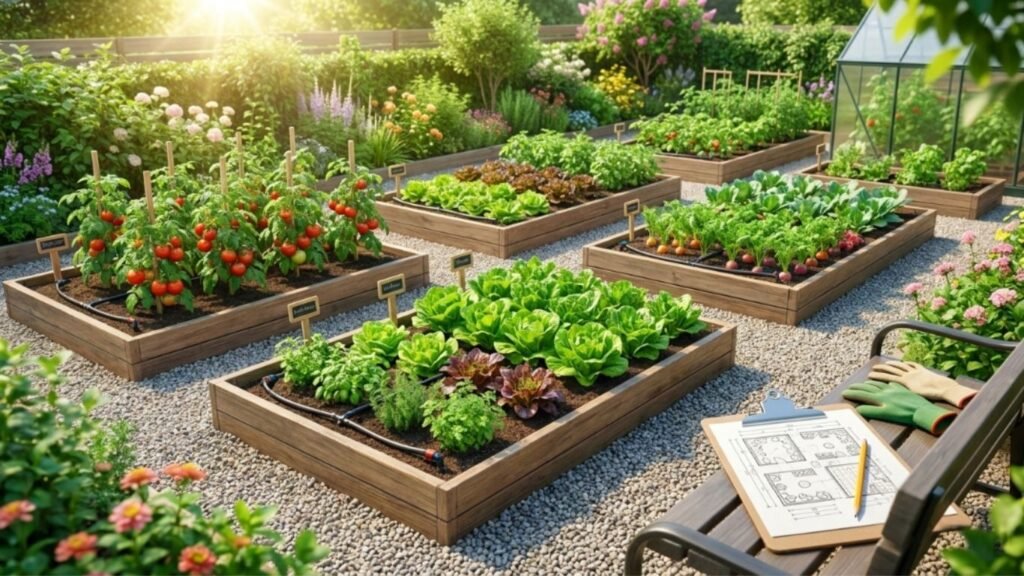
Sunlight, drainage, and proximity to water are the three non-negotiable factors in garden bed planning. Get these wrong and no amount of good soil will compensate.
How to Evaluate Your Space
Walk your yard at different times of day — morning, midday, and late afternoon — and observe where the sun falls. Do this on a clear day during the season when you plan to garden.
Sunlight requirements:
- Full sun: 6–8+ hours of direct sunlight daily (required for tomatoes, peppers, cucumbers, squash, beans, corn)
- Partial sun: 4–6 hours (acceptable for leafy greens, herbs, brassicas)
- Shade: Less than 4 hours (only suitable for some herbs and mint)
Most vegetables need full sun, so prioritize the sunniest part of your yard.
Checklist for Choosing a Location
- Sun exposure: Minimum 6 hours of direct sunlight
- Level ground: Avoid steep slopes where water runs off before soaking in
- Good drainage: Avoid low spots that collect standing water
- Proximity to water source: The closer your bed is to a hose bib or rain barrel, the easier watering becomes
- Distance from large trees: Tree roots compete aggressively for water and nutrients, and canopies cast heavy shade
- Wind protection: A gentle breeze is helpful, but strong wind damages plants — look for natural windbreaks or plan to add one
Common Mistakes to Avoid
- Choosing a “convenient” spot that doesn’t get enough sun
- Planting near black walnut trees, which release juglone — a compound toxic to many vegetables
- Ignoring drainage and ending up with waterlogged beds in spring
Expert Tip
If you’re unsure about sun exposure, use a free app like Sun Seeker or SunCalc to track sun angles throughout the day in your specific location.
Step 2: Measure Your Available Space
Why Accurate Measurements Save You Later
Sketching a garden without measurements leads to beds that are the wrong size, pathways too narrow to use, and plants that end up crowded or wasted. Measuring first lets you design a vegetable garden layout that actually fits your space.
How to Measure Your Garden Area
- Use a 100-foot measuring tape to measure the length and width of the area you’re working with
- Record measurements on paper — a simple sketch works fine at this stage
- Note any fixed obstacles: fences, trees, utility boxes, water spigots, downspouts
- Mark the north side of your sketch — this is critical for bed orientation (more on that shortly)
- Note any changes in grade or slope
Converting Space into Usable Beds
Once you know your total square footage, subtract the space needed for pathways (more on that below) and you’ll have your usable growing area. For example:
- A 20 x 20-foot plot (400 sq. ft.) with two 2-foot-wide pathways gives you roughly 300–320 sq. ft. of actual growing space
Best Practices
- Measure twice, sketch once
- Include the house, garage, or fence lines on your sketch for reference
- Account for the drip line of any trees — roots often extend well beyond what you can see
Step 3: Decide on Bed Size and Shape
Why Bed Dimensions Matter
The width of your garden beds directly affects how easy they are to maintain. If you have to step into the bed to reach the center, you compact the soil and damage root structures. The goal is to design beds you can work from the edges.
Standard Bed Sizes
| Bed Type | Width | Length | Best For |
|---|---|---|---|
| Narrow access bed | 2 feet | Any length | Tight spaces, single-sided access |
| Standard raised bed | 3–4 feet | 4–8 feet | Most home gardens, comfortable reach |
| Wide garden bed | 5–6 feet | 8–12 feet | Two-sided access only |
| Square foot garden | 4 x 4 feet | N/A | Intensive planting, small spaces |
The golden rule: If you can only access a bed from one side (against a fence or wall), keep it no wider than 2–3 feet. If you can access it from both sides, 4 feet wide is the practical maximum for most people.
Bed Shape Options
- Rectangular: The most practical and easiest to plan around — great for crop rotation
- Square: Excellent for intensive square-foot gardening
- L-shaped or U-shaped: Can maximize corner spaces but harder to plan crop rotation with
- Keyhole beds: Circular with a central path — efficient use of space, popular in permaculture
For most backyard vegetable gardens, rectangular beds 4 feet wide and 8 feet long are the sweet spot. They’re easy to build, easy to cover with row fabric, and fit neatly into rotation schedules.
Step 4: Plan Your Pathways
Why Pathways Are Part of the Garden Design
Pathways are not wasted space — they’re part of your vegetable garden design. Good paths keep your soil from being compacted, give you space to kneel or set down a basket, and keep the garden workable after rain.
Path Width Guidelines
- Primary pathways (main access): 24–36 inches wide (wide enough for a wheelbarrow)
- Secondary pathways (between beds): 18–24 inches wide (comfortable walking width)
- Stepping stone paths: 12–15 inches (tight but workable for small spaces)
Path Surface Options
| Surface | Cost | Durability | Weed Control |
|---|---|---|---|
| Wood chip mulch | Low | 2–3 years | Good |
| Gravel | Medium | Long-lasting | Good with barrier |
| Straw | Very low | 1 season | Fair |
| Concrete pavers | High | Permanent | Excellent |
| Packed earth | Free | Variable | Poor |
| Cardboard + mulch | Very low | 1–2 seasons | Good |
I personally use wood chips for most of my pathways — they’re free from local tree companies, they break down into compost over time, and they keep mud from splashing onto lower leaves.
Step 5: Raised Beds vs. In-Ground Beds
Understanding the Trade-Offs
Both approaches work well. The right choice depends on your soil quality, budget, physical limitations, and how long you plan to garden in the same spot.
Raised Beds
Advantages:
- Complete control over soil quality
- Better drainage
- Warmer soil in spring — extends the growing season
- Fewer weeds (especially if you use quality fill)
- Easier on your back and knees
- Defines garden space clearly, keeps grass out
Disadvantages:
- Higher upfront cost for materials and soil
- Requires initial effort to build
- Soil dries out faster — needs more consistent watering
Best materials for raised beds: Untreated cedar or redwood (naturally rot-resistant), galvanized steel, composite lumber, or concrete blocks. Avoid pressure-treated lumber for food gardens.
In-Ground Beds
Advantages:
- Lower cost
- Plants access deeper soil and moisture
- Easier for larger plantings
- Works well if you already have good, deep topsoil
Disadvantages:
- Requires significant soil improvement if native soil is poor
- More weed pressure
- Harder to manage drainage
- Compaction is a constant issue if you’re not careful about paths
Best Practices for Either Type
- Amend soil deeply before planting — at least 12 inches of loose, rich soil for most vegetables, 18 inches for root crops
- Add compost generously — 2–4 inches worked in before each growing season
- Never work wet soil — it destroys structure
If you’re working with soil that’s compacted or nutrient-poor, you’ll find it helpful to learn about natural soil boosters. For example, How to Use Epsom Salt for Plants covers how magnesium sulfate can address common deficiencies in vegetable gardens, especially for tomatoes and peppers.
Step 6: Orient Your Beds for Maximum Sunlight
North-to-South vs. East-to-West Orientation
This is a detail many gardeners overlook, but bed orientation significantly affects how much light your plants receive — especially as they grow taller.
The General Rule: North-to-South Orientation
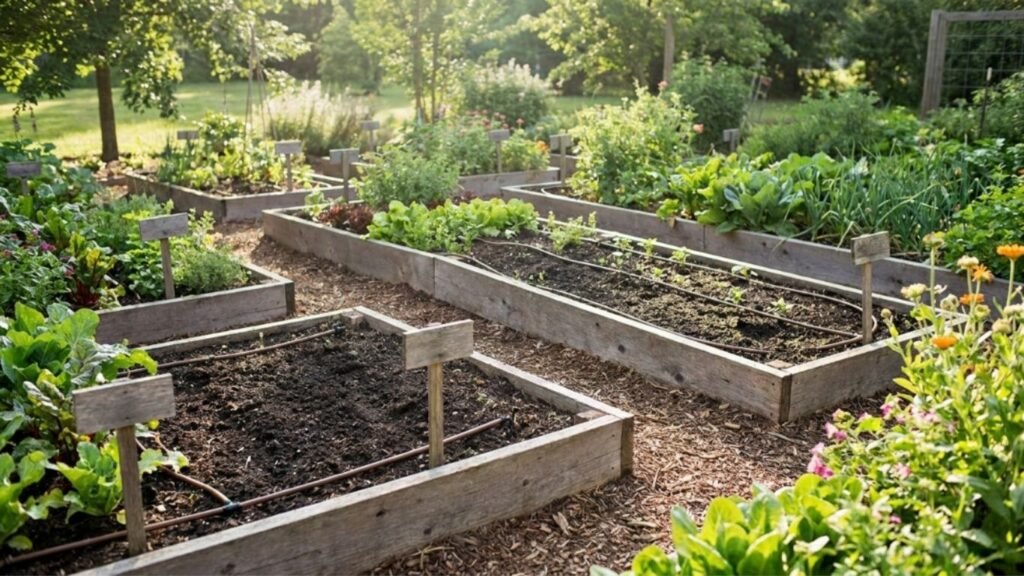
For most garden layouts in the Northern Hemisphere, running your bed rows north to south allows sunlight to reach both sides of the row as the sun arcs from east to west throughout the day. This reduces shading from taller plants onto shorter ones.
- Tall plants (corn, sunflowers, staked tomatoes, trellised beans) go on the north end of the bed
- Medium plants (peppers, eggplant, bush beans) go in the middle
- Short or low-growing plants (lettuce, carrots, radishes) go on the south end
This arrangement ensures taller plants don’t cast afternoon shade on shorter ones.
When East-to-West Orientation Makes Sense
If your growing space is constrained by fences, slopes, or shade from a building, you may have no choice but to orient beds east to west. In this case, be even more careful about plant height — tall plants must go on the north side of the bed to avoid shading everything south of them.
Expert Tip
If you’re gardening in the Southern Hemisphere, flip the logic — tall plants on the south end to avoid shading.
Step 7: Soil Preparation — The Foundation of Everything
Why Soil Is Your Most Important Investment
You can have the perfect garden map, the ideal location, and the right seeds — but if your soil isn’t right, your yields will disappoint. Vegetables are heavy feeders. They need loose, nutrient-rich, well-draining soil with the right pH.
Ideal Soil Conditions for Vegetables
- Texture: Loamy — crumbles easily, not sticky or sandy
- pH: 6.0–7.0 for most vegetables (slightly acidic to neutral)
- Organic matter: 5% or higher
- Drainage: Water should drain within an hour of heavy rain — not pool on the surface
How to Prepare Your Beds
- Clear the area: Remove grass, weeds, and debris
- Test your soil: Use a basic pH test kit from any garden center or send a sample to your local cooperative extension office
- Loosen the soil: Dig or till to 12–18 inch depth for most crops
- Add compost: Work in 3–4 inches of finished compost
- Adjust pH if needed:
- Too acidic (below 6.0): Add agricultural lime
- Too alkaline (above 7.0): Add sulfur or acidic organic matter like peat
- Add other amendments as needed: Based on your soil test results
One natural hack I’ve been using for years: a light dusting of baking soda around the base of tomato plants to sweeten the flavor and fight soil fungal issues. The article 6 Baking Soda Tricks Every Gardener Should Know breaks down several clever uses like this that most gardeners don’t know about.
Common Soil Prep Mistakes
- Skipping the soil test and guessing at amendments
- Working soil that’s too wet (clumps and compacts)
- Tilling too aggressively and destroying soil structure
- Adding uncomposted fresh manure right before planting (nitrogen burn risk)
Step 8: Plan for Crop Rotation
Why Crop Rotation Is Non-Negotiable
Planting the same vegetable family in the same bed year after year depletes specific nutrients and allows soil-borne diseases and pests to build up. Rotating crops — moving plant families around the garden each year — breaks these cycles and maintains soil health.
The Four-Bed Rotation System
The simplest approach divides your garden into four sections that rotate each year:
| Year | Bed 1 | Bed 2 | Bed 3 | Bed 4 |
|---|---|---|---|---|
| Year 1 | Nightshades (tomatoes, peppers, eggplant) | Brassicas (cabbage, broccoli, kale) | Legumes (beans, peas) | Root crops (carrots, beets, radishes) |
| Year 2 | Brassicas | Legumes | Root crops | Nightshades |
| Year 3 | Legumes | Root crops | Nightshades | Brassicas |
| Year 4 | Root crops | Nightshades | Brassicas | Legumes |
The logic:
- Legumes fix nitrogen — a great predecessor for heavy-feeding nightshades
- Brassicas are heavy nitrogen users — follow legumes
- Root crops prefer lower nitrogen — great after brassicas
- Nightshades need different soil nutrients than roots and brassicas
How to Track Rotation
This is where your garden map and journal become essential. Mark each bed with what you grew in it each year. After three or four seasons, you’ll have a clear record that guides next year’s plan.
Common Rotation Mistakes
- Treating all tomatoes and peppers as different — they’re the same family (Solanaceae), so don’t rotate within the family
- Forgetting that herbs and flowers also have families and can carry pathogens
- Not tracking what was where — leading to guessing in year two
Step 9: Companion Planting Strategy
Why Companion Planting Works
Companion planting is the practice of growing certain plants near each other for mutual benefit. Done thoughtfully, it can reduce pest pressure, improve pollination, maximize space, and even improve flavor.
Classic Companion Planting Combinations
| Plant | Good Companions | Poor Companions |
|---|---|---|
| Tomatoes | Basil, marigolds, carrots, parsley | Fennel, brassicas, corn |
| Peppers | Basil, carrots, tomatoes | Fennel, kohlrabi |
| Cucumbers | Beans, dill, marigolds, radishes | Potatoes, sage |
| Beans | Carrots, cucumbers, squash | Onions, garlic, fennel |
| Lettuce | Carrots, radishes, strawberries, herbs | None significant |
| Squash | Beans, corn, nasturtiums | Potatoes |
| Carrots | Tomatoes, lettuce, rosemary, sage | Dill, parsnips |
| Basil | Tomatoes, peppers | None significant |
The Three Sisters — A Classic Companion System
Corn, beans, and squash grown together is one of the oldest and most productive companion planting systems:
- Corn provides a trellis for beans
- Beans fix nitrogen that feeds corn and squash
- Squash shades the ground, reducing weeds and retaining moisture
This system is particularly worth considering if you have a larger in-ground growing area.
Expert Tip
Marigolds are one of the most versatile companions in the vegetable garden. Their roots produce a substance that repels nematodes, and their scent deters aphids and whiteflies. Plant them as a border around your entire garden layout.
Step 10: Plan Succession Planting for Continuous Harvests
Why Succession Planting Matters
Without succession planting, most vegetable gardens peak all at once, leaving you drowning in zucchini in July and picking from an empty garden in August. Strategic succession planting spreads harvests across the entire growing season.
Three Types of Succession Planting
- Staggered planting of the same crop: Plant lettuce every two to three weeks rather than all at once — you’ll have fresh leaves from spring through fall
- Sequential crops in the same space: Follow early-season peas or spinach with summer beans, then fall brassicas — three crops from one bed in one year
- Variety succession: Choose early, mid, and late-season varieties of the same vegetable — especially useful for tomatoes and peppers
A Simple Succession Planting Timeline (Northern US as Example)
| Month | What to Plant |
|---|---|
| Late February–March | Start tomatoes, peppers, eggplant indoors |
| March–April | Direct sow peas, spinach, lettuce, radishes |
| April–May | Transplant brassicas, start first round of beans |
| May–June | Transplant tomatoes, peppers, cucumbers, squash |
| June | Second round of beans, more lettuce |
| July | Start fall brassicas indoors |
| August | Transplant fall broccoli, kale, cabbage; sow fall spinach and carrots |
| September | Last round of radishes and spinach |
Common Succession Planting Mistakes
- Planting everything on the same weekend
- Not leaving space in the plan for follow-up crops
- Forgetting to note when each section was planted (another reason for a garden journal)
Step 11: Plant Spacing — Don’t Skip This Step
Why Spacing Affects Everything
Overcrowding is the number one cause of low yields, disease, and frustrated gardeners. Plants that are too close compete for light, water, and nutrients — and poor air circulation accelerates fungal disease.
Quick-Reference Spacing Guide
| Vegetable | Row Spacing | Plant Spacing | Square Foot Planting |
|---|---|---|---|
| Tomatoes (indeterminate) | 36–48 in | 24–36 in | 1 per sq ft |
| Tomatoes (determinate) | 24–36 in | 18–24 in | 1 per sq ft |
| Peppers | 18–24 in | 18 in | 1 per sq ft |
| Cucumbers (trellised) | 12 in | 12 in | 2 per sq ft |
| Squash (bush) | 36 in | 24–36 in | 1 per 4 sq ft |
| Beans (bush) | 18 in | 4–6 in | 9 per sq ft |
| Beans (pole) | 24 in | 6–8 in | 8 per sq ft |
| Lettuce | 12 in | 6–8 in | 4 per sq ft |
| Carrots | 12 in | 2–3 in | 16 per sq ft |
| Radishes | 6 in | 2 in | 16 per sq ft |
| Kale/Broccoli | 24 in | 18 in | 1 per sq ft |
| Herbs (basil) | 12 in | 10–12 in | 4 per sq ft |
Expert Tip
In raised beds with amended, deep soil and consistent watering, you can reduce spacing by about 25% compared to traditional row garden recommendations. Intensive planting in well-amended beds also naturally suppresses weeds by shading the soil surface.
Step 12: Vertical Gardening — Grow Up, Not Just Out
Why Vertical Space Is Often Wasted
Most gardeners think in two dimensions — length and width. But vertical space is free real estate. Training climbing plants upward dramatically increases your yield per square foot while keeping the garden organized.
Crops That Thrive Vertically
- Pole beans: Grow 6–8 feet tall on a trellis or teepee
- Cucumbers: Trellised cucumbers produce straighter fruit, use less space, and have better air circulation
- Indeterminate tomatoes: Need staking or a sturdy cage — plan for 5–7 feet of vertical space
- Peas: Natural climbers — even netting or brush works
- Squash and melons: Can be trellised with slings supporting heavy fruit
Vertical Structure Options
| Structure | Best For | Approximate Cost |
|---|---|---|
| Wire cage | Tomatoes | Low |
| Bamboo teepee | Pole beans, cucumbers | Very low |
| Cattle panel arch | Cucumbers, squash, gourds | Medium |
| Wooden A-frame trellis | Peas, beans, cucumbers | Low–medium |
| String trellis | Tomatoes, cucumbers | Very low |
Placement Tip
Position vertical structures on the north side of the bed so they don’t shade other crops.
Step 13: Plan Your Irrigation Layout
Why Irrigation Planning Belongs on Your Garden Map
Water is as important to plan as plant placement. Inefficient watering — overhead sprinklers, for instance — wastes water, wets foliage (increasing disease), and delivers water unevenly.
Drip Irrigation: The Gold Standard for Vegetable Gardens
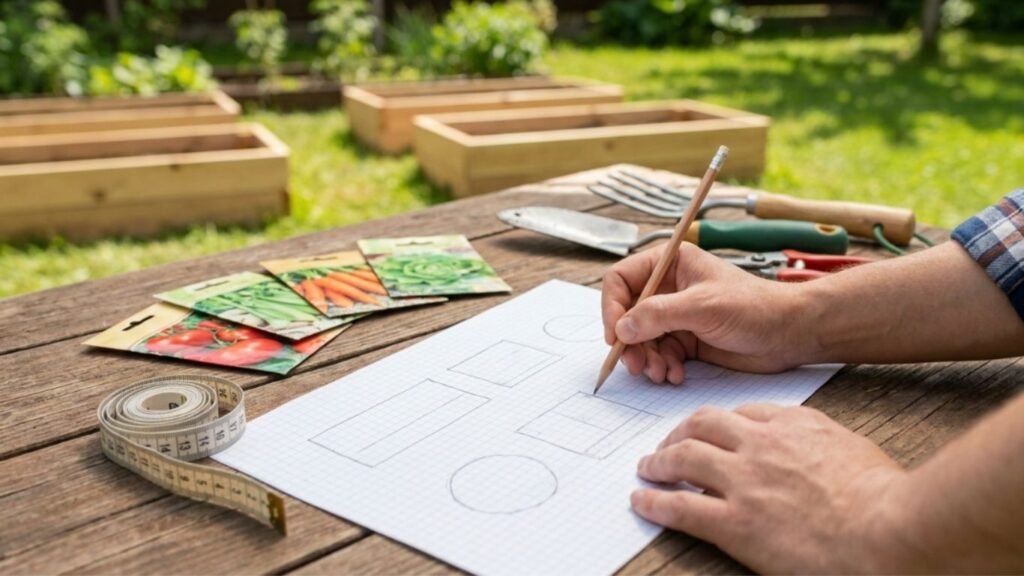
Drip irrigation delivers water directly to the root zone, reduces evaporation, and keeps foliage dry. For most home vegetable gardens, a simple drip system with a timer is the single best investment after good soil.
Basic drip layout for a 4×8 raised bed:
- One main supply line runs down the center of the bed
- Emitters spaced every 12–18 inches deliver water at 0.5–1 gallon per hour
- Timer set to run 20–40 minutes daily during peak summer heat
Alternative Watering Options
- Soaker hoses: Similar to drip irrigation, less precise but more affordable
- Hand watering with a wand: Works well for small gardens — always water at the base, not overhead
- Rain barrels: Supplement watering with collected rainwater — reduces water bills and is beneficial for plants
Watering Frequency by Season
| Season | Frequency | Approximate Amount |
|---|---|---|
| Spring | Every 2–3 days | 1 inch per week |
| Summer (mild) | Every 1–2 days | 1–1.5 inches per week |
| Summer (hot/dry) | Daily | 1.5–2 inches per week |
| Fall | Every 2–3 days | 1 inch per week |
Common Watering Mistakes
- Watering shallowly and frequently — encourages shallow root systems
- Watering in the evening — leaves stay wet overnight, promoting fungal disease
- Using sprinklers in mid-garden season — always transition to ground-level watering for established plants
Step 14: Mulching Strategy
Why Mulch Should Be in Your Garden Plan
Mulch is one of the most effective, underused tools in home vegetable gardening. A 2–3 inch layer around plants:
- Reduces watering needs by 30–50%
- Suppresses weeds
- Regulates soil temperature
- Adds organic matter as it decomposes
Best Mulches for Vegetable Gardens
| Mulch Type | Benefits | Drawbacks |
|---|---|---|
| Straw | Cheap, light, great for pathways | Can contain seeds |
| Wood chips | Excellent for paths, long-lasting | Too slow-decomposing for beds |
| Shredded leaves | Free, adds organic matter | Matts down if wet |
| Grass clippings | Free, fast-decomposing | Avoid treated lawns |
| Compost | Feeds soil as it mulches | More expensive than straw |
| Black plastic | Excellent heat retention, weed control | Not reusable, not organic |
For vegetable beds, I prefer straw or shredded leaves. For pathways, wood chips. Avoid using fresh grass clippings from lawns treated with herbicides.
Step 15: Create Your Hand-Drawn Garden Map
Why a Simple Map Is More Useful Than Software
There are plenty of garden planning apps out there, and some are genuinely useful. But a hand-drawn map on graph paper is faster, always accessible, and forces you to think through each decision carefully.
How to Create a Garden Map
- Get graph paper — each square can represent 1 square foot
- Draw your space to scale — if your plot is 20 x 20 feet, your map is 20 x 20 squares
- Add fixed features — fences, trees, water spigots, structures
- Sketch your beds and pathways
- Mark north clearly on your map
- Label each bed — assign a number or letter to each bed for your journal
- Fill in planned crops — write the crop name or use a simple legend with color coding
- Add notes — planting dates, variety names, amendments planned
What to Include on Your Map
- Bed dimensions
- Plant names and spacing
- Vertical structure locations
- Irrigation lines or sprinkler placement
- Shaded areas
- Seasonal notes (spring vs. fall plantings)
Keep the original safe — tape it inside your garden journal. Make a working copy to bring outside.
Step 16: Keep a Yearly Garden Journal
Why Your Journal Is the Most Valuable Tool You Own
Every experienced gardener will tell you the same thing: a garden journal is irreplaceable. Memory is unreliable. A journal is not.
What to Record
- Planting dates for each crop, each bed
- Seed varieties and seed company names
- Germination rates
- Transplant dates
- Fertilization or amendment notes
- Pest and disease observations
- First and last harvest dates
- Yield estimates
- What worked, what didn’t
- Weather notes — late frost dates, unusual heat spells
Journal Format Options
- A simple spiral notebook
- A dedicated gardening journal (available at most bookstores)
- A binder with printed pages and photo pockets
- A digital note-taking app with photo capability
Photographs are enormously helpful — take them at planting time, midsummer, and at harvest. They reveal things you wouldn’t otherwise notice: spacing that was too tight, a shaded corner that failed, a companion planting combination that thrived.
Maximizing Small Spaces
Not everyone has a large backyard. The good news is that a small, well-planned garden often outproduces a larger, poorly organized one.
Small Space Strategies
1. Go vertical: As discussed, vertical gardening can triple your production in the same footprint. A 4×4-foot bed with a trellis produces far more than a 4×4-foot flat bed.
2. Use containers strategically: Large containers (15-gallon or bigger) work well for tomatoes, peppers, herbs, and even cucumbers on a small patio or balcony.
3. Focus on high-value crops: Grow what you actually eat and what costs the most at the store. Tomatoes, peppers, herbs, and greens give the best return for their space.
4. Interplant fast and slow crops: Radishes mature in 25 days. Plant them between slower-growing crops like carrots (70 days) or broccoli (60 days). You’ll harvest the radishes long before the other crops need the space.
5. Try square foot gardening: Mel Bartholomew’s Square Foot Gardening method divides beds into one-square-foot grids, each planted intensively. It’s perfect for small raised beds and eliminates wasted space.
If you’re growing strawberries as a ground cover or in containers to maximize edges and corners of your small garden, How to Plant & Grow the Perfect Strawberries has a detailed guide to getting the best out of them in small spaces.
Common Garden Planning Mistakes to Avoid
Even experienced gardeners make these. Here’s what to watch out for:
1. Planning a Garden That’s Too Big for Your First Year
Start small, succeed well, then expand. A 4×8-foot bed maintained beautifully beats a 20×30-foot plot that becomes overwhelming by July.
2. Ignoring Mature Plant Sizes
That cute little squash plant in a 4-inch pot will need 12–18 square feet of space by midsummer. Always plan based on mature size, not transplant size.
3. Forgetting About Shade Patterns
Your neighbor’s fence, a nearby tree, or even your own tall crops can shade a significant portion of your garden. Re-evaluate sun exposure at different points in the season.
4. Not Accounting for Paths
Many first-time gardeners design beautiful bed arrangements and then realize there’s no way to actually reach the center plants without stepping on others.
5. Overplanting One Crop
You do not need twelve zucchini plants. Two or three is genuinely plenty for a family of four. Use the space for variety instead.
6. Skipping Soil Preparation
No amount of careful planning compensates for poor soil. This is the investment that pays off most directly in yield and plant health.
7. Not Planning for Water Access
A garden that requires dragging a 100-foot hose around a corner tends not to get watered as consistently as it should. Plan the garden close to water, or plan to extend a water line closer to the garden.
8. Ignoring the Importance of Organic Matter
If you’re consistently seeing pale, weak plants, it’s often a sign the soil is missing something. Before reaching for synthetic fertilizers, consider natural soil boosters like compost tea, worm castings, or even exploring whether Coffee Grounds for Your Garden: Good or Bad? might offer a useful addition to your soil amendment routine — the answer is more nuanced than most people expect.
FAQ: Planning and Mapping Your Vegetable Garden
Q1: How big should my first vegetable garden be?
For a first-time vegetable gardener, one or two 4×8-foot raised beds is an ideal starting point. That’s 64–128 square feet of growing space, which is manageable to plant, maintain, and water without becoming overwhelming. You can always expand in year two once you’ve learned the rhythms of the garden.
Q2: What vegetables are best for beginners?
Start with crops that are forgiving and rewarding: zucchini, bush beans, lettuce, radishes, cherry tomatoes, and herbs like basil, parsley, and chives. These germinate quickly, yield generously, and tolerate beginner mistakes better than finicky crops like celery or artichokes.
Q3: How do I figure out my last frost date?
Your local cooperative extension office is the most reliable source. You can also search “[your city/county] last frost date” online — the Old Farmer’s Almanac website has a free frost date tool. Knowing your last average frost date is the anchor point for your entire planting calendar.
Q4: Can I plan a vegetable garden with only partial sun?
Yes, but your crop selection will be limited. Leafy greens (lettuce, spinach, arugula, kale), herbs (parsley, mint, chives, cilantro), and some root crops (beets, radishes) tolerate 4–5 hours of sun. Fruiting crops like tomatoes, cucumbers, peppers, and squash really do need 6+ hours to produce well.
Q5: How do I plan crop rotation if I only have one bed?
With a single bed, you can still rotate within it. Divide the bed into four sections mentally or physically with a stake. Rotate what goes in each section each year. You won’t get the same disease-break benefit as rotating between completely separate beds, but it still helps — and you can supplement by improving soil health each season with fresh compost, organic amendments, and cover crops in the off-season.
Q6: When should I start planning my vegetable garden?
Ideally, late winter — January or February for most growers in the Northern Hemisphere. That gives you time to order seeds, amend soil before the ground freezes if you’re in a cold climate, build raised beds, plan irrigation, and be ready to plant as soon as conditions allow. Many gardeners spend a few evenings in February planning their season — it’s one of the most enjoyable parts of gardening.
Q7: Is it worth using garden planning software or apps?
Apps like Planter, Seedtime, or GrowVeg are genuinely useful — they include built-in spacing charts, companion planting suggestions, and frost date calendars. That said, a hand-drawn map on graph paper is often faster and more flexible. Many experienced gardeners use both: software for initial planning and a hand-drawn map for the actual garden.
Key Takeaways
Here’s a quick summary of the most important points from this guide:
- Location and sunlight are the foundation — choose the sunniest, most level spot with good drainage and easy water access
- Measure before you plan — accurate measurements let you design beds, paths, and plant placement that actually work in your space
- 4-foot-wide beds accessible from both sides are the practical standard for most home gardens
- Orient rows north to south in the Northern Hemisphere to maximize sunlight and minimize shading between plants
- Tall plants go on the north end of any bed or row — always
- Soil preparation is your highest-yield investment — deep, amended, well-draining soil outperforms any other single factor
- Crop rotation protects soil health and reduces disease pressure — plan it before you plant, not after
- Companion planting, succession planting, and vertical gardening multiply what you can harvest from the same square footage
- Your garden map and journal are essential tools — use them every season and they’ll pay off for decades
- Start smaller than you think you need to — a well-managed small garden beats an overwhelming large one every time
Conclusion
Learning how to plan and map your beds for a vegetable garden is the single most high-leverage skill you can develop as a home grower. It turns guesswork into intention — and intention into harvests.
You don’t need a fancy tool, expensive software, or a master’s degree in horticulture. You need a pencil, some graph paper, an afternoon of careful thought, and the willingness to actually follow through on the plan once the growing season starts.
The gardeners who produce the most food from the smallest spaces are rarely the ones with the most money or the best equipment. They’re the ones who planned well, paid attention, wrote things down, and kept improving each season.
This year, give yourself the gift of a real plan before you plant. Walk your yard, measure your space, sketch your beds, choose your crops thoughtfully, and mark every planting and observation in a journal. You’ll be amazed at how much more productive — and enjoyable — your garden becomes.
The best time to start planning was last winter. The second best time is today.